Windows with drywall returns are one of the simplest but most attractive window designs for minimalists.
It looks modern and beautiful and yet costs less than window trimming does while taking up less time.
However, while this timeless window method is appealing, style and taste change over time.
And you may need to replace these windows with drywall returns to something else. If that happens, how can you go about it?
Replacing windows with drywall returns requires removing the drywall return beads added during installation to enable you to place the window jambs. But this may only be necessary for some window replacements as it depends on your window frame width & corner beads removal often suffices. Also, if you only intend to buy new windows, choose one with a similar depth.
Creating a smooth finish after window installation is vital, and if you intend to work with drywall returns, this article will guide you.
You’ll discover how to install drywall returns on windows and on what type of window designs they fit.
Ready for a Drywall Quiz?
How to Drywall Returns on Windows?
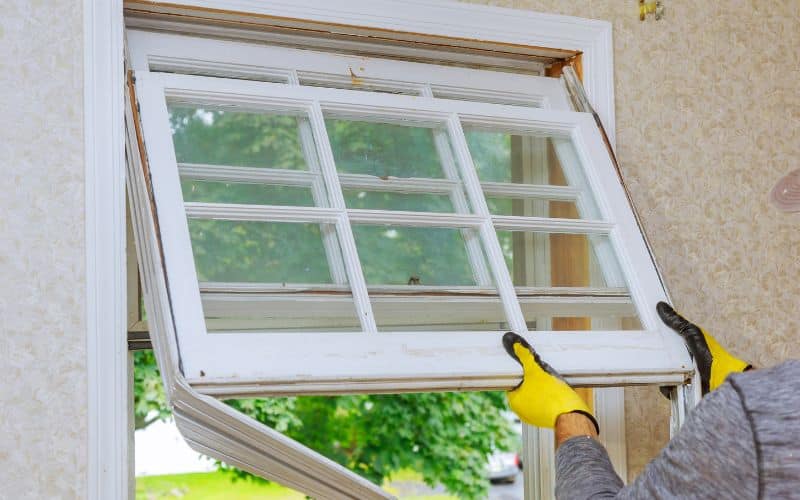
Installing drywall returns is a simple process; below is a step-by-step guide.
#1. Take Measurements
To begin, measure the depth of your window returns from the outside frame to the face of your window’s frame.
Remove ¼ inch from this measurement. Calculate the inner length of the window’s apex beginning from the interior surface of the window’s rough framing on both sides.
#2. Cut the Drywall
Cut out drywalls as you’ve calculated and mark lines on the drywall using a plasterer’s straightedge.
Afterward, cut through the drywall paper using this drywall straightedge to enable you to cut according to the line for a straightly lined sheet.
Then, move your line over to the drywall’s back and cut a short line through it to make cutting all through easier.
Use the straightedge as a cutting guide so all sheets are well-lined and neat. When you’re done lining and cutting, snap the board to break according to the area you’ve cut and set it aside.
#3. Position the Drywall
Align your drywall to the top of the window return and lay it accordingly to the front edge of the window frame. Ensure to keep it ¼ inch away from the window frame.
#4. Attach the Drywall
Position the drywalls and screw them in using the appropriate drywall screws at the respective short end.
Use a distance of 12 inches along each length in pairs to fit the side drywall sheets similarly so they lap well on the windowsill, ¼ distant from the rough framing. Then screw both sides tight.
#5. Install Corner Tape
Cut out two corner tape pieces according to your drywall return depth and apply joint compound. Press the tape into the top edge between the drywall sides and top to ensure it fits snugly.
Then, proceed to smooth the corner using a drywall putty knife. After it drys, apply more compound and rub it; do the same on the other corner.
#6. Cut Two Pieces of Corner Beads
Calculate the inner width of your window between both side drywall pieces. Then cut two pieces of L-shaped plastic corner beads according to your measurement.
Position one corner bead piece with the L facing you and the other L-shaped plastic bead away from you.
Spray water on the molding to trigger its adhesive property and press the corner bead into place.
The corner bead piece with the glued side away from the L shape should go between the drywall and window frame for a perfect position, while the other goes above the drywall face.
Ensure the strips are smooth and well-fitted on the drywalls on both edges and underside, and repeat it for the other side.
#7. Press the Beading
Roll the corner beads with a two-sided installation roller to pin the beading snugly to the drywall.
#8. Apply the Joint Compound
This mixture application is the last phase of the job. Apply it evenly over the screw holes and corner beads for a fine finish.
Give it time to dry, approximately three to four hours before sanding to eliminate imperfections. You can apply another joint compound coat if you wish. Otherwise, you’re good to go.
Do You Replace Windows or Drywall First?
Since replacement windows are usually added from the inside, you can put them in before or after the drywall installation.
For clarity, it’s best to understand replacement windows as they differ from new-construction ones.
So we’ve outlined the differences between both window types in the table below.
| New-Construction Windows | Replacement Windows |
|---|---|
| These windows are meant for precise openings in homes without trims or window sidings. | They’re meant to replace existing new-construction windows or replace old ones. |
| Such windows possess nailing or attachment fins, or rims, on the window’s exterior area. | Replacement windows lack all those properties. Instead, their sides are smooth for easy installation. |
| It’s relatively easy compared to replacement windows, although the peripheral work aspect can be complicated. | It can be a tricky job for individuals who love DIY processes. |
| Finding new-construction windows in stock at most home supply centers is easier. | Obtaining replacement windows can be difficult, but following buying tips makes it easier. |
| They’re best for new structures, profound remodeling, and repairing significantly damaged windows. | This window type works best on existing structures with an excellent peripheral area. |
Are Drywall Returns Better Than Window Jambs?
The appearance and cost savings of drywall returns make them better than window jambs. Drywalls are one of the easiest materials to worth with.
Hence it’s no surprise to see them taking over the construction world. It’s also durable and affordable. But that doesn’t cancel out window jambs, mostly made from wood and plastic.
They’re just more expensive and time-consuming.
Below are some pros and cons of using drywall returns and window jambs.
#1. Drywall Returns
#1. PROS
- Flexibility; they’re effortless to work with, especially for DIY individuals
- They give a clean afterlook.
- They cost less than wood
- They’re very fire-resistant
#2. CONS
- Drywalls don’t work well with stains
- Drywalls get dusty, which makes them uncomfortable for workers, especially since they contain harmful respirable silica.
#2. Window Jambs
#1. Pros
- They’re more durable
- Window jambs can go with different finishes
- They have an appealing look
- Window jambs hide imperfections well.
#2. Cons
- They cost more
- They’re more vulnerable to humidity issues
| Drywall Returns | Window Jambs |
|---|---|
| When You Should Choose Drywall Returns | When You Should Choose Window Jambs |
| When you’re shopping on a limited budget | When you don’t mind paying more money for premium looks |
| Your area is vulnerable to heat and humidity | You wish to use several paints and finishes |
| When you’re considering a DIY process and need an easy-to-work-with material | You’re prioritizing longevity and durability |
| You’re going for a contemporary design in your room. | When you need a retro or even more classic style, |
Can You Use Drywall Returns on Windows With Trims?
You can use drywall returns on windows with trims, and many builders have confirmed this possibility by combining both options to achieve good results.
And accomplishing this is pretty straightforward. You only use drywall returns on both sides and the window’s top, while the windowsill and stool have the trims.
However, the drywall returns should fit perfectly to touch the window’s frame. Also, you may need to caulk joints between the drywall returns and windows.
Additionally, remember that you may need to paint the drywall to match the wooden trims on the window.
Often, carpenters use enamel paint since it does a great job of imitating natural wood color. Sadly, drywall doesn’t have excellent staining quality, so it limits your paint-coating choices.


