Discovering uneven, noisy hardwood flooring is normal when refurbishing an older house. The common and ideal response is learning to fix the issue.
Carpenters or constructors use shims to level surfaces and even fill in gaps in the wood and other materials.
Therefore, shimming your floor joists may be your best option for solving the problem.
Shimming floor joists help to level the height of the tile floor and prevent tripping risks. The practice is normal for hardwood floors, as joists have dissimilar thicknesses wherever they meet. Shimming can prevent an opening or edge amid a room, resulting in a seamless change.
This article covers everything you need to know about shimming floor joists, including when, what, and how to shim.
Ready for a Flooring Quiz?
How Do You Shim Floor Joists?
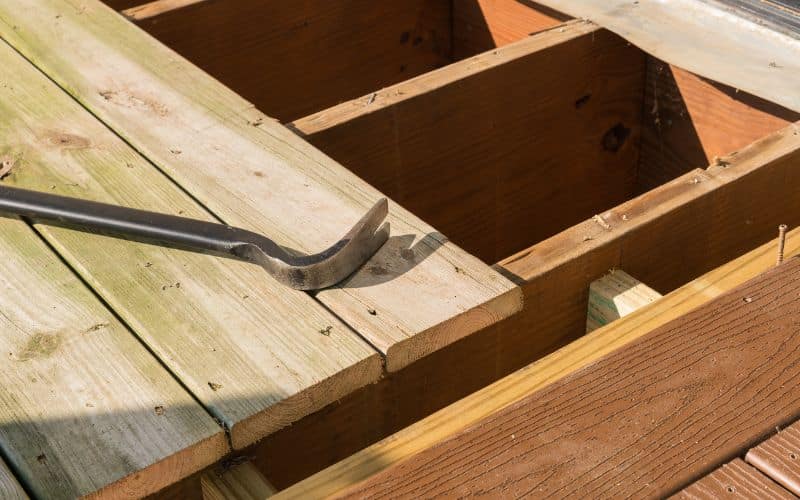
Shims are crucial in diverse industries, including the building, automobile, and aerospace sectors. It’s easy to shim floor joists even though it requires expertise.
Experts choose to shim floor joists, depending on whichever method gives them a satisfactory result.
Below is a guide on how to shim floor joists.
#1. Identify Any Asymmetry
Before shimming floor joists, the first thing to do is to locate any asymmetry. Finding the uneven areas will first inform your decision to shim and how to shim.
Most experts prefer the reviewed marble method among many other methods of determining whether the floor is not plane.
The marble method is one of the simplest methods to deduce or help reduce the uneven nature of your floor.
You only have to throw a few marbles onto the floor and monitor their movement. If the marbles move in one direction repeatedly, that side is lower than the rest of the floor.
If they spread across the floor and stop at certain areas, there are likely dips that 8 feet can’t see with your naked eye.
Dips are the lower areas in the floor where your marble settles, while the high areas are the heaves.
If no marbles are available, you could still use the 8-foot carpenter’s level to check for dips and heaves on the floor.
Here, place the level in various locations in the room. Then check to see if the level lies flat throughout the entire the sur of the floor.
You will notice a low spot if there is a space under the center of the level. If the level cradles to and fro, there’s a heave.
#2. Remove Subflooring
Ensure to remove the subfloor in case of remodeling. The subfloor lies first on the floor joists. Most times, it’s flat across the top of the joists.
However, they can still be installation errors and warps in irregular portions of floor joists.
Even if there are faulty joists, the initial subfloor installation can make the floor flat.
Now, use wood shims to level out any minor low locations. Moving the level in various directions will help identify the dips more clearly.
#3. Screw Shim Into The Joists
Using a drill and screws, secure the wood shims on top of the joists to level out the uneven installation area for the subfloor.
When you screw in the shims, they raise the low locations to the same level as the heaves.
Adjust the shim depth from the narrow tip to the about ¼ or ½-inch thick edge, depending on how high you want to lift the area.
#4. Level Down Slight High Points Of The Joists
It is necessary to plane down slightly high points of joists. Therefore, use the planer to smooth off any little joist high spot.
Adjust the depth of the planning tool depending on the level you want to chop off the top of the joists.
#5. Custom Shims
It’s quite different for joists that require portions of many feet to rise to the height of other shims. For such joists, make long unique shims.
Determine the highest and lowest points along the length of a top joist for a specific joist that needs matching. To that, use the level and tape measure.
Follow the steps below for your Custom shims.
#1. Flip A Piece Of Joist Material On Its Side
It would be best if you turned a piece of joist material on its side according to the size of the joists you’re using so that the 6-inch or 10 or 12-inch wide section faces up.
#2. Create Markings At The Opposite Ends Of The Joist Material
Create markings at the opposite ends of the Joist material. The markings must correspond to the wedge thickness you require for your unique shim.
For instance, if you have 1/8 unit on one end and ½-inch on the other.
#3. Draw A Chalk Line Between Two Pencil Lines
Check the reference line that runs the length of the joist depending on the length you want. To do that, draw a chalk line between two pencil lines.
If the joist were in the right spot, there would be an “angled line along its side.”
And you’re removing that angled top part from the “top” of the joist put on top of another joist to raise it to the same level as those around it.
#4. Place And Clamp Down The Wood Piece
Place the wood piece atop your sawhorses and clamp it down. Hold the circular saw firmly in your hands to make a custom-sized, thick shim.
Pull the trigger, push the blade into the wood, and cut along the chalk line.
#5. Fasten Shin With Screws
As necessary, fasten this shim with screws on top of the existing floor joist. It implies that it’s a long, triangular wedge shim.
To raise the height to correspond to the other joists to have an even surface for subfloor installation.
Place the thin end on top of the highest point of the joist and the thick end on the lowest portion.
When Is It Necessary To Shim Floor Joists?
It is necessary to shim floor joists if the floor joists cause uneven floor. They need shimming if the joists were not installed properly, bent, or jerked over time.
It would be best to separate the subflooring and shim the floor joists to level and flatten the floor. Unique for its use, Shimming will make the joist’s tips even.
Wood floor shims are thin wedge-shaped pieces that resemble doorstops. Shimming helps to fasten tiny wood pieces onto the top side of the lower joists.
Flooring contractors use shims to wedge between a subfloor and a floating floor or the joist and subfloor.
Can I Use Any Wood For Shimming Floor Joists?
No, you can’t use wood for swimming floor joists due to the species of wood of floor joists.
Redwood, hemlock, Douglas, and southern yellow pine are the typical wood species for floor joists.
Flooring constructors support, adjust, hold, or tweak the position of floor joists with shims. Wood shims are very affordable but should not serve every floor joist.
There are various materials available for wood shims. Since these shims are simple to cut and shave, softwoods like pine are the most typical species for their making.
Additionally, the softer wood is more prone to crack and split when the installer inserts a nail or screw.
Shims made of cedar are also a good option; they work better in moist or outdoor environments due to their durability.
There are also plastic shims available.
Can I Use Plastic Shims For Floor Joists?
Depending on the total load, you can use plastic shims for floor joists. A heavy load can cause the plastic to spread, which is unsatisfactory.
Apart from the weight problems, plastic shims can do as much as wood and steel.
The table below compares wood shims with plastic shims.
| Wood Shims | Plastic Shims |
|---|---|
| Holds enough weight | Has more chance of slipping |
| Offers good friction | Has more chance of slipping |
| Bad for places exposed to water | Good for places exposed to water |
| They are not expensive | They very expensive |

