Cedar breathers are excellent underlayments for wood roofing systems. A roofing system is incomplete without an adequate underlayment.
However, it is not a pretty popular choice for building construction. As a result, most roofers choose other alternatives over the cedar breather in most cases.
You might wonder what alternatives you can use. Therefore, this article would help you to know the cedar breather alternatives and other vital facts about cedar breathers.
Cedar breather alternatives you can use under your roof include felt underlayment and synthetic underlayment. The two alternatives also perform the same function as cedar breathers. Both underlayments are efficient in keeping moisture out of your roof and preserving the roof’s lifespan by allowing adequate airflow.
Ready for a Roofing Quiz?
Is a Cedar Breather Necessary for Your Roof?
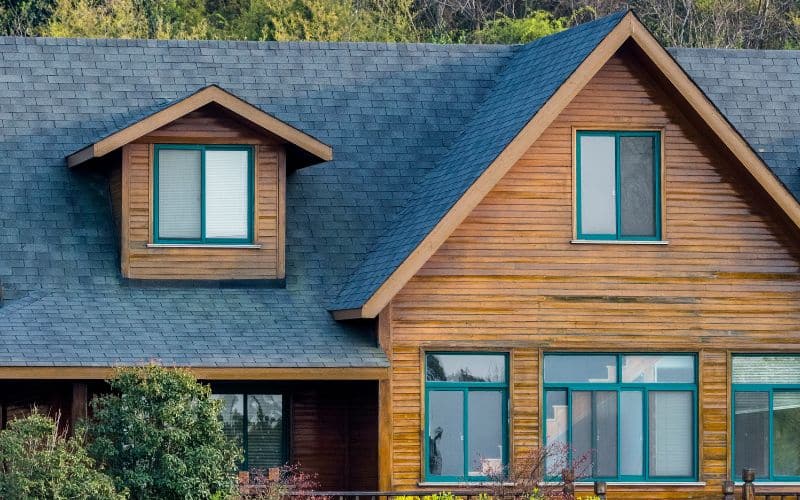
Cedar breather is necessary for your roof because of the several benefits it gives your roof. Cedar breather is a functional underlayment for wood shingle and shakes roofing.
The primary benefit of installing a cedar breather for your roof is to provide enough ventilation to help the roof control moisture and water.
The cedar breather helps the roof to dry properly and evenly, thereby increasing the durability and lifespan of cedar roofs.
Every cedar roof requires enough ventilation underneath them. The ventilation helps them to dry out water and moisture trapped in the roof.
If they don’t dry out properly, your roof material will split and curl over time. The cedar breather prevents wood rot in your wood roofing.
It effectively preserves the beauty of your wood roofing due to the continuous ventilation between the roof deck and shingles. It also serves as fire resistance for your roof.
Additionally, ultraviolent exposure does not affect the cedar breather because of its material composition. It is a product of nylon matrix, which is UV resistant.
What Are the Best Alternatives for Cedar Breathers?
The best alternative for cedar breathers is roof underlayments that help your roof to get enough ventilation and protect it from water and moisture damage.
You can use two alternatives on your roofing instead of cedar breathers. The alternatives are below.
#1. Breathable Membrane
Breathable membranes or breather membranes are resistant to water and moisture but allow air circulation within your roof.
They prevent water and moisture from leaking into the building. Although they prevent moisture, they still allow ventilation into the building.
Breather membranes also prevent external elements such as dirt and debris from damaging the roof structure.
You can choose from different types of breathable membranes in roofing stores if you want something other than a cedar breather.
Examples of breathable membranes include air-permeable breather membranes, timber frame permeable breather membranes, metal roofs breather membranes, etc.
#2. Felt Underlayment
Felt underlayment is a low-cost roofing underlayment that helps to protect your roof from damage and preserves the roof structure.
Felt underlayments are a product of natural materials such as natural fibers, wood cellulose, etc. Some other types are from synthetic bases, for example, fiberglass or polyester.
The underlayment is coated with a protective asphalt coating to make it waterproof against elements that can pass through the cedar shakes or shingles.
The elements a felt underlayment repels are moisture, water, and debris. Such elements can cause damage, such as rot and corrosion, to your wood roofing.
The underlayment is an extra barrier between your roof deck and the shingles or shakes. It protects the vital parts of the roofing structure and materials.
Although the felt underlayment is an excellent alternative to a cedar breather, there are pros and cons you should consider before opting for it.
The pros and cons of felt underlayment include:
| Pros | Cons |
|---|---|
| It is inexpensive. | It doesn’t last long. |
| It is water-resistant. | It weakens from excess sun and moisture exposure. |
| It is easily accessible from stores. | It wrinkles under ultraviolet exposure. |
| It is a popular roof material. | It might need a slip sheet for protection. |
| It losses its fire resistance when it becomes weak. | |
| It is heavier than synthetic underlayment. |
#3. Synthetic Underlayment
Synthetic underlayments are durable and excellent for protecting your roof. In addition, the underlayment is effective against extreme weather conditions.
The synthetic design allows you to use it for different types of roofing and against various weather and climate conditions.
Additionally, synthetic underlayment also provides extra insulation and prevents heat loss within the building. It also has a longer lifespan than felt underlayment.
The underlayment is a layer of synthetic material like laminated polyethylene or polypropylene plastic.
It is water and moisture-resistant and effective in keeping your roof dry. The pros and cons of synthetic underlayment include:
| Pros | Cons |
|---|---|
| It is durable against high heat and moisture exposure. | It is expensive. |
| It lasts longer than felt underlayment. | |
| It is lighter. | |
| It has a high resistance to mold and mildew. |
What is the Required Cedar Breather Thickness?
The ideal cedar breather thickness for your roof is 1/4 inch (one-quarter inch). It is enough thickness to protect your roof structure.
Irrespective of the roof design, you should always allow this level of thickness for your roofing. Thankfully, you don’t require any unique tool to install cedar breathers.
So, it should be easy to install because it is not too thick. It would also maximize the effect of the cedar breathers on your roof.
Is a Cedar Breather Needed Under a Metal Roof?
Cedar breather is essential under a metal roof. It helps to create space for adequate drainage and ventilation in your metal roofing system.
Although cedar breathers are mostly functional for wood roofings, they are also efficient in metal roofing systems.
The roof’s metal panels also trap moisture and dirt, but installing cedar breathers underneath increases airflow, preventing it from trapping in moisture.
In addition, it increases ventilation and reduces thermal bridging between the metal roofing and your attic during hot climates.
The underlayment has enough thermal breaks to reduce the amount of heat transfer from the roof surface to the building structure underneath.
It increases energy efficiency and makes the entire building cooler. Another effect of this thermal break is it serves as a soundproof system for your building.
It also serves as a sound barrier for the metal roof. It prevents sound from traveling through the roofing system into the building below.
Metal roofs are naturally loud, especially during rainfall, but the thickness of the cedar breather is enough to prevent sound vibrations from passing through the roofing.
Additionally, the cedar breather will last long under metal roofs. Therefore, you won’t need to adjust the underlayment throughout the lifespan of the roofing.
How Do You Install a Cedar Breather?
Installing a cedar breather doesn’t require any special equipment or tool. However, the installation process depends on the roofing material you use.
The installation process for the cedar breather according to the roof material and section is as follows:
#1. Under Cedar Shingles
- First, you need to install the plywood deck on the roof rafters.
- Then, install the roofing felt a quarter inch beyond the edge of the entire roof deck.
- Ensure the felt layers overlap at least four inches towards the roof ridge.
- Use one tack or nail at three square feet intervals to tack down the cedar breather.
- The flat side of the cedar breather would be the side facing upward, and the dimples would be facing down. Thus, the flat side is where you apply the tacks or nails.
- Tack the cedar breather so that the layers do not lap over each other.
- Next, install the cedar shingles from the fascia towards the roof ridge so you don’t have to walk over the cedar breather.
- The nail length you use to install the shingles should allow complete or three-quarter penetration through the sheathing.
- The space for cedar thickness should be a quarter inch during installation.
#2. Under Cedar Shakes
- First, install the plywood deck on the roof rafters.
- Then, install 36 inches of roofing felt a quarter inch beyond the edge of the entire roof deck.
- Install the cedar breathers with the dimple side facing down and tack it down with one nail every three square feet.
- Install the cedar breather working it from the fascia to the ridge towards the shake and felt installation, so you won’t have to walk over the cedar breather.
- Next, lay an 18 inches wide #30 roofing felt over the top of the shakes and widen it onto the cedar breather.
- Position the bottom edge of the roofing felt above the base of the shake at a distance two times the installation instructions from the manufacturer.
- Complete the task with a nail length penetrating thoroughly or three-quarters through the sheathing.
- Leave a quarter inch for the cedar breather thickness during the process.
#3. Under Metal Roof
- First, install a prepainted aluminum or galvanized drip edge onto the roof deck. You can also install a rake edge cap if you want.
- Install roofing felt on the roof deck. If a rake edge cap is installed, the felt should extend by at least half an inch beyond the fascia board.
- Next, install the cedar breather and shingles according to instructions from the manufacturers.
#4. Around Roof Valley
- Install a 24 inches wide strip of #30 roofing felt over the cedar breather around the roof valley area.
- Then, install a 22 inches wide center crimped aluminum or galvanized steel valley flashing.
- Install roof shakes or shingles, allowing a space of four to eight inches as the open valley width.
- The open valley width of the shakes or shingle should depend on the volume of water you expect.
- You should avoid breaking into the valley with the joints between the shakes or shingles.
Conclusion
In conclusion, cedar breather installation is essential to preserve the lifespan of your roof. However, you should let a professional roofer install it.
An incorrect installation could allow moisture and dirt into the structure, leading to a roof leak. As a result, you might have to spend more repairing the roof.

