Are you tired of staring at the unattractive ceiling drywall seams which seem to be ruining the aesthetics of your building? Worry no more; you’re not alone.
Visible drywall seams can be frustrating, and it’s one of the common issues that most homeowners struggle with.
Meanwhile, several reasons can cause your ceiling drywall seams to be visible. Likewise, effective solutions can fix the problem and make your ceiling look seamless.
Drywall seams can become visible on a ceiling for several reasons. One of the most common reasons may be due to poor installation or finishing of the drywall. Another reason is the drywall’s natural expansion and contraction with temperature and humidity changes. Moreover, low-quality or incorrect drywall materials can also result in visible seams in your ceiling.
This article will explain the likely cause behind visible ceiling drywall seams. I will also provide practical tips and solutions to make you achieve a seamless and smooth ceiling finish.
By the end, you will be able to discover the causes and practical solutions to uneven and visible ceiling drywall seams.
Ready for a Drywall Quiz?
Why Are My Ceiling Drywall Seams Showing?
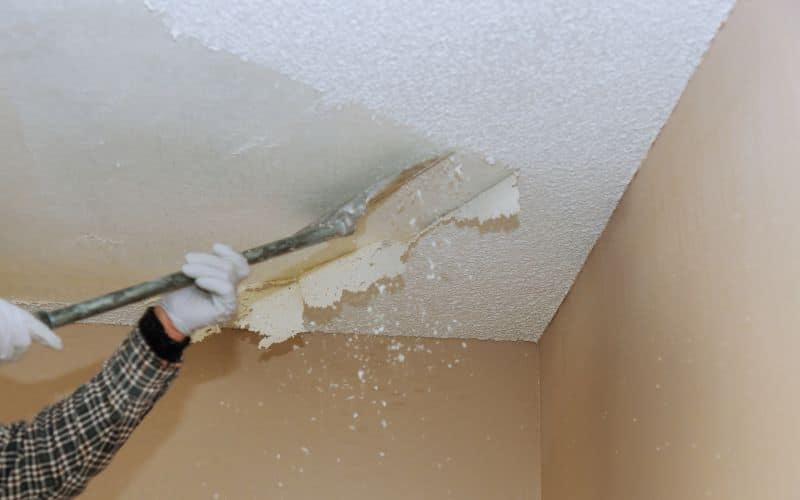
When the ceiling drywall seams of your space start becoming visible, it can be frustrating and unappealing to your sights.
Meanwhile, various reasons can make your ceiling drywall seams visible; below are some;
#1. Movement/Settling
Ceilings can move and settle over time due to several factors, such as changes in temperature and humidity.
This movement and settling can cause the joint compound used to cover the seams to crack and pull away from the drywall, making the seams underneath visible.
#2. Poor Installation/Improper Finishing
Poor installation and improper finishing are other reasons why the ceiling drywall seams of your building become visible.
If the drywall of your space was not installed appropriately or if the joint compound was not applied evenly or allowed to dry completely before sanding and painting, the seams may become more visible over time.
In addition, using low-quality or incorrect drywall materials or improper storage and handling of the drywall can also contribute to visible seams.
Meanwhile, poor installation is most likely due to improper techniques used during the installation process or lack of experience.
#3. Moisture
Moisture is another thing that can cause the drywall of a building to expand and contract, and of course, this can result in visible seams.
Meanwhile, visible ceiling drywall seams due to moisture can result from leaks, condensation, or even high humidity levels in the home, such as toilets, the kitchen, etc.
How Do You Fix Visible Drywall Seams on the Ceiling?
To know the exact and effective solution to visible drywall seams on your ceiling, you first need to identify the cause.
Regardless of the cause, below are the solutions to why your ceiling drywall seams are showing.
#1. Strengthen the Seams
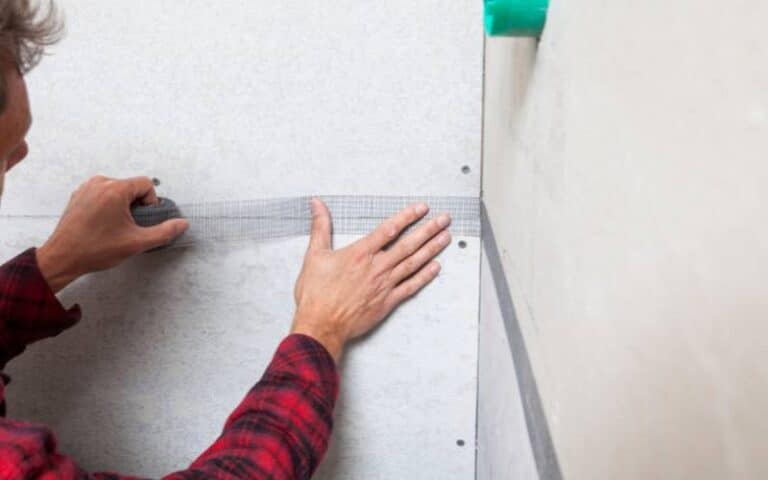
One of the practical solutions to ceiling drywall seams that are showing is to reinforce the drywall seams using joint compound and mesh tape.
Follow the instructions below for the joint compound application:
- First, clean the area around the seam with a damp cloth to remove dust or debris.
- Now, apply the joint compound to the seam using a putty knife. Make sure the joint compound spreads evenly over the seam and extends a few inches on either side of the seam.
- Allow the joint compound to dry completely.
This step may take several hours or even overnight, depending on the joint compound’s thickness and the room’s temperature and humidity. - After, sand the area lightly with fine-grit sandpaper to remove any rough spots or bumps.
Be careful not to sand too much, as you don’t want to create a depression in the joint compound. - Then, apply a second coat of joint compound, extending further out from the seam. Allow this coat to dry completely as well.
- Sand the second coat lightly with the sandpaper to smooth out any bumps or rough spots.
- Repeat steps 5 and 6 until the seam is completely smooth and the repair is flush with the surrounding ceiling.
- Repaint: After sanding the seam down, repaint it so it helps hide the seam. Make sure to use high-quality paint that will match the existing color of the ceiling.
#2. Address the Underlying Issue
Another effective solution is to identify the underlying cause and find a solution.
If the cause of the visible seams is due to movement or moisture, it’s essential to address the underlying issue. This measure could involve fixing leaks or addressing humidity levels in the home.
In this case, it would be best to consult a professional contractor or handyman to assist with these issues.
Why Are My Ceiling Drywall Seams Showing After Painting?
In general, there are a few potential reasons that can cause your ceiling drywall seams to show after painting, and here are some of them.
#1. Poor Quality Drywall
If your ceiling drywall seams are showing through the pain, it might be that the drywall used is damaged or of low quality. This issue can be due to improper installation or damage during transportation or storage.
#2. Insufficient Sanding
If you didn’t adequately sand your drywall before painting, any imperfections in the seams might show through the paint.
In this case, the seams become visible regardless of the paint because the paint won’t hide the uneven surface.
#3. Poor Quality Paint
Another reason your ceiling drywall seams are showing may be the type of paint used.
Using low-quality paint or not applying enough coats of paint can result in the drywall seams showing through.
This issue can become more evident, especially if the paint is too thin or needs more pigmentation.
#4. Moisture
High humidity can cause drywall seams to expand and contract, making them more visible after painting.
This particular issue can occur if there is a leak in the ceiling or the space lacks proper ventilation.
Meanwhile, to address any of these issues, you first need to identify the specific cause to provide adequate and practical solutions.
How Do I Make Drywall Ceiling Even?
Achieving a smooth and even ceiling is quite simple if you follow instructions.
Making a drywall ceiling involves several steps and may require one or a combination of the solutions below.
#1. Inspect the Ceiling Thoroughly
Before anything, you must thoroughly inspect the existing ceiling and identify any low or high spots.
To make this easy, you can use a long straight edge, such as a piece of lumber or a level, to identify any irregularities.
#2. Proper Planning
Once you’ve identified the irregular spots, you need to plan the repair of the spots. In some cases, you can fix the problem with a simple patch.
However, you may need a more comprehensive repair method if the ceiling is uneven.
#3. Apply Joint Compound
If you realize that the uneven are just small low spots, you can use joint compound to level the surface.
Apply a thin layer of joint compound to the low spots, and then use a trowel to feather the edges. Allow the compound to dry completely, and then sand it smooth.
#4. Apply a Skim Coat
If the uneven surfaces are high, you may need to apply a skim coat of joint compound over the entire ceiling to level it.
Apply the joint compound with a trowel or drywall knife, and then use a wide taping knife to smooth it out. Allow the compound to dry completely, and then sand it smooth.
#5. Paint or Texture
After the repair process, and you’ve achieved a smooth and even surface, you can then paint or texture the ceiling to your desired finish.
Meanwhile, you may need clarification about what even an uneven drywall ceiling should look like; check the table below for a better understanding.
| Even Drywall Ceiling | Uneven Drywall Ceiling |
|---|---|
| It has a smooth surface. | It has a textured surface. |
| It provides a clean, uniform look. | It provides a more natural, organic look. |
| Can highlight unique architectural features. | It can reveal imperfections or irregularities in the ceiling. |
| It has adequate joint compound for taping and finishing. | Requires more joint compound for taping and finishing. |
| It beautifies the look of the room. | It makes a room look unattractive. |

