Crown molding is one of the most effective ways to enhance the visual appeal of any room in your house.
Be it the living room, dining room, or bedroom, crown molding creates an elegant transition between walls and ceilings.
While these may be the common places where you would see crown molding, they can also be used in bathrooms – to add a bit of sophistication.
Crown molding is functional and aesthetic, especially when transitioning from walls to tiles. However, several factors must be considered to achieve the polished and refined look you desire. You must choose the right materials, consider your design and style, ensure proper installation, and maintain it regularly so you can keep enjoying it.
This article will explore how to seamlessly transition crown molding from bathroom walls to tiles.
We will also look at some important factors to consider before installation and some vital installation techniques.
Should You Put Crown Molding in Bathrooms?
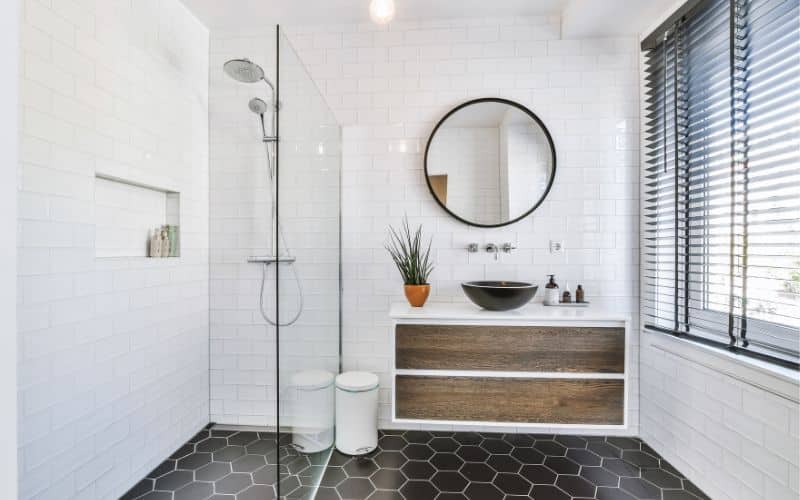
You can put crown moldings in your bathroom to make it look classy. However, the decision depends on your personal preferences and the design goals you have for your home.
If you are still contemplating installing crown moldings in one or all the bathrooms in your house.
Here are some factors you should consider:
#1. Aesthetics
One of the benefits of crown molding is the elegant and sophisticated look it gives any room – including your bathroom.
With crown molding in your bathroom, you can elevate the visual appeal of your bathroom and get a luxurious atmosphere.
The beauty is even more pronounced when you accessorize with complementary decorative pieces.
#2. Ceiling Height
Crown moldings are best in bathrooms with high ceilings than low ceilings.
The reason is that installing this molding in a high-ceiling bathroom makes the bathroom feel more spacious.
However, installing crown moldings would make the space feel cramped in a bathroom with a low ceiling – especially if you opt for an elaborate design.
Generally, the higher the ceiling, the more elaborate your designs can be. So, it is important to consider the height and proportions of the bathroom when deciding.
#3. Moisture & Humidity
Bathrooms experience the most moisture and humidity of all rooms in a house. These phenomena pose challenges for some types of crown molding, particularly natural wood.
Considering this factor, if your ceiling height is right, you should use moisture-resistant materials like polyurethane or PVC.
These materials are less likely to warp, rot, or get damaged because of water damage. It is best to install and maintain your moldings to ensure longevity.
#4. Maintenance
Like every other appliance or fixture, crown molding lasts longer when you clean and maintain them.
Dust and moisture can accumulate on the surface of the molding. So, remember that you will perform periodic cleanups to keep everything in good shape.
Choosing a material that is easy to clean and maintain, like PVC, can simplify this process.
#5. Design Compatibility
Before choosing to install a crowning molding, consider your bathroom’s overall design style and theme. There are different designs to complement several aesthetic options.
If you want a professional touch, it is best to speak with a designer. Doing this will ascertain that your chosen crown molding style blends with the existing design elements in the bathroom.
How To Transition Crown Molding in Bathroom Walls to Tiles?
Transitioning crown molding from bathroom walls to tiles requires meticulous planning and careful installation. Following through on these two things will ensure a seamless transition.
Below is a guide for you:
#1. Take Measurements & Plan
The first thing to do is to take measurements of the wall where you want to install the crown molding.
While taking the measurements, note the corners, angles, and any other part that requires any technicalities.
These measurements will help you plan the installation layout and determine the height where you wish to install the molding on the wall.
#2. Prep the Walls
Before transitioning, ensure the walls are clean, smooth, and debris-free. If there are cracks in the wall, endeavor to fix them before you proceed with the molding.
Depending on the severity of the cracks and repair, you may have to prime or seal the wall again to create a smooth surface for your crown molding.
#3. Cut Your Molding
After prepping your walls, cut all the molding pieces. Ensure you follow the measurements you took earlier. Doing this will help you achieve a perfect lay and even more perfect corners.
As you cut, you can do a dry test to ensure your measurements are correct and the parts fit well.
#4. Begin Installation
Start by adding a strip of wooden board to the part of the wall where you want to install the crown molding.
This board gives you something to install the molding on, especially if using nails. These nails must be long enough to penetrate the walls and hold the molding firmly.
Alternatively, you can apply an adhesive to the back of the molding. If this is your preferred method, follow the manufacturer’s instructions for good results.
#5. Caulk the Corners and Spaces
No matter how meticulous you are, there might be some spaces between the crown molding and the tile or at the corners.
Use a high-quality, waterproof caulk to fill these spaces at this stage.
This caulk’s color should match the molding’s color so that it does not stand out and ruin the beauty of your work.
You can also use high-quality silicone instead. Next, allow the caulk or silicone to dry.
Then, using a smoothing tool or cloth, sand the edges where you applied these products to give your molding a professional finish.
It is important to take your time throughout these processes, working carefully. Seek professional assistance when and where necessary.
How to Finish Crown Molding Transition to Tile?
After installing your crown molding, the next step is to give it a nice finish. This stage requires you to be careful and thorough because this determines the final look.
#1. Clean the Area
You can clean the area as you work, removing dust or debris from the surface. You can use a sponge or damp cloth and allow the moldings to dry completely.
Doing this makes the next steps easier, faster, and more seamless.
#2. Caulking Corners and Spaces
Applying caulk is very important as it helps you cover up any spaces that would make your work look amateur.
Ensure you pick an appropriate grade of caulk that matches the color of your crown molding.
Be generous in your caulk or silicon application because if the product is insufficient, those spaces will remain visible.
You can use a smoothing cloth to remove excess products and make your application smooth and seamless.
#3. Painting
You can buy most crown molding in their finished state. However, if yours is unfinished or requires any touchups, the next step is to paint it.
It is best to use high-quality paint that would not chip quickly. This paint should also be crowning molding appropriate.
You may have to apply multiple coats depending on whether you touch up or paint an unfinished product.
But it is best to allow each coat to dry completely before applying the next one.
Overall, remember to choose a color that complements the color scheme in your bathroom.
#4. Finishing
Most people apply finishes to give their crown molding a distinct look, particularly when working in other rooms.
But in a bathroom, the primary function of a protective finish is to enhance its durability and moisture resistance.
The type of finish you use depends on the molding material and your preference. One of the best options is the polyurethane finish.
Follow the manufacturer’s directions when applying the finish and allow it to dry completely.
After this stage, you can review your work to check for any spots you may have missed. If there are any, touching up will fix it quickly. Otherwise, you are good to go.
Is It Better to Tile Up to The Bathroom Ceiling?
Choosing whether to tile up to the bathroom ceilings can be conflicting. This choice also depends on many factors, like your preference, budget, design, and practicality.
It is best to consider the advantages and disadvantages before deciding.
#1. Advantages of Tiling Up to The Bathroom Ceiling
Tiling up to the ceiling gives your bathroom a seamless look and makes it look more expansive without taking up any space. This style works best for bathrooms with low ceilings.
Another peculiar advantage is that tiles are more durable and water-resistant than any other alternative. Additionally, tiles are easier to clean and maintain.
Tiles are not easily damaged by cleaning products, and a simple wipe-down can take off stains quickly.
#2. Disadvantages of Tiling Up to The Bathroom Ceiling
The major disadvantage of this process is that it is expensive. Complete tiling requires more material and labor than a half- or three-quarter tiling pattern.
If you have a small bathroom, complete tiling can make your bathroom look overwhelming, so it is best to strike a balance by tiling up to water-prone levels and using paints or crown moldings at the top.
Furthermore, tiles are more challenging to manipulate, especially if you want to change your bathroom designs later.
Below is a tabular representation of these advantages and disadvantages.
| Advantages | Disadvantages |
|---|---|
| Tiles give your bathroom a seamless and expansive look. | It is more expensive and requires more technicality, especially around wall fixtures. |
| Tiles are more durable and moisture-resistant. | It can be overwhelming, especially in small bathrooms. |
| Tiles are easier to clean and maintain. | It can limit future design updates and changes. |
Can I Install Crown Molding Over Tiles?
Yes, you can install crown molding on tiles. But there are some factors you must consider if you want good results.
These factors include:
#1. Material and Thickness of Tiles
The material of the tile is a significant factor to consider before deciding. If the tiles are delicate or brittle, you must be extra careful not to break or destroy the tiles during molding installation.
Depending on the tile surface, you may have to adjust the crown molding to ensure a secure installation.
Additionally, if the tiles are very thick, you may have to trim off some sections so that your crown molding would fit properly on the tile.
#2. Adhesive Section
When installing over tiles, it is better to use adhesives than nails to secure your molding to the wall.
Therefore, choose an appropriate adhesive suitable for the molding material and the tile. You can consult a professional if you need help deciding.

