Drywall is a popular choice for resilient interior walls because of its durability and increased resistance to smoke and fire.
However, drywall can’t last long in the presence of moisture. This drawback makes it a less suitable material for a bathroom or moisture-rich area.
Still, you may wonder how some bathrooms have dry walls around the tub flange. Reading this article to answer your and other related questions is best.
It is possible to drywall around a tub flange with some expertise. The key is leaving a gap between the tub flange and the drywall to prevent the wall from absorbing water. Then, fill the gap with some caulk or hot mud. You must also seal the drywall edge and flange to prevent moisture from penetrating the drywall.
In this article, I will help you know if you can put q drywall around a tub flange, how to carry out the process, and what you should put between the drywall and the tub flange.
By the end, you’ll also understand how to fill the gap between the drywall and tub flange and how to cover a tub flange.
Ready for a Drywall Quiz?
Can You Put Drywall Around the Tub Flange?
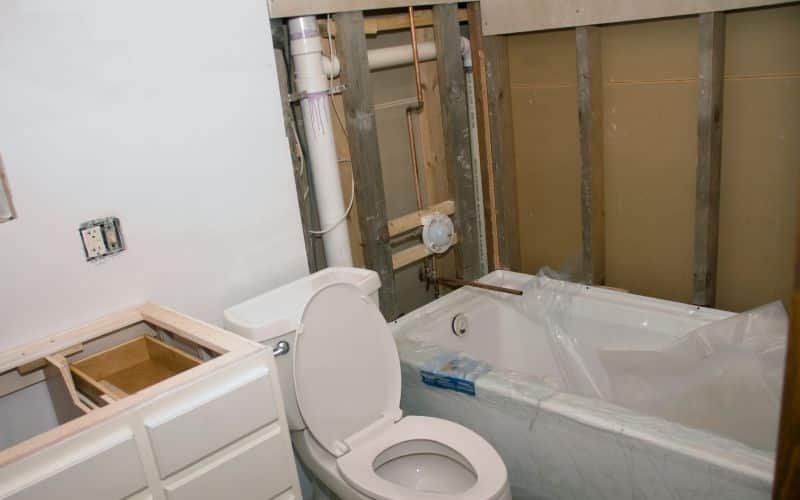
Use some methods and care to put drywall around a tub flange because drywall isn’t ideal for bathrooms and water areas.
It can’t withstand moisture; water easily damages it. Moisture can lead to mold growth which gradually degrades the drywall.
Therefore, it is essential to seal the wall edges to prevent water from the bathroom from entering the gap behind the drywall.
Installing drywall around the tub flange requires proper finishing to protect the wall. It requires some level of expertise to achieve this.
You must avoid letting the wall touch the lip of the tub or overlap the edge. It is best to let the drywall rest on the edge of the tub flange.
This method prevents water from entering the wall by allowing it to flow back into the tub. Although drywall isn’t ideal for bathroom areas, it has some advantages.
The table below outlines the pros and cons of using drywall around a tub flange.
| Pros | Cons |
|---|---|
| Its light-weight makes it less stressful to handle. | It readily takes up and retains water. |
| Its installation takes little time. | It is prone to mold growth. |
| It requires little to zero maintenance. | The drywall board doesn’t allow installing anything on it. |
| It is durable and long-lasting. | Improper installation will make the drywall fall off. |
| It adds an aesthetic effect to the bathroom walls. | Installation requires patience and adequate skill. |
How Do You Drywall Around a Tub Flange?
The proper way to drywall around a tub flange is to leave a gap between the tub and the wall. You should avoid fitting the drywall to overlap the tub where moisture can reach it.
The gap helps to prevent moisture from damaging the drywall. Additionally, using a shower bead for the installation helps to get the perfect finish.
The process can be challenging, but the bead makes it easier. A proper guide will help you achieve a quick and beautiful result.
The steps below will guide you through installing drywall around a tub flange using a shower bead.
- First, position the drywall boards a few inches above the tub flange.
- Then, measure the tub flange and cut the shower bead to an equivalent length.
- Place the bead at a 45-degree angle on one end to get an accurate and clean angle fit.
- Next, apply some spray adhesive on the length of the back of each drywall.
- Hold the drywall bead to the board with ½ inches of stainless-steel staples. Staple it at an interval of about six to eight inches.
- Then, apply coats of some drywall mud on the bead to cover it up. Do this up to the bead’s tear-away strip.
- Remove the strip from the entire bead area to get a clean edge.
- Make sure to sand the area for a smooth and clean finish.
- Finally, apply some caulk between the enclosures and the drywall.
What Do You Put Between the Tub and Drywall?
You must put a waterproof material like caulk between the tub and drywall. The material insulates the tub and drywall edges.
You must leave a gap between the tub and drywall and fill it with hot mud or caulk. Then, cover the area with mesh tape.
You can also finish the gap by furring the wall before hanging the drywall or using drywall beads. However, the furring method is time-consuming and stressful.
On the other hand, the filling-the-gap method involves cutting and fitting sheetrock into the gap. The sheetrock will go around the gap between the drywall and the tub flange.
Then, apply hot mud to prefill the middle gap with sheet rocks. Next, cover the prefilled gap with mesh tape.
Finally, apply coats of drywall compound on the tapped finish. Then sand the edges to get a smooth finish.
Another material you use to finish a tub and drywall transition is a shower bead. It has an extended leg to stress across the space between the tub enclosure.
It is easy and less stressful to install. The shower bead is long-lasting because it is from high-quality PVC, which will never rust or grow mold.
Using a shower bead gives you a smooth furring effect without the stress of furring the entire wall.
How Do You Fill a Gap Between a Drywall and a Tub Flange?
As explained above, you must fill the gap between a drywall and a tub flange with hot mud or caulk. The process is straightforward, with the proper guidelines.
However, it is essential to note that after filling the gap, the drywall edges will run along the edges of the area surrounding the flange.
Although you may fill the gap with other materials, the material you use depends on the gap size.
The gap could be broad or narrow, depending on your preferred distance between the drywall edge and the tub flange.
A wide gap can be up to 6 inches or more; you need to install a wet area compatible backer rod before applying caulk on such gaps.
A narrower gap doesn’t need such a particular method. You can apply hot mud or caulk side-by-side between the gap spaces.
This method is easy without any previous experience. However, the method could cause a breakdown because the caulk has little resistance against water.
You may have to replace the materials frequently. The standard method is the one suitable for a quarter-inch wide gap.
The following steps will guide you through filling the gap between a tub flange and drywall.
- Get hot mud or caulk that matches the bathtub color.
- Clean the gap and remove every debris. Debris can diminish the caulk’s durability.
- Prefill the enclosure or surrounding area with hot mud or caulk.
- Cover the prefilled area with mesh tape. Avoid using paper tape because it encourages mold growth.
- Apply fine coats of standard drywall compound on the area to seal the joint.
- Sand the edges to get a smooth and clean result.
How Do You Cover a Tub Flange?
Sealing the edges of the drywall and tub is best to cover the flange. The process improves the drywall installation process in the bathroom.
It is best to avoid covering the tub flange with drywall because it will absorb water from the edge of the flange.
Therefore you need to leave some allowance between the edges and use mud to cover it. Sealing the spot with mud makes the project last longer.
For this project, you will need the following materials.
- Masking tape
- 150-grit sandpaper
- 6 Inch drywall knife
- Joint compound
- Paper drywall tape
- Silicone caulk
Follow the steps below to seal the edge of a tub flange.
Step 1: Prepare the spot
- Identify where the compound meets the flange.
- Cover the tub flange with some masking tape to keep it clean while you work.
- Avoid getting the tape stuck underneath the caulk and joint compound so you don’t affect the seal.
- Fill the spot where your drywall edge meets the tub flange with the joint compound.
- Apply enough to align the surfaces but avoid adding too much so the joint compound doesn’t flow out.
- Leave the compound to dry for 24 hours, after which it will turn white.
Step 2: Apply the Joint Compound
Use a 6-inch drywall knife to apply a 6-inch wide band of joint compound to the spot the drywall edges meet the flange.
Step 3: Lay the Drywall Tape
- Lay the drywall tape above the bands of the joint compound so that it ends up against the tub flange.
- Cover the entire area underneath the tape with the joint compound. This part ensures adequate adhesion.
Step 4: Flatten the tape
- Flatten the drywall tape with the drywall knife.
- Avoid scratching the tub flange while doing this.
- Please leave it to dry completely.
Step 5: Conceal the Tape
- Apply another coat of joint compound over the tape to conceal it.
- Avoid applying too much so the surface doesn’t become wavy or pitted.
- Leave the compound to dry thoroughly.
- Repeat the process after it dries thoroughly.
- Allow the new coat to dry completely.
Step 6: Smoothen the spot
- Use the sandpaper to smoothen the spot.
- Avoid scratching the tub flange in the process.
Step 7: Seal With Caulk
- Apply a slim band of caulk over the spot where the flange meets the edges of the drywall.
- Smoothen the caulk with your fingertip until it is even.
- The caulk provides a waterproof seal.
- It is advisable always to read the manufacturer’s instructions to ensure that the caulk bonds with the drywall surfaces and is suitable for bathrooms.

