The Kohler faucet set of handles always gives your bathroom decor that antique elegance and feel.
Like most other faucets, it has a double-handler cartridge, which makes removing the handle necessary when it becomes clogged.
Although, the process isn’t always easy as it may seem. But, with this article comes detailed information on the Kohler bathroom faucet handle removal and all that’s involved.
When attempting to remove this faucet handle, first turn off the water supply. Using a screwdriver, remove any set of screws holding it in place. Then, gently wiggle the handle with your hands to pull it off (use a handle puller if it doesn’t come off easily). Now, lift and remove the handle straight from the valve stem.
Dismantling a Kohler bathroom faucet handle can be as easy as a piece of cake, depending on your level of expertise.
That’s why in this article, we’ve compiled as much useful information as you may need to get through the process of removing this faucet handle by yourself.
If you carefully read this guide and follow all instructions, you’ll certainly be able to start and finish this process independently with little to no challenges.
How to Remove Kohler Bathroom Faucet Handle Without Screws?
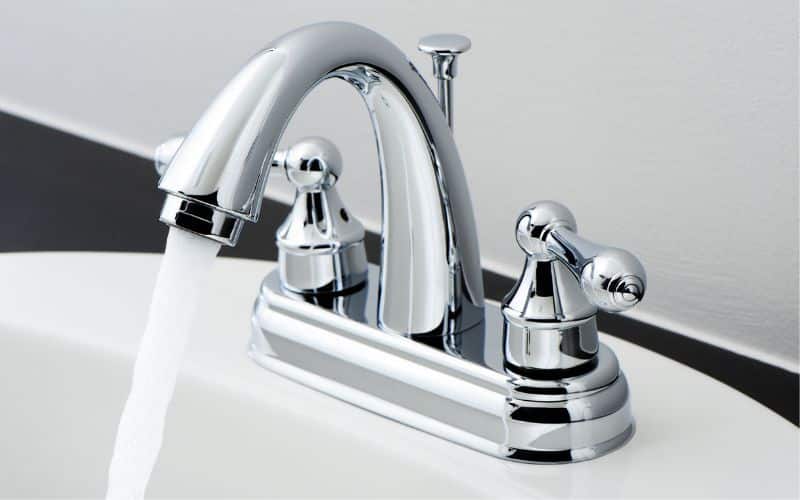
If you have a Kohler bathroom faucet without screws, the handle removal process might be slightly different from the traditional screw-based faucet handles.
However, you can still remove the handle to fix a leak or for maintenance by following these steps:
- Turn off the water supply: Locate the water valves under the sink and turn them off to stop water flow to the faucet.
- Pry off the decorative cap: Look for a decorative cap on top of the faucet handle and pry it off using a flathead screwdriver or a similar tool. You may need to wiggle it a bit to loosen it up.
- Remove the handle screw: Once you remove the decorative cap, you’ll see a handle screw. Remove it using a Phillips screwdriver.
- Remove the handle: With the screw removed, pull the handle straight out to remove it from the faucet valve.
- Remove the escutcheon: You’ll now see the escutcheon, which is the decorative cover around the valve stem. Kohler escutcheons are usually secured with screws, so remove them to take off the escutcheon.
- Remove the faucet cartridge: With the escutcheon removed, you’ll see the cartridge, which is part of the faucet that controls water flow. Use a pair of pliers to grip the cartridge stem and pull it straight out to remove it from the faucet body.
- Clean the faucet parts: Now that you’ve removed all the parts, it’s a good time to clean them thoroughly with a soft brush and warm, soapy water. Rinse them off and dry them with a clean towel.
To reassemble the faucet, just reverse the steps above. Insert the cartridge, replace the escutcheon and handle, and tighten the screw.
Finally, turn on the water supply and test your faucet for leaks.
Nevertheless, if you’re unable to remove the handle, you may want to consult a plumber or professional for additional assistance.
How to Replace Kohler Bathroom Faucet Handle: The Complete Process?
You can easily carry out the process of replacing your Kohler bathroom faucet handle with the use of the following tools and materials while also carefully following the instructions below.
First, you’ll need the following;
- Screwdriver (Phillips or flathead, depending on your faucet)
- Allen wrench or hex key (depending on your faucet)
- Replacement handles
- Plumbers grease
Here are the steps to replace the Kohler bathroom faucet handles:
- Before starting the replacement process, turn off the water supply to your faucet – both hot and cold water lines.
- Remove the existing handles from the faucet by unscrewing the set screws that hold the handles in place. For Kohler faucets, you will typically find the set screws at the base of the handle or behind the lever handle.
- Once you’ve removed the handles, you might need to unscrew the escutcheon cap to access the cartridge. Use an Allen wrench or hex key to loosen it. Alternatively, some Kohler faucets may have a metal or plastic cover that you need to remove first.
- Carefully remove the cartridge by pulling it out with pliers. Be gentle to avoid damaging it.
- Check the cartridge for signs of damage, such as cracks, chips, or debris accumulation. If it is damaged, replace it.
- Before installing the new handles, apply some plumber’s grease to the stem of the cartridge to lubricate it.
- Attach the new handles onto the stem and tighten the set screws to secure them.
- Replace the escutcheon cap or cover (if applicable) and tighten it with an Allen wrench or hex key.
- Turn on the water supply to your faucet and test it to make sure it works properly. If you notice any leaks or drips, tighten the handles a bit more.
That’s it! You have now successfully replaced your Kohler bathroom faucet handles.
How to Fix a Leaking Kohler Bathroom Faucet Without Removing the Handles?
Unfortunately, fixing a leaking Kohler bathroom faucet without removing the handles may not be possible.
In most cases, removing the handles is necessary to access the cartridges or valve stems that need to be replaced to fix the leak.
However, there are some general steps you can follow to fix its leaking faucet:
#1. Locate the Shut-Off Valves
You should be able to find the shut-off valves under the sink. They are usually on the wall and look like small knobs or levers.
If you’re looking to fix a leaking Kohler faucet without removing the handle, your first step should be to locate the shut-off valves.
These valves are typically located beneath the sink and can be turned clockwise to shut off the water supply to the faucet.
Once you’ve turned off the water supply, you can proceed with fixing the leaking faucet.
It’s important to note that the specific location of the shut-off valves may vary depending on the type of faucet and the plumbing configuration in your home.
If you’re unsure where to locate the shut-off valves, consult a professional plumber for assistance.
#2. Turn-Off The Water Supply
Turn the shut-off valves until they are fully closed. This action will stop the flow of water to the faucet.
Turning off the water supply will allow you to work on the handles without any water coming out, which can greatly simplify the repair process.
In addition, working on plumbing fixtures while the water is still on can be dangerous and can potentially result in water damage or other issues.
It’s always a good idea to turn off the water supply before making any plumbing repairs, including fixing leaking bathroom handles.
#3. Release Any Excess Pressure
After turning off the water supply, turn on the faucet to release any excess water pressure and drain the remaining water in the pipes.
You can do this by turning off the water supply valves under the sink or shutting off the main water supply to the house altogether.
Once the water supply is turned off, turn on the faucet to release any remaining pressure in the system.
Then, follow the steps specific to your Kohler faucet model to disassemble the handle and make any necessary repairs.
It’s worth noting that if you can’t repair it yourself, contacting a professional for assistance would be a better option.
#4. Disassemble The Faucet:
With the water supply off, you can now disassemble the faucet and locate the problem area causing the leak.
Disassembling the faucet is a common approach to fixing a leaking bathroom faucet handle. It’s recommended to turn off the water supply first before you disassemble the faucet.
You may need a wrench to dismantle the bathroom sink while being careful not to scratch the finish.
Once you have removed the handle of the faucet, you can now access the cartridges or valve stem and inspect the cause of the leak.
After which, you can then proceed to replace any worn-out or damaged parts.
Always note that the process of disassembling a faucet may vary depending on the type of fixture.
So, it’s essential to follow the manufacturer’s instructions or seek the help of a professional if you’re not confident in doing it yourself.
#5. Repair or Replace the Faulty Parts
Repair or replace the damaged or faulty parts accordingly by checking for leaks and making any necessary adjustments.
As mentioned earlier, you can find these faulty parts in the cartridges or valve stem. Thus, always examine these areas carefully for damage or wear and replace them if necessary.
#6. Reassemble The Faucet
Once the repairs are done, reassemble the faucet back to its original state.
After you have successfully fixed the leak, take the necessary steps to reassemble the faucet handle so that it functions properly.
Make sure that all parts are properly aligned and tightened before turning on the water supply to check for leaks. If there are no further leaks, you can use the faucet normally.
#7. Turn on the Water Supply
Finally, turn on the shut-off valves to restore the flow of water to the faucet. Check for leaks and make sure everything is working properly.
Reassemble the faucet and turn the water supply back on.
Before turning back the water supply after fixing a leaking bathroom handle, you need to follow these steps:
- Ensure that the faucet handle is properly installed and tightened.
- Locate the water shut-off valve under the sink or near the bathroom.
- Turn the valve handle counterclockwise to open the valve and allow water to flow.
- Inspect the faucet for any leaks. If you notice any leaks after turning on the water supply, turn off the valve and check for any loose connections.
- If there are no leaks, let the water run for a few minutes to flush out any debris.
- Turn off the faucet and check again for any leaks.
If you’re unsure about how to turn on the water supply or if there’s additional work done to the plumbing, it’s a good idea to consult a licensed plumber.
To ensure everything is properly installed and functioning correctly.
Nevertheless, It’s important to note that the exact steps to fix a leaking Kohler bathroom faucet may vary depending on your specific model and type of faucet.
Thus, consulting the manufacturer’s instructions or a professional plumber for more specific guidance is generally recommended.
It’s always worth noting that there are some general pros and cons to fixing your Kohler bathroom faucet without removing the handle.
Here are some of the pros and cons outlined below;
| Pros | Time-consuming |
|---|---|
| Saves money | Risk of damage to other components |
| Easy DIY task | May not work if there’s a wrong diagnosis |
| Increased lifetime of the faucet | May not work if there’s a wrong diagnosis |
| Reduction of water wastage and water bills | Often requires replacement of certain parts |
| An opportunity for you to learn a new skill | Need for special tools |
Overall, repairing a leaking Kohler bathroom faucet without removing the handles is a good DIY task that can save you money in the short term and even in the long term by reducing water bills.
However, weighing the pros and cons and making an informed decision based on your needs and skills is always important.

