The toilet flange is a crucial connection between the drain pipe and your toilet.
A properly mounted flange secures the closet to the floor and creates a watertight seal that prevents leaks and odors.
Hence, if your toilet flange is too low, it can negatively impact your bathroom’s cleanliness and functionality. This toilet defect results in a wobbling of the closet, leakages, and foul odors.
You don’t have to worry, however, as there are fixes available for this issue.
The easiest and one of the most efficient fixes for low flange issues is the installation of a flange extender. This device increases the length of the drain pipe’s connection to the toilet to an optimal height. Other fixes include replacing the wax ring and installing a new flange.
In this article, I’ll explore the causes of the low toilet flange issue and its lasting solutions. We’ll also determine the ideal height at which this device must sit for optimum functionality.
How Low Is Too Low for a Toilet Flange?
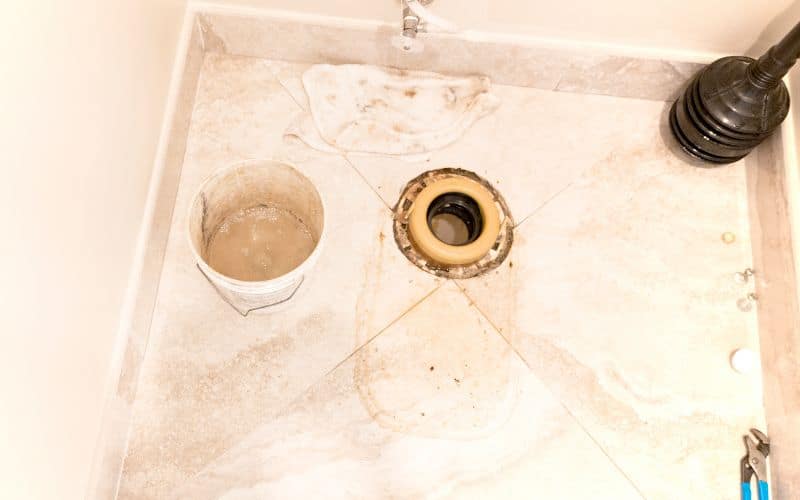
A toilet flange should sit flush with the floor or 1/4 inch above or below it. Therefore, a flange that sits below this depth is too low.
The flange is an important component of the toilet and, as such, should sit properly to function well. A low flange can cause several issues in the bathroom and the house.
Most of the time, you may be unable to tell that the toilet flange is sitting too low. In such cases, malfunctions of the toilet can indicate the issue.
One of the clear signs of this issue is a wobbly or uneven toilet bowl. The toilet flange is too low if the closet does not sit level on the floor.
This situation results in an uncomfortable sitting experience.
Another indication that a flange is too low is water leakage around the toilet’s base. An incorrect flange height leads to improper sealing of the wax ring and causes water to seep out.
Furthermore, a foul odor in the bathroom indicates a low toilet flange. A properly seated flange prevents sewer gases from escaping. However, when it is too low, these gases escape.
The foul odors can also result from difficulty flushing due to a low flange. A low flange interferes with proper waste flow and causes clogging or flushing issues.
A low toilet flange doesn’t just materialize. Several factors can contribute to why the equipment sits below its ideal depth.
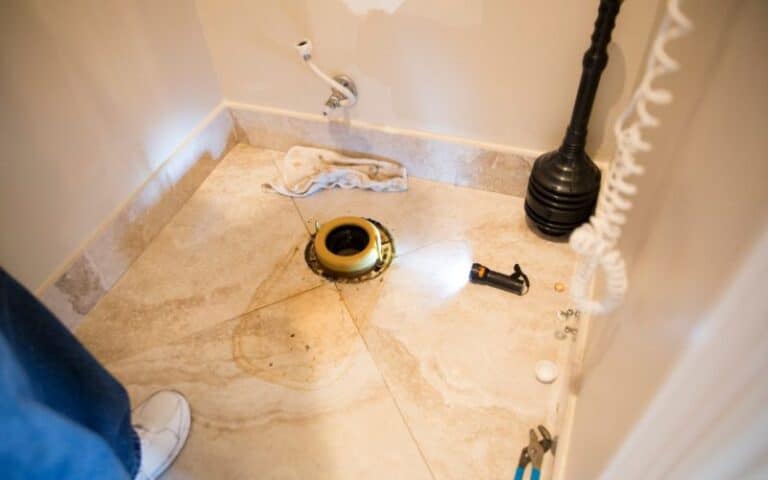
A common cause of this issue is installation errors. Plumbers may fail to position the flange during the initial installation, which results in it being lower than the floor level.
Another cause of a low flange is changes in floor height. Over time, renovations in the bathroom may add multiple layers to the existing floor or subfloor.
Sometimes, the renovators may fail to consider the flange during these repairs. The consequence of this oversight is a low flange depth.
Water damage can also contribute to a low flange. Water leaks or exposure to moisture can weaken the floor on which the toilet stands.
Consequently, the subfloor deteriorates, and the flange sinks lower than the floor level. Inadequate floor support can also result from the deterioration of the subfloor.
Furthermore, the flange might deteriorate over time due to wear, tear, and corrosion exposure. As it weakens, it sinks lower than the floor level.
How To Fix Excessively Low Toilet Flange?
You can fix an excessively low toilet flange by replacing it or installing an extender. Installing an extension is the easiest way of raising the flange’s height.
A toilet flange extender is a device used to raise a flange’s height. It fits over the existing flange and raises it over the surrounding floor.
Installing the flange is quite simple, even for a beginner.
You can follow the steps below to fix this device and increase the height of your toilet flange:
Step 1: Get the Necessary Tools and Materials
You will need the following tools and materials:
- Flange extender kit
- Wax ring
- Adjustable wrench
- Screwdriver or drill
- Putty knife
- Rags
- Toilet bowl wax or silicone caulk
- Mineral spirit
Step 2: Find the Fitting Extender
Finding the extender that fits your project is usually the first step in installing a flange extender.
This device has different types and brands; installation depends on these factors.
Some extenders come with spacer rings to adjust the flange height. In any case, ensure that the extension sits flush with the floor or at most ¼ inches below or above it.
Step 3: Shut Off Your Water Supply
Turn off the toilet’s shutoff valve to shut off the water supply. Then flush your toilet and drain all remaining water from the bowl and tank. Use a sponge or towel to dry the toilet.
Step 4: Remove the Toilet
Unscrew the bolts or nuts holding the toilet to the floor using a wrench or spanner. Carefully remove the toilet from the flange and set it aside.
Step 5: Inspect and Clean the Flange
If you find old wax on the flange, scrape it off. You can do so with this putty knife. Soak a rag in a mineral spirit and wipe the flange to remove any residue.
Step 6: Install the Extender
Remove the screws holding the flange to the floor. You’ll need the screw holes to secure the extender.
Apply the silicone caulk along the extender’s bottom lip. You can install a rubber gasket if it comes with an extender. Endeavor to adhere to the manufacturer’s instructions, however.
Place the extender over the flange and align their screw holes. Fasten the extender to the floor using the screws provided in the kit. Make sure it is at the ideal height.
Step 7: Reinstall the Toilet
Install the new wax ring, lift the toilet, and align the holes in its base with the flange’s bolts. Lower it straight over the bolts. Apply downward pressure to ensure a good seal.
Insert the bolts through the holes in the toilet base and tighten them. You can further seal the base to the floor by applying silicone caulk to the seam between them.
Turn on the shutoff valve to reconnect the water supply. Check for leaks from the toilet’s base. Tighten the bolts further if necessary.
While fixing a low flange issue with an extender is easy, it also has some downsides.
The table below contains the pros and cons of this solution:
| Pros | Cons |
|---|---|
| Easier installation | Limited extender compatibility |
| Enhanced toilet stability and balance | Additional complexity during installation |
| Cost-effective solution to flange issues | Potential for leaks |
In some low-flange cases, there may be extensive damage to the existing flange. In such situations, replacing the device instead of fitting an extender is the best thing to do.
What Is the Ideal Height for Toilet Flange?
There may be slight variations of ideal toilet flange heights depending on some circumstances.
However, the recommended dimension is ¼ inches above or below the finished floor.
Though the perfect flange sits ¼ inches above the floor, this device can also sit flush with the floor. It can sit below but should not be lower than the ¼ inches mark.
Due to several reasons, this seemingly minor detail is very important. First, maintaining this height establishes a watertight seal between the toilet and the drain pipe.
It enables the effective installation of a wax ring or other seals. This seal prevents wastewater leakage and foul odor and ensures a hygienic bathroom.
The ideal flange height also ensures proper disposal of toilet waste. The toilet will not flush well if you set the device too low. This situation results in clogging or incomplete evacuation.
This height also ensures flexibility during the repair and installation processes. It allows for variations in flooring thickness.
Additionally, it makes future maintenance and repair work easier. There will be space for adjustments to the toilet flange or wax ring without many modifications.

