Clothe dryers are more energy-efficient and produce fewer potentially dangerous gases when vented outside.
Does venting a dryer through a wall make sense when other ways exist to route the exhaust outside?
Yes, a dryer vent can touch drywall. Dryer venting through the wall is the most secure and convenient choice. Condensation and lint buildup reduce when a duct is vented to the outside through a wall because the duct pipe can be kept relatively short. Ducts in the walls have two further purposes: they block drafts and keep rats out.
This guide tells you everything you need to know about installing your dryer vent, how much space it needs, and how close it should be to your drywall. Read on to learn more.
Ready for a Drywall Quiz?
Does a Dryer Vent Need Clearance from a Drywall?
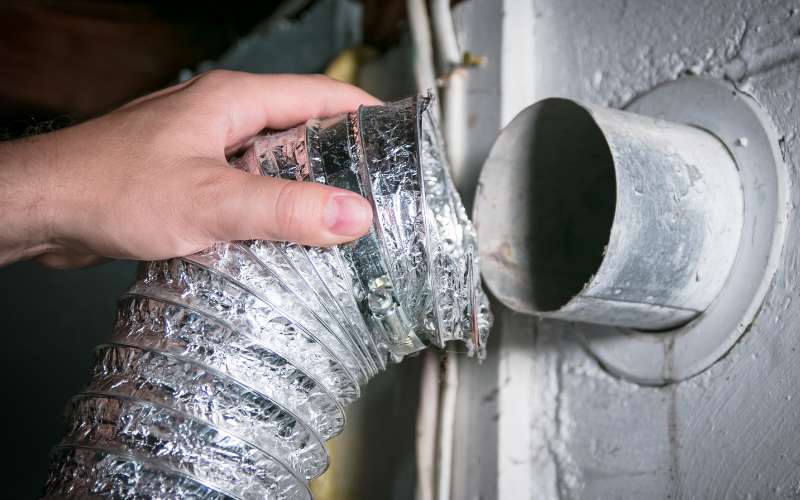
Yes, a dryer vent requires adequate clearance from the drywall. Rubber or iron duct is a common substance used to manufacture dryer vents.
As a result, they are susceptible to being compressed to the point where they unfold from the dryer and penetrate the wall.
Also, dryers tend to be stored in tight spaces, leaving limited mobility around them.
You can get vent elbows that make a 90-degree bend in a tight place without obstructing the exhaust air’s path. But, likewise, the limitation of airflow can increase the risk of a fire.
The exhaust stream conveys extremely combustible particles of clothing composed of cotton and polyester, which is one of the reasons why limits pose a risk of starting a fire.
The fact that the exhaust stream also contains the water vapor that evaporates from wet clothing increases this risk.
Because a clogged exhaust duct slows the airflow, the dryer’s heat doesn’t escape as well as it could.
When the dryer gets too hot, technical problems may cause sparks to ignite, which can cause lint in the dryer vent to catch fire and create an explosion.
When this happens, the whole home is at risk. For example, dryer fires often start within the appliance and move into the airflow duct, igniting accumulated lint and, eventually, the building wall.
How Close Should Drywall Be to Your Dryer Vent?
From the distance of the dryer to the point where it stops in the wall, the length of the exhaust duct should not exceed 35 feet.
Bends of 45 degrees (0.8 rad) and 90 degrees (1.6 rad) limit the authorized width of the duct by 2.5 feet and 5 feet, respectively.
Although there are a few exceptions if the manufacturer instructs that an exhaust vent be longer than the IRC requirement, the IRC will follow the manufacturer’s guide.
Inspectors don’t often have access to manufacturers’ guidelines, and even if they did, verifying that a home complies with guidelines would go beyond the scope of a general house inspection.
Dryer vents that end in attic vents will be visible to inspectors. These areas accumulate moisture, promoting mold development, wood degradation, and other implications.
It’s not unusual for them to get as low as the ventilation ducts in the attic. They are supposed to finish outside the building, not near any doors or windows.
So it’s important to ensure that screens are present at the duct’s end since they can get clogged with lint.
Dryer Exhaust Vent Codes
| Duct Fitting Type | Equivalent Length |
|---|---|
| 4-inch radius mitered 45-degree elbow | 2 feet, 6 inches |
| 4-inch radius mitered 90-degree elbow | 5 feet |
| 6-inch radius smooth 45-degree elbow | 1-foot |
| 6-inch radius smooth 90-degree elbow | 1 foot, 9 inches |
| 8-inch radius smooth 45-degree elbow | 1-foot |
| 8-inch radius smooth 90-degree elbow | 1 foot, 7 inches |
How Do You Safely Install a Dryer Vent Through a Drywall?
Maintaining a properly vented dryer is essential for optimal performance and to prevent fires and water damage.
The good news is that you may easily install a dryer vent. Below are the steps to follow:
#1. Draft a Strategy for the Ductwork
After you’ve settled on a position for the dryer, you can start thinking about how to organize the ductwork. First, ensure you do not exceed 25 feet while laying out the duct pipe.
For every 90-degree curve, take five feet off the overall length; for every 45-degree curve, take two and a half feet off.
#2. Make a Pilot Hole
Use a 3/8-inch drill bit to create a pilot hole within the home for the duct outlet. If the outside wall is of stone or masonry, you will need a masonry bit.
This excavation allows you to view the hole’s location and adjust it if any obstacles are found.
In addition to serving as a point of reference, this will allow you to cut the hole from the outside accurately, so the hole is easily fixable in the event of an error.
#3. Knock Through
Drilling with a 4 1/4-inch hole saw will allow you to cut through solid materials like wood, concrete panels, vinyl, or aluminum siding.
To make sure the hole saw can properly cut into the material, move the hole saw’s pilot bit about half an inch away from the hole that has already been drilled.
Hold the drill in both hands as soon as the saw starts cutting. Note that it’s easy to lose control while using a big hole saw because of the massive torque it generates.
Alternatively, you can use a drill bit with a diameter of 3/8 inch to bore a hole through the line you indicated. After that, you could use a hammer to remove the leftover material.
#4. Sketch the Pipework
Make a rough sketch of the duct pipe’s layout on masonry or any other material that a saw can’t penetrate completely.
You can use a 1/4-inch masonry bit to drill several holes around the layout, and you can use a cold chisel should be used to remove the debris and complete the hole.
#5. Attach the Dryer Vent Cap
Ensure the tubing connecting to the dryer vent cap can pass through the hole you cut in the wall before installing it.
Use the included screws to fasten the cap in place, and don’t forget to caulk the gaps to seal them and keep the weather out.
Now, go inside and use a hose clamp to connect the dryer duct to the vent cap pipe.
#6. Trim the Pipe
You can redirect airflow through the vent pipe in the desired direction by attaching a fitting to the very end of the pipe.
Use a measuring tape to determine how long a section of pipe you need, and then cut it to length using the pliers.
Using the proper couplings, connect the pipe to allow it to run to the dryer’s exhaust vent.
#7. Align the Dryer with the Vent
You must align the vent hole in the vent line before joining it using the correct fitting, so you must first move the dryer to the correct location.
A metal pipe clamp is a secure attachment point for the duct line to the dryer.
#8. Wrap in Aluminum Foil Tape
Metal foil is good for reinforcing all vent pipe connections. In addition, it’s more durable than regular tape.
You can use pipe straps to anchor the ductwork to the floorboards or wall studs for further stability.
#9. Check the Vent
After the installation, turn on the dryer to see whether air is coming from the vent cap outside your home.

