Application of drywall is a process that might be easy, but the outcome depends on how carefully you carry it out.
When you apply drywall on a surface like a wall, you also have to consider the drywall’s contact with your ceiling.
You can create different types of edges with your drywall for the ceiling. That said, can you use tapered edges on your ceiling joint?
Yes, you can use a tapered edge on your ceiling joint. Tapered edges are the best option since the ceiling is a flat-seam installation. Always fill the tapers with mud and avoid any gaps during this process.
In this article, I’ll explain how to fill gaps between your drywall and ceiling and put tapered edges on your drywall.
Ready for a Drywall Quiz?
Should You Fill Drywall Tapered Edge on Ceiling Joint?
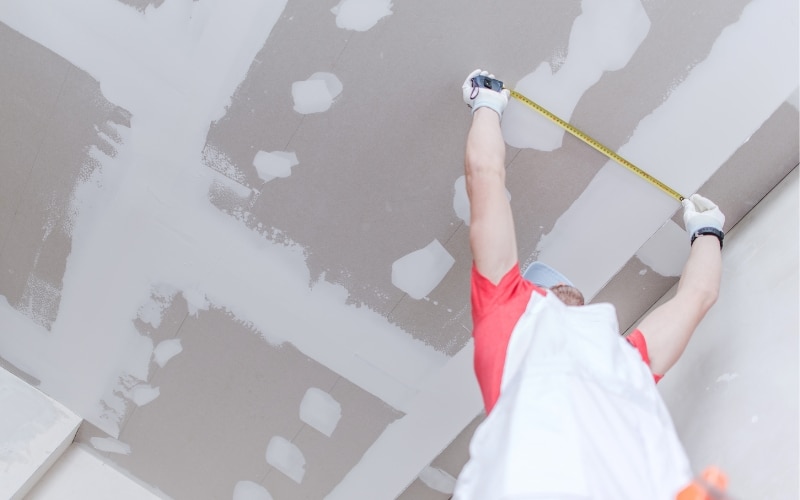
Yes, it would be best if you filled up the tapered drywall edge, especially when there are visible gaps.
Filling up the joints in your drywall helps to hide the cracks and gaps between the joints. Failure to mud these joints can be disadvantageous to you.
Here are the disadvantages of skipping the mudding process for your drywall tapered edges:
- There will be no bond to attach the joints properly. Therefore, the drywall will one day crumble.
- If you do not fill the gaps between the joints with mud, the surface of the drywall will be unattractive when you start to paint it.
- Your drywall might eventually bow outwards, as you need to secure the joints with a joint compound.
Can You Use Tapered Joints for Drywall Ceiling?
Yes, you can use tapered joints for drywall ceilings. However, it would be best to use a tapered joint and fill the taper with joint compound since the drywall ceiling uses flat seam installation.
Here are the advantages of tapered joints:
- Tapered joints properly cover up your drywall seams.
- Making tapered joints is very easy.
- It is suitable for flat-seam installation.
Here are some disadvantages of using tapered joints on your drywall:
- You’ll need a lot of mud or joint compound to fill the taper.
- It is difficult to alter tapered joints because the tapes are not easily accessible.
Should there be a Gap Between Drywall and Ceiling?
No, there should not be a gap between your drywall and the ceiling. However, if there is any gap between your drywall and the ceiling, you should fill it up.
You might notice a gap between your drywall and your ceiling, improper installation, wrong measurements for the drywall, etc.
How to Fill the Gap Between Your Drywall and Ceiling?
Here is a table showing the materials you will need to fill the gap between your drywall and ceiling and their functions.
| Materials | Functions |
|---|---|
| Fiberglass mesh tape | To tape the gap between the drywall and ceiling |
| Joint compound | To fill up the gap |
| Paper tape | To tape the gap |
| Putty knife | To apply the joint compound |
| Sander | To blend out the joint compound |
| Primer | To provide an adhesive layer for the paint |
Here are steps on how to fill the gap between your drywall and ceiling:
- You’ll need to get fiberglass mesh tapes for this process. Open up the tape and place it over the gap.
- Mix up the joint compound and use a putty knife to apply it over the tape. Make sure the joint compound covers the entire tape and pushes into the gap.
- Open the paper tape and lay it on the seam between the drywall and ceiling. Apply joint compound on the and use the putty knife to spread it along the seam
- Allow the joint compound to dry, and then start the process for another coat of joint compound.
- After repeating the process, use a sander to blend and smoothen the mud.
- Apply a coat of primer over your work and then cover it with paint.
How to Put Tapered Edges on Drywall?
Here are steps to make tapered edges on your drywall:
- The first step is to remove the stray paper from the edges of your drywall.
- You can easily carry out this task by running a utility knife down the butt edges of your drywall through a 45-degree angle.
- Removing all stray paper on sight helps to prevent a ridge from forming when the butt edges meet.
- After removing all the stray paper from the drywall edges, you should apply tape. Use your utility knife to cut out the appropriate size of drywall tape you need.
- If you don’t have self-adhesive tapes available, you’ll need to prepare a joint compound for the drywall taping process.
- Once you finish preparing the joint compound, use your drywall knife to put a thin layer of the joint compound on your drywall seam.
- Immediately after putting the drywall compound, please pick up the tape you cut out and apply it to the seam.
- Place your hand on the tape and apply pressure on it so that it sticks properly.
- Use your knife to lay the tape on the compound properly. Make sure to do it gently enough so the mixture does not spill out from beneath.
- Leave the tape and the compound to dry and become firm.
- After the tape dries, apply joint compound over the tape with a 6-inch drywall knife.
- Make sure the compound stays within the seam.
- Smoothen out the folds and bubbles if they form.
- Use a sander to smoothen out the tape and joint compound. Refrain from sanding the entire seam on your drywall.
- After sanding the affected area, apply more joint compound and let it fry. Once it has finally dried up, you can sand the entire drywall seam.
How to Prepare Joint Compounds for Drywall?
There are two types of joint compounds: premixed mud and hot mud. Premixed mud does not require mixing, while hot mud does.
The table below contains the materials you’ll need for mixing hot mud and their functions.
| Materials | Functions |
|---|---|
| Buckets | To hold the mud and to hold water |
| Mud mixing drill | To mix the mud properly |
| Water | To soften and break down the mud |
Here are steps on how to mix hot mud:
- You’ll need buckets, a mud mixing drill, and drywall quick-set mud from a brand like CGC lifeline or the USG, plus three for the drywall mud mixing.
- Open the drywall mud from its packaging by unfolding the box and tearing open the plastic bag containing the content.
- Transfer the content carefully by turning it over into a bucket, then dispose of the bag.
- If you purchase drywall mud from a brand like CGC, you will notice the mud is dry.
- The dryness of the mud makes it good enough to use in place of the quick set in case you can’t find one available.
- Pour some water into the bucket of mud and use the mixing drill to break it down for a while.
- Hold the bucket between your legs, and allow the drill to spin at the bottom.
- Pause the drill between spins as you slowly work your way to the top of the bucket.
- Add more water into the bucket and lift the drill to the top to spin. The mud will get smoother as you spin the mud.
- Once the mud is smooth enough, you can use it for the drywall taping.

