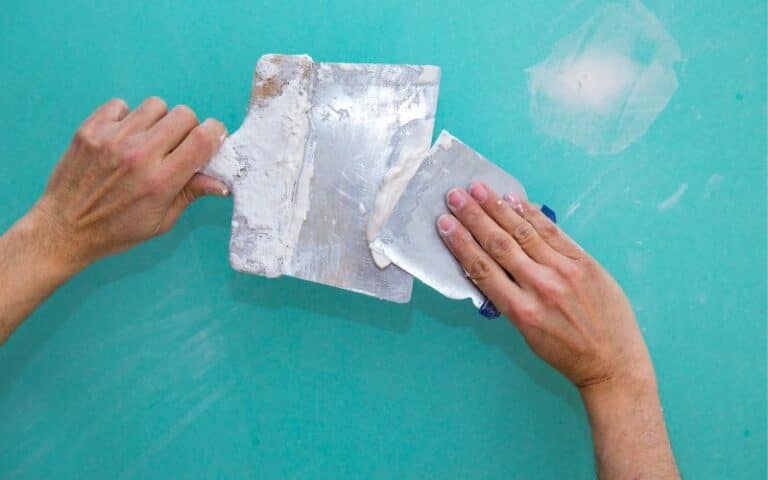
Drywall can add uniqueness to your residential or commercial building, but its cracks can compromise this uniqueness.
Imagine what would happen if your drywall fell off one day and shattered into pieces because you ignored the horizontal lines on your drywall.
Drywall, or gypsum board, is a popular material used for interior walls and ceilings in modern construction.
There are horizontal lines on your drywall because of a few things, which include a need for installation skills, improper drywall jointing techniques, or a sagging ceiling. You must identify the root cause and take corrective measures to fix the issue.
Before fixing the horizontal lines on your drywall, there are certain things you need to know, and this article will be your guide.
At the end of this article, you will know the best way to fix your drywall, and you will understand everything concerning the use of drywall.
Ready for a Drywall Quiz?
What are the Horizontal Lines in Drywall?
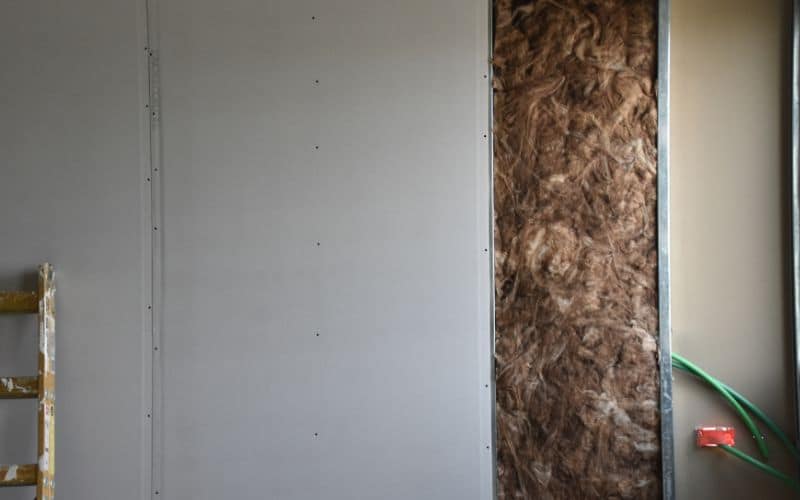
One of the distinctive features of drywall is its visible horizontal seams between panels, also known as “joints.”
These seams are typically covered with joint compound and tape to create a seamless and smooth surface that you can paint or decorate anytime.
However, in some cases, even after being carefully taped and finished, the seams can still be visible when inspecting closely.
In some cases, this happens because of poorly finished joints, but in other cases, it may be due to slight differences in height between adjacent panels.
The horizontal lines in drywall result from these seams and slight differences in panel height.
Because drywall is a somewhat flexible material, it can bend and deform slightly over time due to changes in temperature and humidity.
It can cause the seams to become more visible over time, especially if the finishing needs to be done correctly when installing your drywall.
You must pay careful attention to the installation process to minimize the appearance of seams in drywall.
The panels should be appropriately sized and fitted together, and any gaps or spaces should be filled with joint compounds to create a smooth, even surface.
After the initial taping and finishing process, apply additional coats of joint compound to smooth the surface further.
In some cases, it may be necessary to use special techniques or materials to hide seams and create a smooth surface.
For example, some drywall installers use a technique called “skim coating,” which applies a thin layer of joint compound over the entire wall surface.
Drywall installers perform this technique with the main aim of creating a uniform texture and hiding seams.
Alternatively, you can apply textured paint or wallpaper to create a decorative finish that masks any imperfections in the drywall surface.
Although they can sometimes be difficult to avoid altogether, installing drywall carefully and finishing techniques can minimize their appearance.
If you are considering installing drywall in your home or workplace, it is essential to work with professionals who can ensure that the final product meets your expectations.
Why Are There Hairline Cracks On My Drywall?
Hairline cracks are a common problem that most homeowners face after some time.
Here are some reasons why hairline cracks appear on your drywall and how to address them.
#1. Age of the Drywall
Over time, using structural materials to support the wall or ceiling will “settle.”
Settling your foundation can cause small movements in your walls and ceilings, resulting in hairline cracks.
It is more common in older homes, as time takes a toll on materials. However, this natural process can also happen in newer homes.
The settling happens in newer homes when carrying out inferior-quality construction work without the installation of proper material, which then triggers the settling of the structure.
#2. Humidity and Temperature Changes
Temperature and humidity variations impact your walls and ceilings.
Weather changes can significantly impact your home’s structural integrity and, as a result, affect your drywall.
Heat and humidity will cause an expansion in your wall, whereas dry and cold weather conditions result in a contraction of the material.
These constant changes can often make the drywall crack or peel.
#3. Poor Materials
Sometimes, hairline cracks appear due to using low-quality materials when installing drywall. Poor materials will eventually result in hairline cracks.
Examples of poor-quality materials are weak or incorrect substances in the drywall installation process, low-quality joint compounds, and incorrect tapes.
Bumps or impacts from heavy items accidentally hitting your wall or ceiling can cause hairline cracks to form.
Impact damage can range from subtle cracks to severe lines.
Note that addressing hairline cracks may be unsightly, but they are usually not a cause for alarm regarding the structural integrity of your home.
Addressing them can be a simple process that doesn’t require professional help. Below are solutions you could consider:
#4. Joint Compound
A joint compound is an excellent solution for small hairline cracks.
Using a putty knife, apply the compound over the cracks, then use sandpaper to smooth the surface once it’s dry. Afterward, repaint the wall as desired.
#5. Mesh Tape
You can use mesh tape to prevent cracking, but you can also use it to cover hairline cracks.
To use this method, apply a thin layer of joint compound to the area where the hairline crack is, covering it with mesh tape while the joint compound is still wet.
Once the tape and the compound have dried, re-apply another layer of joint compound, smooth it out, and repaint it.
#6. Call a Professional
If your hairline cracks are extensive or are a sign of more significant problems, such as foundation issues, it may be best to call a professional.
For instance, if the drywall and the cracks are around your doors and windows, there could be an issue with a build-up of moisture that needs to be dealt with promptly.
A professional contractor will assess the situation and offer the best possible solution.
Hairline cracks are a regular occurrence in drywall and don’t necessarily mean a significant problem with the building’s structure.
How to Fix Mild Cracks On Drywall After Painting?
Before fixing mild cracks on your drywall, these are the materials you will need drywall sandpaper, joint compound, drywall tape, a putty knife, a sanding sponge, paint, and a brush.
Here are some step-by-step instructions to fix mind cracks on drywall after painting:
#1. Prepping the Area
Before beginning any work on the crack, prep the area.
Prepping the area includes removing loose or chipped paint around the crack with drywall sandpaper. Be sure to remove any dirt or dust on the surface of the drywall.
#2. Apply the Joint Compound
Applying a putty knife, apply a joint compound (drywall mud) over the crack.
Apply enough compound to cover the crack smoothly, but avoid applying too much as it will require a longer drying time. If the crack is intense, apply the compound with a small paintbrush.
#3. Place the Drywall Tape
Next, position the drywall tape over the wet mud, starting at the center of the crack.
Cut the tape to size for self-adhesive tape and press it in place. The paper tape must be wetted first so it sticks to the mud.
Follow the manufacturer’s directions on the tape packaging and apply it to cover the crack fully, ensuring you flush it with the surrounding drywall.
Use a putty knife to press the tape firmly into the mud.
#4. Spread the Joint Compound.
With the tape in place, spread additional joint compounds over the tape to create a smooth and even surface.
Apply enough pressure with the putty knife so that the compound fills any gaps between the tape and the drywall.
Make sure the surface is smooth and flush with the rest of the wall.
#5. Allow the Mud to Dry
After applying the joint compound, allow it to dry thoroughly as per manufacturer instructions.
Depending on the applied compound and thickness, it could take a few hours to a full day for the product to dry completely.
Once the joint compound is completely dry, use a flexible sanding sponge, sandpaper, or sanding block to smooth the surface of the patch with the surrounding area.
Be sure to feather the patch’s edges when sanding, ensuring it blends well with the rest of the wall.
#6. Repaint
Finally, once you hit ready to paint ave smoothened the mud, it’s a fresh coat of paint with a brush that blends with the rest of the wall.
Depending on how well the color matches up, you may need to repaint the entire wall.
How Can I Prevent Cracks On My Drywall?
If you want to prevent cracks from forming in your drywall, there are several measures you should take.
These measures include:
- Choosing the right drywall.
- Using proper installation techniques.
- Controlling the level of moisture.
- Using Installation expansion.
- Applying proper finish.
- Maintaining drywall regularly.
However, you must note that horizontal drywall lines and cracks have some significant differences.
The table below highlights a few differences:
| Horizontal Lines | Horizontal Cracks |
|---|---|
| Drywall horizontal lines are intentional and are usually at a consistent height along a wall | Horizontal cracks can appear randomly and in various locations. |
| Drywall horizontal lines are straight and even | Horizontal cracks are usually jagged and irregular |
| You create horizontal lines when you install multiple sheets of drywall horizontally | Various factors, such as settling, temperature changes, etc, can cause cracks. |
| Drywall horizontal lines are typically narrow | Cracks can be more comprehensive and may expand over time. |
| Drywall horizontal lines are flush with the rest of the wall | Cracks can be raised or natural, depending on their cause. |

