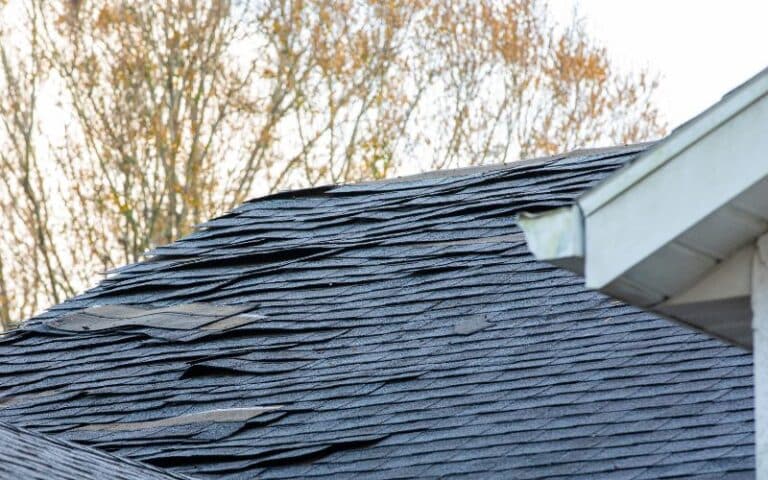
When your roof starts leaking, it could damage your home appliances and home. Loose roofing or exposed roofing nails are mostly the cause of this issue.
You might have to hide the roofing nails to seal their nails. In this article, we will find out how to tackle the problem.
You can hide your roofing nails by hammering the nail head back into the roof of the roofing nails protrude over the roof. Then, apply roofing cement or roofing tar evenly on the nail head to cover the exposed nail and allow it to dry. This method will permanently cover the nail head, keeping your home safe from leakage.
Ready for a Roofing Quiz?
How Do You Cover Exposed Roof Nails? (Step by Step)

You can cover exposed nails by applying caulk or roofing cement on the nails. However, if exposed roofing nails are on your roof, you must protect them if you can.
Exposed nails will not just disturb the outer look of your roofing but also damage your roof and expose your home to leaks.
Before venturing to hide the exposed pins, here are the tools you will need:
Here are step-by-step methods to cover exposed nails:
#1. Locate the Roofing Nails
Ensure the roof surface is dry and climbable to avoid accidents. This step is the first to take when you notice that your roofing nails protrude over the ceiling.
Check for other exposed roofing nails on your roof and note the location. You can also check the leak spots and trace them to the ceiling.
Use a bright marker to mark the nail locations so that you can find them easily. Hammer the nails down till they are on the same level as the roof.
#2. Apply the Roofing Cement on the Marked Spots
After locating all the exposed nails on your roof, wear your protective gloves, and apply the roofing cement in generous quantities to hide the nail heads.
The roofing cement is waterproof and tar-like, so it will seal the nails properly if you apply it effectively.
Since it is waterproof, it will stop the leaks. Apply the sealant properly on the nail head and the shank.
#3. Cover the Sealant With a Sheet of Roofing Paper
Once you finish applying the sealant on the exposed roof, cover the roofing cement with roofing paper.
Roofing paper is a thin material you can use to seal the nails. Smoothen the roofing paper after wrapping it over the nail head to remove air bubbles.
#4. Reapply Another Layer of Roofing Cement
Once you have applied the roofing paper to the nail head, apply a second layer of roofing cement on the roofing paper.
This action will secure the first sealant and the roofing paper and ensure you have sealed the nails properly. Smoothen out any air bubbles after the application.
#5. Cover the Area With Roofing Felt
After covering the area with roofing cement, cover the area with a sheet of roofing felt. The roofing felt is thicker than the roofing paper and waterproof.
It will further secure the site and hide the exposed nails. Also, smoothen the roofing felt to remove air bubbles.
After you follow through with these steps, you will successfully hide your roofing nails and the roof secure from leakage.
If you encounter any problems or you need an expert’s knowledge, contact your roofing contractor.
Is It Normal To See Nails Coming Through the Roof Decking After a New Roof Was Installed?
It is typical to see nails through your roofing deck after installing a new roof is typical.
The reason is that the plywood sheet of your roof is not as thick as the galvanized roofing nails you use for your roofing.
Therefore, it is natural for the galvanized nails to show through your roof decking, even if the roof is new.
However, the shingles in the outer covering protect the plywoods and decking underneath, and the damage that the nails might cause will not affect the safety of your decking and your home.
Although, you must use the correct nail length to nail your shingles. The tip of the nail should extend by 3 /8-inch through the roof sheathing.
Best Sealant for Roof Nails
The best sealant for roof nails is the one with good UV reflectivity, application, water resistance, and longevity.
The following guide will help you decide the best adhesive for your exposed roofing nails:
#1. Water Resistance
Every sealant should have some level of water resistance. Sealant materials like polyurethane, rubber, and silicon have a strong water resistance that allows your roof to resist leakage from rain.
To get waterproof quality, apply the adhesive in several layers.
#2. UV Reflectivity
This property is essential to keep your home cool by reflecting sunlight. It is effective during hot summer weather because it reduces the cost of using electric cooling appliances, lowering the electricity cost.
Silicon and rubber sealant materials have high reflective levels. The color of the sealant also plays a role in the sealant’s reflectivity level. The darker shades have lower reflectivity than the lighter colors.
#3. Longevity
Sealants have varying shelf-life, mainly depending on the material, lasting 10 to 20 years.
For example, tape sealants last as long as 15 years with just a layer of tape, but other liquid bonds will need a thicker coating to last as long.
Apply the adhesive according to the manufacturer’s information to increase the sealant’s longevity. Also, ensure to apply to a clean and dry surface.
#4. Application
Various sealants have different methods of application. The tape sealant is self-explanatory, while the liquid or spray application method may need guidance.
The paint method is best if you plan on covering a wide surface area as it comes in large quantities. Spray bottles and caulk guns come in small sizes, require lesser work, and are suitable for small spaces.
Roof manufacturers design roofs to withstand harsh weather. Though they can withstand constant exposure to rain, snow, sun, or hail can reduce the quality of your roof.
When the ceilings become too weak, leakages will develop and can cause damage to the home. Sometimes, if you are not conscious of the damage, you might eventually need a new roof.
Using roof sealants to cover this damage early will protect your roof from further damage.
Some of these sealants are suitable for small leakage, while other adhesives can cover a wide area, creating a firm barrier against sunlight and water.
Below are some of the best sealants for your roofing nail:
- For Leaks: Liquid Rubber Seam Tape
- For RV Roofs: Liquid RV Coating
- For Metal Roofs: LR Color Waterproof Sealant
- For Flashing: Loctite Flashing Sealant
- For Flat Roofs: Rubber seal Waterproofing Coating
Best Ways To Hide Roof Nails
The best way to hide roof nails is by covering them with sealants like caulk or roofing cement. Though this method is a temporary fix, it hides the nail heads on your roof.
Protect yourself by taking the necessary precautions like wearing gloves, boots, and roof climbing gear.
You can also pour red coloring into a bucket of water and pour it over your roof. Then go to the attic to trace the points where the leaks are coming from to locate the leak points.
You can also hide smaller roofing nail holes with roof cement, but larger holes may contract more and damage the seal.
Instead, you can use a metal sheet to cover larger holes by lifting the shingles in the loose nail area and spreading roofing cement over the place.
Then, place the sheet metal on the roofing cement, use a caulk gun to coat the sides of the metal sheet, and replace the shingles over the metal.
Final Words
Use effective and water-resistant sealants like caulk and roofing cement to hide roofing nails to ensure the longevity of the adhesives on your roof.
It is normal to see your galvanized roofing nails puncturing through your roof deck. However, contact a roofing expert if you are unsure how to proceed with hiding your roofing nails.


