Understanding building requirements can be challenging if you do not know how it works. For example, one of these building requirements is the roof deck and fascia level.
If you space the fascia level wrongly, it can lead to further problems like leakages in your roofing.
Installing a drip edge flashing is also a prerequisite, as it protects your roof from moisture. In addition, fixing a drip edge to your roof sheathing, though expensive, can save you from frequent fascia repair.
Your roofing sheathing should be flush with the fascia board to keep the fascia from rotting due to constant water contact. The roof deck should overhang the fascia by 1/3 inches to 1/4 inches so you can comfortably install a drip edge between your fascia and the roof deck.
Ready for a Roofing Quiz?
Roof Sheathing Overhang on Fascia
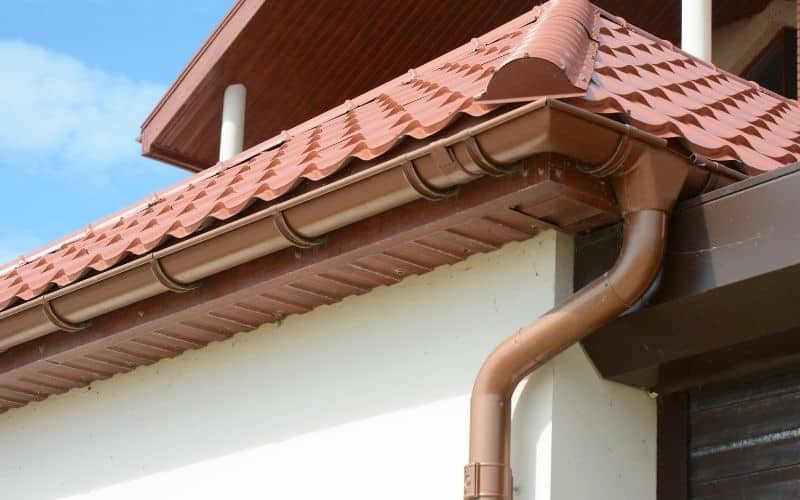
Roof sheathing overhang provides shelter for your building, protecting it from weather like rain and heat.
Erecting a roof overhang is not difficult, but installing the overhang might require some expense and expertise.
To prepare your roof for the new installation, separate the fascia from the roof deck and remove any finishing pieces covering the rafter tails.
If the workspace you need from the attic is not enough for you after removing the fascia, you may have to remove the three-tab shingles and roof sheathing from the lower end of the work area.
Clearing the section will give you enough space to install the roof overhang.
Measure and cut out the rafter extension from lumbers the same size as the old rafters on your roof. Ensure the rafter tail measurement is thrice the overhang length that you need.
Place the rafter tails against the old rafters such that ⅔ of the new rafter extension overlaps the existing rafters.
Position the other ⅓ to extend outward past the typical roof sheathing length. Ensure the overhang is less than two feet from the roof deck tail to stabilize it against the roof.
Use galvanized roofing nails to nail the rafter extension to the old rafters.
Attach your fascia boards along with the new extension. You can include enclosed eaves by installing soffits underneath the overhang to wrap the overhang space.
After framing the roof, sheathing overhang, cover the rafter extensions, the open sheathing, and three-tab shingles.
Replace the old shingles and sheathing or use new replacements to cover the open side of the roof.
Start by installing the drip edge flashing along the overhang, then lay your three-tab shingles on the roof’s edge.
Next, install the shingles starting from the roof’s edge, moving upwards till you have replaced all the shingles.
Is Roof Sheathing Flush With Fascia?
The roof sheathing should be flush with the fascia. When placing your fascia, ensure that the edge of the fascia board is at the same level as the sheathing.
However, if there is a space between the roof sheathing and the fascia, you might have to install a drip edge above the fascia to protect fascia from moisture.
The drip edge flashing is non-corroding moisture protecting metal you can attach to your roof’s edge to serve as water drainage for your roof.
It directs water flow from the top and protects your roof foundation from premature damage.
You can place the roof drip edge above the roof’s cover, between the roof sheathing and the fascia. Drip edge flashing is a drainage channel between the fascia and the drip edge.
The drainage channel between the roof deck and the fascia board improves water movement from the roof and prevents moisture damage.
Benefits of Installing a Drip Edge
Installing a drip edge may not seem necessary until you encounter damage from leaks on your roof.
Drip edge installation might be an extra expense but can save you the cost of roofing repairs in the future.
In addition, it preserves and prolongs your roof’s appearance:
- It prevents rodents and insects from entering the gap between the roof deck and fascia, which gives pests access to your attic.
- Directs water flow away from your fascia board and decreases the risk of rotting.
- Safeguards open spaces below your roof from insect infestation.
- It prevents any shifts between the fascia boards and roof deck.
- Safeguards your roof shingles from water damage, preventing damage to your shingles, fascia board, and roof sheathing
- Protects the roofline against rotting from winter weather like ice and snow.
If you would be installing the drip edge yourself, here are some tips on installing it:
- Position a speed square on the rafter edge. Hold the fascia board steady until the speed square tallies with the fascia board center.
- Use a screw gun to nail the fascia board in place. It will ensure the roof sheathing lines up with the top of the fascia center.
- If your roof contractor handles your roofing project, ensure he installs a drip edge between the fascia and the roof sheathing.
Should Roof Sheathing Be Spaced?
When installing your roofing, it is necessary to space your roof sheathing to allow proper ventilation in your roof decking.
Leave a gap of ⅛-inch between the sheathing panels to allow the roof sheathing to expand and shrink during different weather.
According to the American Plywood Association (APA), give a ⅛-inch to ¼-inch spacing between your sheathing panel edge and the joint ends.
Plywood boards and oriented strand boards (OSB) often expand or contract during slight changes in moisture content.
If you do not leave spacing between the board joint ends, there will be no space to allow the panels free movement during expansion.
The lack of spacing between the panels can cause buckling and extra roof replacement costs.
To prolong your roof sheathing, follow the sheathing spacing recommendations of your local building code or the APA Rated Sheathing.
Like all slanted rooftops, plywood sheds moisture, though it is not waterproof, and when it comes in contact with water, it absorbs moisture.
Plywood or OSB roof sheathing is also subject to sunlight, heat, and hot air in your attic space.
After the wood gets wet from moisture, the heat from the sun and the hot attic will dry up the wood.
But the excess heat and the trapped humidity from the wood will generate a steam effect, which will make the roof shingles dry halfway from the outside.
The steam effect will then cause just a side of the wood to dry, retaining moisture and leading to wood defects.
If you space the plywood boards, you will avoid this occurrence. But if you do not space the panels, the plywood sheathing will curve to get to a particular radius.
It will also cause your roof shingles to warp. Warping will eventually lead to cracking shingles which can expose your roofing to more damage from water and moisture.
To prevent this from happening to your roofing, ensure to space your roof sheathing panels to allow proper ventilation.
Gap Between Roof Sheathing and Fascia
If you did not install a drip edge flashing between your roof sheathing and the fascia board on your roof, then you should cover any gaps between your roof deck and the fascia board.
It is not unnatural to see a space between the fascia board and the sheathing. Though it is uncommon, you should be concerned if the gap is more extensive than ¼-inch.
Once you notice the gap, you can seal it with a caulking gun or install a drip edge if you cannot secure it with caulk.
When installing the drip edge, ensure it extends two inches over the fascia board. The roof drip edge also protects your fascia from moisture damage.
Conclusion
Your roof sheathing should be the same level as your fascia board. Ensure it covers the fascia with enough space to allow you to place the drip edge flashing in between.
The roof drip edge should extend one to two inches over the fascia to protect it from moisture.


