Rigidity and durability are paramount when building any structure to enable the users to get the best out of the structure. There are lots of problems that could arise if your shed’s walls aren’t braced.
The walls of the shed would become wobbly. ‘Dancing’ with every movement of the wind might end up collapsing on your pets, tools, farm stocks, and anybody inside.
Bracing the walls of your shed protects life and goods by reducing the possibility of structural damage during natural disasters such as; storms, tornados, and earthquakes. Every building should adopt a form of bracing for safety purposes.
Ready for a Roofing Quiz?
What is Shed Wall Bracing?
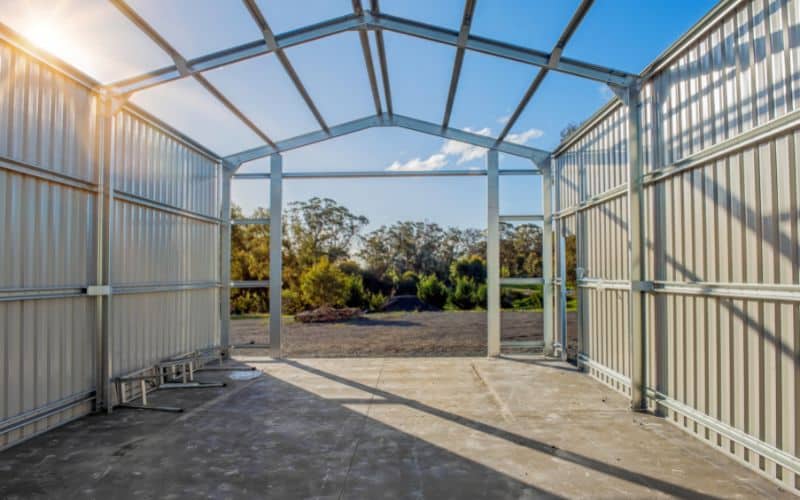
Shed wall bracing uses concrete cores, wood structural panels, or diagonal steel members to make a shed resistant and stable to lateral load.
Columns and beams that form the frame are constructed to support only vertical load, while the bracing system supports the lateral load.
However, high-tech buildings express bracing as either an external or internal detail.
To code officials and engineers, wall bracings are just sections of a framed wall. These sections have no door or window opening with let-in bracing or other sheet material.
The International Residential (IRC) must have approved the material for usage.
Bracing protects your shed from collapsing due to wind, storms, earthquakes, or other natural hazards.
Bracing your shed’s wall would keep your mind at peace when the storm comes. The more wind prone an area is, the sturdier the buildings should be.
Buildings in coastal areas with wind speeds exceeding 100 mph to 110 mph have codes that require new structures to have an engineered design.
How Do You Brace a Shed Wall?
Knowing the right way to brace your shed’s wall is a critical skill that provides resistance from forces that act on the wall plane. Shed wall bracing should be taken as a priority in coastal areas.
There are different ways of bracing your shed walls listed in the IRC of constructing a braced wall.
The top three methods are; portal frames, continuously sheathed wood structural panels, and gypsum board.
#1. Portal Frames
A portal frame offers the best bracing if your shed has a large door. Portal frames need specific dimensions for the sheathing, anchors, headers, and other things.
A downside of this type of bracing is its limitations on when it can be installed.
#2. Continuously Sheathed Wood Structural Panels
This is the exterior sheathing of the shed, from ceiling-to-floor OSB sheets with a specific structural rating and thickness. This construction type is considered standard by most framers.
#3. Gypsum Board
Sometimes the exterior walls would not be enough to resist the amount of horizontal load exerted. So you finish with gypsum boards from floor to ceiling, leaving no openings.
You should note that gypsum boards aren’t as strong as plywood, so the lengths should be more. Bracing is done in two systems and various styles or types. They are as follows.
#4. Bracing Systems
- Vertical Bracing: This type of bracing system is designed by bracing between the column lines; in vertical planes. This system makes sure that load pressure from horizontal forces has a way of being transferred to the ground level. To brace the two directions and for maximum resistance to torsion about a vertical axis, a framed building should have at least three planes of vertical bracing.
- Horizontal Bracing: This is done so that there is a route for the load from horizontal forces to be transferred to the planes of the vertical bracing; by bracing every floor in the horizontal plane.
How Do You Brace Walls for Framing?
Framed structures need a minimum of 3 bracing planes installed vertically. For maximum resistance from racking from wind, earthquake, and lateral forces.
After reading through the types, methods, and systems of bracing, you must have picked the one that best suits you.
Below is a step-by-step guide on how to brace the walls of your shed.
- Using chalk, outline the areas you’d be bracing.
- Measure from the floor and mark the inside faces of the end of each stud at 17.”
- Drive a 16-penny framing nail partially at the marked area on the stud.
- Remember to take safety precautions by wearing safety gear such as glasses, gloves, boots, and helmets.
- Using a saw, more conveniently, a circular saw. Cut a 2-by-4 10 feet lumber
- Nail the brace to the wall extending diagonally to the floor. Repeat this process for all the marked areas by attaching the upper end of the brace at the opposite end of the wall at the inside of the stud.
- Cut cleats to secure the lower ends of the braces.
- Nail each cleat to the floor
- Nail the lower end of the next brace to the next cleat with two framing nails.
- Repeat this same process to brace the other areas marked and the opposite side.
What Angle is Best for Shed Wall Bracing?
The best angle for shed wall bracing is approximately 45°, nothing more than 60°, and nothing less than 30°. Anything outside this range would result in unstable bracing.
First-position wall bracing according to the code requirement. Using the edge of the bracing as a point of reference, pinpoint the saw cut position.
Take caution that there is about a 45° angle between the bracing and the top plate. This is the perfect angle to install bracing in the walls of your shed.
Bracing is more efficient when installed at angles between 30° and 60°. This is because the steeper the level, the more difficult it is to connect the ends. And loose ends would defeat the purpose of the bracing.
Shed Wall Bracing Requirement
The IRC Wall Bracing: A Guide for Builders, Designers, and Plan Reviewers contain the requirements to brace a wall.
The requirements are as follows for different bracing methods.
#1. Traditional Bracing Methods
- Method 1: Approved metal brace or 1×4 wood let-in-braces
The braces must be installed at angles of at least 45° and nothing more than 60°. Each brace is counted as a braced wall panel. Approved braces should be installed per the manufacturer’s instructions.
- Method 3: wood structural panels and Method 4: Fiber Board.
Multiple sheathing panel usage for braced wall panels that are 48 inches wide or wider.
- Method 5: Gypsum Board.
Braced panels 48 inches wide or more for both sides of installation count towards the required bracing amounts.
In contrast, 98 inches wide panels or more required bracing according to their length.
#2. Supplemental Bracing Methods
- Continuous Wood Structural Panel Sheathing: Braced wall panels 24 inches wide or wider vary the bracing amount and height of an adjacent window or door. 2-inch panels are required at the end of the braced wall line corners.
- Alternate Braced Wall Panels: 32-inch panels can be substituted for 48-inch braced wall panels for another method. Use hold-down brackets at the edge of every panel, anchored directly to the shed’s foundation (this is limited to 1 and 2-story buildings).
- Alternate Braced Wall Panels Adjacent to a Door or Window Opening: requires a minimum of 16 inches panel for a one-story building and a minimum of 24 inches for two stories. This installation method uses special sheathing nailing patterns and framing details.
Conclusion
Bracing the walls of your shed would give it the stability it needs and save you from the loss of lives and properties.
Before you brace your walls, go through the requirements, methods, and styles outlined to make a good pick.
Also viewed: Knee Wall Height Code

