Drywall is often the run-to material for constructing walls in homes and buildings because of its many interesting properties.
Plasterboards are compatible with many construction materials, including bricks. Due to this, builders use them together when creating walls.
But since the borders of bricks are jagged, you may wonder if it’s natural for gaps to exist between the brick and the drywall.
If the paragraphs above express your thoughts, you’ve come to the best place for professional answers.
You should expect a gap along the point where your brick and plasterboard meet because the brick and drywall are not flush/ level. The jagged borders of the brick make it difficult for the wallboard to align perfectly. However, the resultant gap is an eyesore that may potentially lead to
In this article, you’ll learn more about the gap between brick and drywall. You’ll discover why the gaps are present and how to cover them up.
Additionally, I’ll tell you the necessary equipment for the task and how to finish a transition from brick to drywall.
Ready for a Drywall Quiz?
Should there be a Gap Between Brick and Drywall?
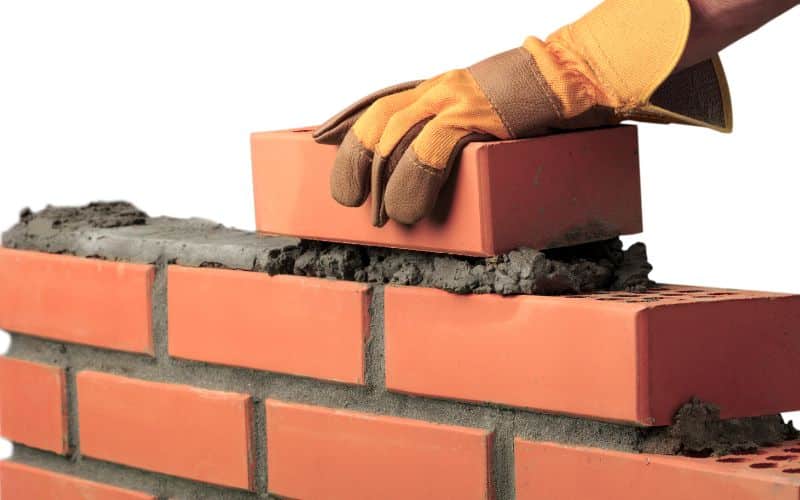
It’s normal for people to find brick against drywall in homes, offices, and buildings as builders incorporate both materials.
You can find the pair in bathrooms, chimneys, bedrooms, and other places where walls serve as demarcations.
But, the more builders combine brick and drywall to construct buildings, the more questions arise concerning the compatibility of both materials.
If you have brick and drywall in your building, you’ll surely notice the presence of gaps between them both.
When you do, you’ll want to know why and whether or not the space is normal. So yes, there may be a gap between your brick and drywall after installation.
The reason for this space is the rough nature of bricks. Their surfaces are never perfectly flat, and neither are their edges smooth.
Due to this, when a builder installs drywall close to brick (to construct a wall or ceiling), the joint along which both materials meet will not be flush.
This action will result in a misalignment that leads to the space between brick and drywall.
Although some people claim this gap is negligible, it’s an eyesore that may result in damage along the line.
The major damage that may occur is the inflow of air or build-up of the draft, which has numerous negative effects.
The presence of a draft can reduce energy efficiency and increase the accumulation of moisture, which damages drywall. It can also lead to poor ventilation.
Due to these reasons above, I’ll advise you to cover up any gaps between your drywall & brick.
Though the gap may not have any immediate adverse effect, it’ll be in your best interest to act fast and prevent impending damage.
There’s no need to worry about the process as it won’t cost much because you can do it yourself without hiring a professional.
Additionally, you’ll only require a few tools that are affordable and easy to find. You may even have some of them in your repair kit.
What Can I Use to Fill Gap Between Brick and Drywall?
Now that you know the gaps between your brick and drywall are coverable, I’m sure you’ll want to do it immediately.
But first, you have got to discover the necessary tools and equipment for the task at hand before proceeding.
So, the need for this information accounts for the question above. Once again, I’m glad to inform you that I’ve covered you.
So, below are the tools and equipment you will need to fill the gap between your brick and drywall.
- Spray foam filler.
- Foam backer rod.
- Paintable latex caulk.
- Caulk tube.
- Caulk gun.
- Paper towels.
- Paint.
Please note that if you click on any of the tools above, you will access a website from which you can order.
However, if you prefer, you can buy them from local shops or stores around you. The spray foam filler and foam backer rods are alternatives, so opt for your preferred choice.
You can also choose between the paintable latex caulk or a caulk tube. Whichever you choose, ensure the caulk is of good quality.
Now, let’s see the purpose of each tool listed above.
| Tools | Use |
|---|---|
| Spray foam filler | It fills up some space and serves as a backing to support the caulk. |
| It is a wedge; you can use it instead of foam spray for support. | It is a wedge, and you can use it instead of the foam spray for support. |
| Paintable latex caulk or caulk tube | They can serve as sealants for covering the gap between your brick and drywall. |
| Caulk gun | It holds the caulk tube and enhances the easy application of the caulk. |
| Paper towels | Use these to smoothen the line of caulk. |
| Paint | Apply paint over the caulk when it sets for a smooth visual transition. |
So, six easy tools will help you in your DIY procedure. With these tools, you can nicely cover the gap between your brick and drywall.
How Do You Fill a Gap Between Brick and Drywall?
With the tools in hand, the question that comes up next is how to fill the gap between brick and drywall.
As I mentioned, the procedure is easy, and you can do it yourself. You won’t have to hire a professional to seal the gaps.
Moreover, there are two methods by which you can fill the gap between your brick and drywall. The first involves using foam spray, while the second requires a foam backer rod.
Just get your tools, and follow my guides. They’ll help you save money while practicing dexterity.
Below is a step-by-step rundown of the procedures for filling the gap between the building blocks and drywall using foam spray.
- Firstly, spray your foam filler into the gaps so it will reach behind and seal up all the space, thus giving backing to the glue.
- Wait for the spray-filling foam to dry, then apply caulking glue on the top.
- You can use a caulk gun to ease up the application process.
- Use your paper towel to smoothen the glue so it will spread evenly across the gap.
- Lastly, use good paint, the same color as your drywall, to cover up the caulking glue.
There are important things to note in the process above.
- Get a good foam filler from a reliable brand that will hold properly and last long.
- Use a moist paper towel, as dry will likely break up, and stick to the caulk.
- The application of paint is optional.
- It’s important to use paint with the same color as your walls to ensure it blends and looks appealing.
Below is an outline of the second method of filling gaps between brick and drywall.
- Measure the gap you want to cover up.
- If the gap is deeper than ½”, you must use a backer rod. The length of the backer rod you’ll use depends on the gap size.
- So the gap
- the size will determine the size and length of the backer rod you’ll use.
- After getting an appropriate rod, place it in the gap and push it in. You can use a screwdriver to ensure the rod gets to the end of the gap.
- Place your caulking tube into the caulk gun and ensure it sits securely. The plunger should be close to the tube.
- Proceed by cutting off the nozzle of the caulk glue.
- Next, place the open end of the nozzle on the gap, then gradually press on the trigger.
- Follow up by dragging the caulk gun along the length of the gap till the trigger reaches its limits.
- You can now withdraw the pressure off the trigger and repeat the last step till the gap is fully covered.
- Leave your caulk for some days so it can dry. When it dries, apply paint to cover it up.
If the gap is less than ½”, you won’t have to use a backer rod; you can stick to the foam filler.
If you use the rod, you must get the right fit, so be mindful of its size and length.
If you need more clarity on installing a backer rod, click here to watch a video.
How to Finish a Brick-to-Drywall Transition?
You can finish your brick-to-drywall transition using a tearaway bead.
The tearaway is good for the job because it has a removable flange that prevents the mud brick from staining the divider.
There are many methods of installing a tearaway bead. One of the popular methods requires the use of an adhesive.
But the method I’ll explain doesn’t require adhesive or extra tools.
That said, here is how to finish drywall to brick transition:
- Firstly, purchase your tearaway bead and measure it according to the length of the space so that it will fit.
- Snip on all three sides to cut out a suitable length, then slide the tearaway into the gap.
- Mix quick-set mud with PVA glue to create a bonding agent. Ensure that the consistency of your moisture is slightly runny.
- Spread the mixture along the edge of the drywall before sliding the tearaway bead in.
- When placing the tearaway bead, ensure it sits straight to avoid folding, which will result in a bumpy placement.
- Apply some pressure to the tearaway bead to press the bonding mixture into its holes and ensure it sticks properly.
- You can add mesh tape to the bead to ensure it sticks securely.
- Next, go over the mesh with your bonding agent again to cover up the entire tearaway strip.

