If you’re a homeowner, you’re likely familiar with the frustration of discovering imperfections in your walls, like bubbles or blisters in the drywall tape.
Not only do they detract from the appearance of your walls, but they can also be a sign of deeper issues that must be addressed.
Fixing a drywall tape bubble is a relatively simple DIY project you can complete with just a few basic tools and patience. Caused by poor installation, drywall, and climatic condition, you can easily fix bubbles by replacing the drywall tape and applying a new finish.
This post will guide you through the process step-by-step to fix bubbles from drywall tape so you can restore your walls to their original smooth, seamless finish!
Ready for a Drywall Quiz?
What Causes Drywall Tape Bubbles?
Some of the most common causes of drywall tape bubbles include;
#1. Poor Installation Technique
If the tape is not properly embedded in the joint compound, air pockets can form underneath, causing bubbles to appear.
This occurrence is more likely if the joint compound is applied too thickly, as the weight of the compound can cause the tape to buckle and create bubbles.
#2. Moisture and Humidity
If the drywall is in an area with high humidity, such as a bathroom or kitchen, moisture can seep through the tape and cause it to lift away from the drywall.
Such exposure can create bubbles and weaken the bond between the tape and the joint compound.
#3. Improper Drywall Storage
If drywall is stored in a humid or damp environment, the paper facing can absorb moisture, causing it to warp or buckle.
It’ll create uneven surfaces that are difficult to tape and finish and can also cause bubbles to form under the tape.
How to Fix Drywall Tape Bubbles?
Drywall tape bubbles are a common problem that can ruin the smooth appearance of your walls.
However, the good news is that fixing drywall tape bubbles is a relatively straightforward task you can do with just a few basic tools and materials.
Outlined below are six easy steps to fixing dry tape bubbles;
#1. Identify the Affected Areas
The first step is identifying the affected areas. These are usually areas where the tape has become loose or detached from the wall.
Use a putty knife to gently press on the tape and see if it moves or is firmly attached to the wall. If it moves, there is likely a bubble underneath.
#2. Cut the Damaged Tape
Once you’ve identified the problem areas, it’s time to cut the damaged tape. First, use a utility knife to cut a slit along the length of the bubble.
Be careful not to cut too deep; you don’t want to damage the drywall underneath. Instead, use your fingers to gently pull back the edges of the slit and remove the damaged tape.
#3. Apply a Joint Compound
After removing the damaged tape, it’s time to apply the joint compound.
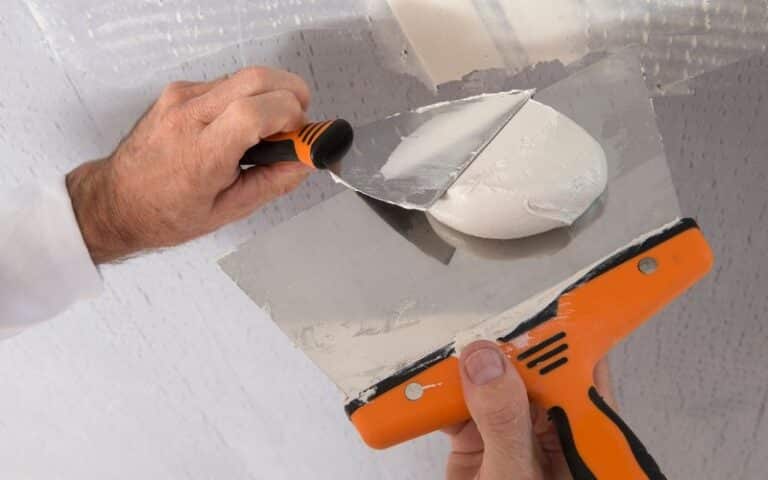
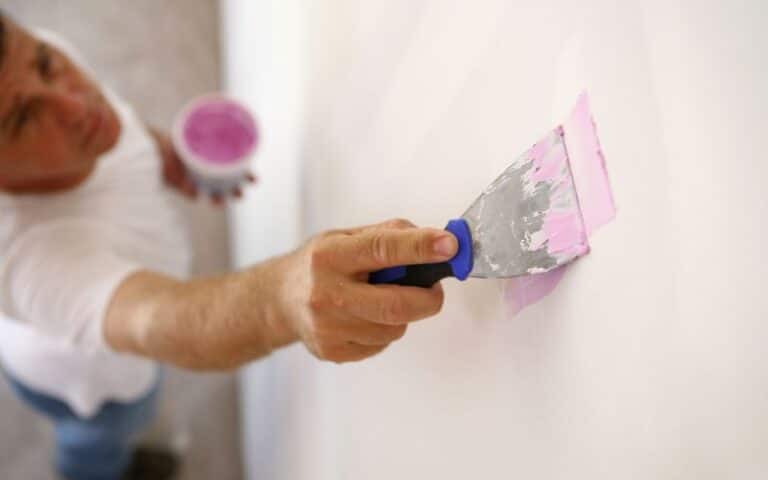
Spread joint compound over the affected area with a putty knife. Make sure to cover the entire area, including the edges of the slit.
#4. Apply New Tape
When the joint compound dries, apply new tape. First, cut a piece of self-adhesive drywall tape to size and place it over the joint compound.
Press the tape firmly into place with your fingers, ensuring no bubbles or wrinkles.
#5. Apply A New Layer of Joint Compound
Once your tape is in place, it’s time to apply a new layer of joint compound.
Spread the compound over your tape with a putty knife, covering the tape edges as well. Then, smooth out the surface with the knife, removing any excess joint compound.
#6. Sand and Paint
Once the joint compound is dry, sand and paint the repaired area. First, use fine-grit sandpaper and smooth out the surface.
However, do not sand too much, or you may damage your tape. Once your wall surface is smooth, paint over it with a matching paint color.
Can You Fix Drywall Tape Bubbles After Painting?
Yes, you can fix drywall tape bubbles after painting. You’ll begin by cutting the loose tape away using a utility knife.
Be sure to cut along the entire bubble length, not cutting into the surrounding drywall.
Next, apply joint compound to the affected area, using a putty knife to smooth it out. Doing so will fill any gap or unevenness left behind by the removed tape.
After the joint compound dries, apply the new piece of drywall tape. First, cut the tape to the appropriate length, place it over the joint compound, and press it firmly into place.
Use a putty knife to smooth out any bubbles or wrinkles in the tape, being careful not to press too hard and create additional bubbles.
Once the new tape is in place, apply a new layer of joint compound over it. Use the putty knife to smooth out the joint compound, ensuring it is flush with the surrounding drywall.
Allow the joint compound to dry properly before you sand. It will help to create a smooth surface that is ready for painting.
Finally, it’s time to paint over the fixed area. Apply primer to the patched area, allowing it to dry completely before applying the final coat of paint.
Be sure to feather the paint out around the edges of the repair to blend it in with the surrounding wall.
How Does the Drywall to Wood Transition Affect the Fixing of a Drywall Tape Bubble?
The drywall to wood transition guide plays a crucial role in fixing a drywall tape bubble. It ensures a seamless connection between the drywall and the adjacent wood surface, preventing any gaps or bulges. Proper installation of the transition guide helps maintain the structural integrity of the tape, ensuring a smooth and durable finish.
How Much Does it Cost to Fix Drywall Tape Bubbles?
Fixing drywall tape bubbles is a relatively simple process. The cost, however, will depend on the damage’s extent and the repair’s complexity.
Firstly, the size and location of the bubbles will play a significant role in determining the repair cost.
Small bubbles that are only a few inches wide and located in easily accessible areas such as corners and edges will be less expensive to fix than larger bubbles that cover a significant portion of the wall or are located in hard-to-reach areas such as high ceilings.
The second factor to consider is the cause of the bubbles. For example, if the bubbles result from poor installation, such as using too much joint compound, the repair cost will be relatively low.
However, the repair cost will be higher if the bubbles are due to a more significant issue, such as water damage or foundation problems.
The third factor that will impact the repair cost is the type of finish on the wall.
If the wall has a textured finish, such as popcorn or orange peel, it will be more challenging to match the texture after the repair. In addition, the repair will require additional time and effort, increasing the cost.
On average, repairing drywall tape bubbles can cost anywhere from $50 to $400 per bubble, with the average cost being around $150 per bubble.
However, as previously mentioned, the cost can be significantly higher if the repair is complicated or if there are multiple bubbles to fix.
In terms of labor costs, you can expect to pay between $50 to $75 per hour for a professional drywall contractor.
Most repairs can be completed within a few hours, so you can expect to pay between $150 to $225 for labor costs.
Finally, you’ll need to consider the cost of materials. For example, a joint compound is a primary material required to fix drywall tape bubbles, which costs around $10 to $20 per gallon.
You may also need sandpaper, primer, and paint to match the wall finish.
In conclusion, the cost of fixing drywall tape bubbles varies depending on some factors, including the size and location of the bubbles, the cause of the bubbles, and the type of wall finish.
On average, you can expect to pay around $150 per bubble for labor and materials, but the cost can be significantly higher for more complex repairs.
If you’re uncomfortable fixing the issue, hiring a professional drywall contractor is always best.
Doing so will ensure the repair is done correctly and avoid potential long-term damage to your home.
Can You Fix Drywall Tape Bubbles Yourself?
Yes, you can. Fixing drywall tape bubbles is a relatively simple task that you can do without the need for professional help. However, it requires patience, time, and a few tools.
First, you need to locate the areas with the drywall tape bubbles. Then, if the tape has completely come off, you must remove it and apply a new one.
If it’s just a small bubble, you can try to fix it without removing the tape.
Below are some pros and cons of fixing drywall tape without a professional’s aid.
| Pros | Cons |
|---|---|
| It is cheaper. | There’s the risk of further complications. |
| You’ll gain useful experience. | You may not resolve the underlying cause. |
| The work will be done according to your taste. |

