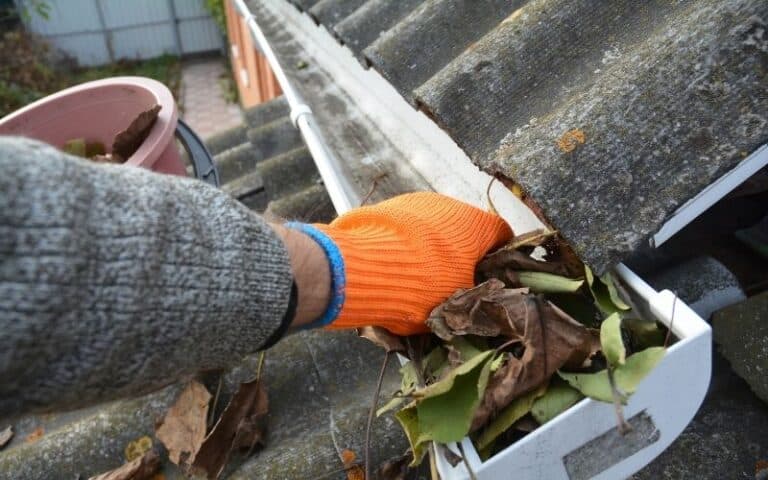
Roofing a house, we are usually more interested in choosing beautiful, eye-catch designs. Even if considering beauty is necessary, roofing a home goes beyond that.
The topmost priority you should be keen on is protection and comfortability. When considering a gambrel roof, the drip edge is an essential part.
The edge’s absence can invite water behind your gutters. Hence, reducing the lifespan of your fascia board and deck of the roof.
Gambrel roof drip edge is the installation of metal flashing on a gambrel roof. A gambrel roof is like a classic barn roof, and it has two slopes on each side. When using this type of roof, install the roof drip edge along the eaves before placing an ice-water barrier inside the felt paper on top of the drip edge.
Ready for a Roofing Quiz?
How To Install Drip Edge On Gambrel Roof
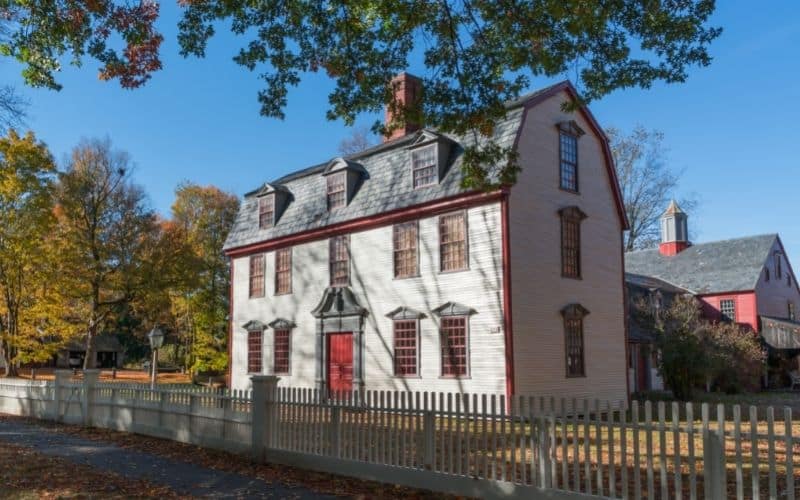
A gambrel roof is a distinguished barn roof used in garages and barns. It is now a trend to use gambrel roofs for residential buildings.
The lower part of this roof is steeper than the upper. The roof of the gambrel is short. It creates enough space for the top part of the attic.
In addition, the drip edge prevents water from entering beneath the shingles and protects them from getting rotted and damaged.
A drip edge is required for your roof when not using gutters. Using a drip edge will take water off your fascia board and water to the gutter center.
However, the drip edge must be well-positioned to avoid overflow into gutters. Consequently, aside from the protection part of using a drip edge, it also beautifies your roof and makes the low side of your roof cleaner.
Let’s discuss the steps to install a drip edge on your gambrel roof. If you consider DIY as a homeowner, this guide is for you.
Steps To Install Drip Edge On Gambrel Roof
#1. Step One
Place the drip edge with eaves. Then, place the underlayment and the drip edge alongside the gable end. Also, ensure the ice-water barrier in the felt paper is over the drip edge.
#2. Step Two
Nailing the drip edge to the sheathing, start from one roof’s corners. Nail above the drip edge to make the shingles cover the nail.
The best method is to nail about 12 inches and ensure it does not exceed 16 inches between nails. In addition, you should leave an inch to overlap the sections on the edges at each end in the direction of rain and wind.
#3. Step Three
Make sure to cut for a decent job where the eaves and rake edges connect. The most fundamental thing is to join the lower edge to the raking edge.
Take note of the area where the drip edge overhangs plus one inch.
#4. Step Four
Using the second mark, cut the drip edge all the way through. Allow it to hang one inch over the border. Also, using your starting mark, cut out the top half of the drip edge.
Finally, remove a square of the drip edge with the perpendicular cut.
#5. Step Five
In a usual way, install the drip edge. Afterward, form a corner by bending the drip edge flap. Then, place the edges on the rakes to complete this corner.
#6. Step Six
Cover the leaves with the drip edge and install the underlayment. However, ensure the felt paper is on the drip edge–over the eaves and beneath the edges on the rakes.
#7. Step Seven
Add the drip edges to the rakes with the aid of nails. Make use of the nails as before.
#8. Step Eight
On the flap you did not use, apply the drip edge of the rake while installing the eave’s drip edge–the moment you reach the angle where the rake and eave edge joins.
#9. Step Nine
In your drip edge, make another cut the moment you get to the roof’s ridge. Allow the ridge to have a drip edge over it.
Note where the drip edge outsteps the roof. Then, with the aid of tin snips, form a cut along the under of the drip edge.
#10. Step Ten
Make the drip edge fold over the topmost part of the ridge. Put a tag of identification on the centerline. To complete this stage, cut the drip edge’s uppermost part along the line.
Pin the drip edge down with one nail to keep it in place.
How To Install Drip Edge On An Old Gambrel Roof?
You discover the drip edge on your roof is absent or needs a repair. Check out the below steps to repair the drip edge of an existing gambrel roof.
#1. Step One
Slide the flat flange of the material wide under the first level of gambrel roof shingles. Ensure that the out of the edge goes above the gutter. If it doesn’t, slightly pull the drip edge out from under the tiles.
#2. Step Two
Use roofing cement throughout the top of the drip edge. Then, hold down the shingles. Protect the drip edge’s end with small roofing nails.
And most importantly, ensure the roofing nails are placed high at the bottom of the shingles.
Does Drip Edge Go Over Felt Or Under?
Drip edges can be over or under the felt paper underlayment. It depends on the position it is. For example, install a drip edge under the felt it is along the roof’s eaves.
However, if the drip edge is along the reck edges, it’s best for the drip edge to be over the felt.
The reason for installing a drip edge under the felt paper is to enable the water to flow easily on top of the drip edge.
In addition, it is important to note the passage suitable for flowing water along the roof during the installation process.
Installing a drip edge is not a hard task. Even if you aren’t an expert, it’s something you can do.
It would be best if you found out the purpose and importance of installing the drip edge under or over a felt paper underlayment.
Should There Be a Gap Between Drip Edge And Fascia?
Of course, there’s a need for a gap between them. Allowing the space is recommended. The reason for leaving the gap is to enable airflow through the attic.
During the application, the roof’s drip edge should exceed the fascia board by 3/4 inch to make the water flow in the gutters. But if the overhang is short, the water will go behind the gutters.
If the water is going behind the gutters, it will cause the fascia board to rot or have discolored siding.
In addition, it may likely lead to flooding or soil erosion. However, apply a sheet metal drip edge or drip cap if you want to repair the edge.
Though the gap may give access to pests and other harmful wild animals to penetrate inside the home, pests can travel beneath the shingles.
Nevertheless, you can avoid the wildlife slipping inside the home if the distance between the fascia board and the lower edge isn’t more than the wideness of a forefinger.
Also, ensure the shingles overhang the drip edge within the space of ⅜–½ inches.
Conclusion
Installing a drip edge to a roof is recommended because of the numerous benefits. First, however, make inquiries to confirm if there are new regulations from the local building codes on installing drip edges on roofs.
People didn’t widely use the drip edge in the past. However, since people are now discovering its importance, it has become a trend.

