Hardie boards wrap beautifully on homes and other structures. The boards are appealing and solid, which adds a finishing touch to the walls of a building.
If such a building has bare posts, they can spoil the entire structure’s visual charm.
Therefore, there’s no reason why you shouldn’t adorn your posts with Hardie boards.
Hardie boards are highly sturdy products you can use to wrap your posts. Cement, cellulose, fiber, and sand are the materials that combine to form these boards. Your posts will look formidable as the boards will enhance any building’s beauty for a long time.
At the end of this article, you’ll learn how to wrap posts with this fiber cement siding.
Ready for a Roofing Quiz?
Can You Wrap Posts With Hardie Boards?
Hardie boards can wrap up your posts and are excellent to use because of their aesthetic appeal. With Hardie boards, you have a product with proven quality.
Due to their fine design, these boards give your posts a sturdy and attractive look. The fibers used in making these boards give them a natural wood texture.
With Hardie boards, you have a few maintenance concerns. The boards are resilient and resist pests, cracking, and deforming.
The cement material adds enviable durability to these boards. It’s also possible to paint and repaint these boards anytime you wish.
Hardie boards will be great for your posts. However, it would be best to consider the drawbacks before using it.
The table below highlights the advantages and disadvantages of Hardie boards.
| Pros | Cons |
|---|---|
| Enhanced durability. | High purchase cost. |
| Aesthetic appeal. | Extended installation process. |
| Consummate warranty. | It needs recoating after fifteen years. |
Are Hardie Boards Good For Post Wraps?
Hardie boards are excellent for use on posts. You can scarcely find a better cement fiber material for wrapping your posts.
The superiority of Hardie boards comes from their high quality. Below are some of the attributes that give Hardie boards a high reputation.
#1. High Durability
Hardie boards are well-made and can endure the elements easily, even after direct contact.
The cement material used to make these boards lends them their durability. The boards can withstand the following;
- Storms
- High winds
- Hail
- Ice and snow
- Rain
Moisture cannot easily penetrate the boards. Therefore, you don’t need to worry about rot, distortion, and swelling.
Hardie boards endure these harsh conditions for a long time.
Furthermore, Hardie boards are impervious to carpenter ants and termites. The boards’ colors last a long time as they are fade-resistant.
The boards are also fire-resistant. They won’t combust when directly exposed to fire, unlike regular wood.
#2. Aesthetic Appeal
Hardie boards have an exquisite texture that is pleasing to the eyes. Wrapping your posts with these boards will add a mature look to the building.
The good thing about Hardie boards is that they have various colors and designs. You’ll have many options to pick from their Dream and Statement Collections.
They have warm, dark, light, neutral, and cool colors. This wide variety helps you pick the board with colors or textures that will match your building.
#3. Warranty
HardieTrim boards and HardieShingle siding are under a 15-year and 30-year product warranty, respectively. The lifetime begins on the day you buy the product.
The warranty guarantees that the boards will not suffer damage from termite or hail attacks for 15 years.
You can only transfer the warranty on one occasion from the initial buyer.
Hardie Company will replace or repair the damaged board if the product suffers harm or defects.
They can also repay the covered individual up to twice the board’s original selling price. You can’t switch the defective board for another Hardie product.
However, the warranty will be void if the boards undergo improper installation. It’s safer to seek the services of Hardie siding contractors when wrapping your columns.
This way, you’ll ensure that your warranty remains intact. Other attributes of Hardie boards include;
- High resale value
- Low maintenance
- Environmental friendly.
How Do You Wrap Posts With Hardie Boards?
Wrapping posts with Hardie boards can be very tasking. It isn’t advisable to do this yourself since improper installation can void the warranty on the Hardie boards.
You can only attempt this if you’re confident in your abilities and know the warranty conditions.
To wrap your posts with Hardie boards, you’ll need the following;
- Galvanized nails
- Measuring tape
- Nail gun or hammer
- Saw
- Work table
- Glue
The following is a guide on how to wrap posts with Hardie boards.
#1. Measure Your Posts
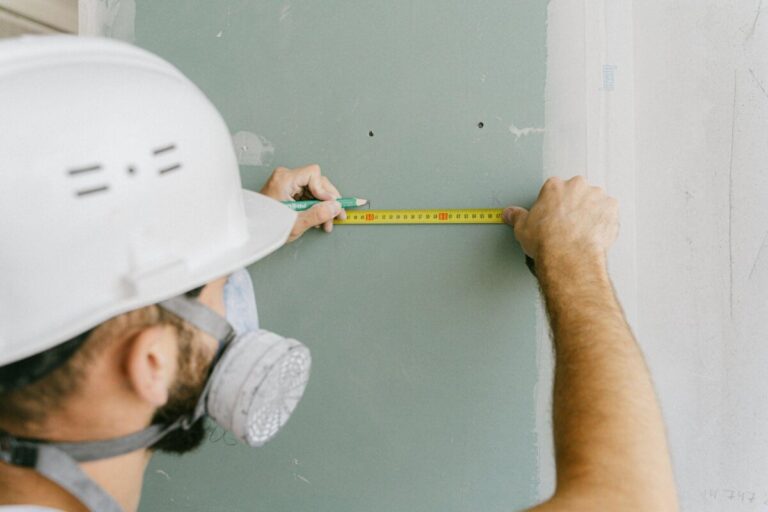
Use your measuring tape to measure the dimensions of your post, including the width and height.
Stretch the measuring tape from the bottom to the top of the post to get the length.
For the width, stretch the tape from left to right of the post to measure it. Ensure that you take measurements for each post and record them.
#2. Purchase Hardie Boards
After getting the measurements, you can buy HardieTrim boards in sizes at least 3 inches more than your measurements.
Buying larger boards is wiser so you can adjust them to the required measurements. Four boards should be enough for wrapping a column or post.
After wrapping with Hardie boards, you’ll also need trims for the top and bottom of the posts.
If you’re capable, purchase enough boards to compensate for any errors.
#3. Making Spacers
You’ll need rectangular spacers to attach to the posts before wrapping them with Hardie planks.
For each post, you’ll need 12 spacers, which can be regular wood or Hardie boards.
Use the saw to cut the first six spacers of about 2.5cm and 2 inches in height. For the width, whatever measurement you get after measuring, add 1.5 inches to it.
These original six spacers will serve as your front and back spacers. After making them, smear glue across one side of these spacers.
Attach these spacers to the front and back of the column’s top, center, and bottom. For the other six spacers, measure the space at the sides where you’ve fixed the first spacers.
This measurement should allow you to fit the spacers into the sides of the column. The second set of spacers will sit between the front and back spacers.
After getting the measurements, I saw down wood to produce the spacers. Apply glue behind these spacers and attach them to the sides of the columns.
Note that you’ll make these spacers for each of the columns you want to wrap. After gluing the spacers to the column, send nails into each corner of the spacer.
#4. Attaching the Boards
Saw down the Hardie boards to the exact height of the columns. Remember that you have wider spacers.
Ensure that the width of your front and back boards corresponds with the wider spacer’s width.
You’ll also saw down boards to match the width of the thinner spacers for the sides.
Next, smear glue on the spacers on the columns to attach the boards. Pick a board and place it on the post’s front side. Make sure it hangs before letting it go.
Grab the next board and move on to the back until you’ve wrapped an entire column with Hardie boards. Do so for the rest of the columns.
If all the sides fit, you can use the nail gun or hammer to drive nails into the boards. If there are any gaps, use caulk and fill them.
You can trim the base and top of the column to give the posts a finished look.
All You Need To Know: Mastic On Cement Board
Conclusion
It’s not uncommon to wrap posts with Hardie boards. The boards’ durability adds a unique and complete aesthetic to a building.
The following steps can guide you on how to wrap Hardie boards on posts;
- Measure your posts.
- Purchase Hardie boards.
- Produce rectangular spacers and attach them to the post.
- Attach Hardie boards to the columns.
It’s advisable to buy the services of Hardie Company contractors. This way, the warranty on the boards will be valid after installation.

