Removing glued hardwood flooring is a time-consuming job and requires some tools.
If you have old, damaged hardwood or laminate flooring that needs to be removed, we have the resource for you here.
In this article, we look at some of the ways and techniques you can follow to remove glued hardwood flooring from its place without damaging the subfloor in any possible way.
Stay with us as we look at the solutions.
Ready for a Flooring Quiz?
What is Hardwood Flooring?
Hardwood flooring is a type of flooring that’s made from the wood of deciduous trees.
It’s durable and long-lasting, so it can be installed in residential homes or commercial spaces like offices, shopping malls, and hotels.
Hardwood floors are a natural material that provides an elegant look to any room they’re installed in.
Hardwood Flooring vs. Laminate Flooring vs. Carpet
Hardwood floors are thicker than laminate or vinyl options because they’re made from real wood instead of synthetic materials like plastic or vinyl composite boards (VCB).
The thickness also helps make them more durable than other flooring options when scratching them up by accidentally dropping things on them- or even intentionally!
Benefits of Hardwood Flooring
Hardwood flooring is durable, long-lasting, and easy to clean. It’s also easy to maintain and install–a huge benefit if you’re doing the installation yourself.
And, of course, hardwood floors look beautiful!
Hardwood flooring is durable, versatile, and adds value to a home. It has a timeless aesthetic and can complement any decor style.
It is also easy to clean and maintain, and if properly taken care of, it can last for many years.
Hardwood flooring is a great option if you want to make your home more comfortable, healthier, and environmentally friendly.
It’s durable, warm, easy to clean, and can be installed in almost any house.
Here are some more benefits of hardwood flooring:
#1. It’s Easy to Clean
Hardwood floors are easier to clean than carpets because they don’t trap dirt as carpets do.
Plus, if your kids spill something on the floor, you must mop it up with water and a rag (or a Bissell Steam & Sweep).
That’s it! No need for expensive cleaners or special equipment—just plain old water and elbow grease!
#2. It Can Be Installed Anywhere
You don’t have to have an open space in your home for hardwood flooring.
If an area seems to be better suited for wood than any other surface (like between a row of cabinets), you can install hardwood there instead of tile or linoleum!
This means that even if the rest of your place is carpeted or tiled over, you’ll still have at least one spot where everyone can feel like they’re walking barefoot.
Plus, hardwood lasts a long time! It won’t warp like other types of flooring, so you won’t need to replace it as often.
If you’re looking for something that will stand the test of time and give your home a classic look, hardwood flooring is the right choice!
Use a Putty Knife or Small Pry Tool
You might remove the old flooring using a putty knife or other small pry tool. If you don’t have one, you may be able to borrow one from a friend who does carpentry work.
Insert the tool in between two pieces of glued hardwood and gently pry them apart from each other.
If this doesn’t work, try tapping it with your hammer until they separate enough for you to pull out with your hands (make sure not to damage or crack the subfloor!).
If this doesn’t work either, you will need another method: cutting up the boards with a reciprocating saw–or even better yet–a special blade designed for cutting up hardwood floors called an “edge splitter.”
Steps for Removal
You can follow the steps below to remove glued hardwood flooring:
- Prepare the room: Clear the room of all furniture and remove any baseboards.
- Score the flooring: Use a utility knife to score the surface of the flooring in a crosshatch pattern.
- Apply heat: Use a heat gun to soften the adhesive beneath the flooring.
- Remove planks: Use a pry bar to lift and remove the flooring planks gently.
- Clean up adhesive: Scrap the remaining adhesive with a scraper or putty knife.
- Sand the floor: Sand the surface to remove any residue and prepare it for new flooring.
- Install new flooring: Install new flooring as desired. Note: Always wear protective gear such as gloves and a mask and take necessary precautions for safe and effective removal.
Use a Reciprocating Saw
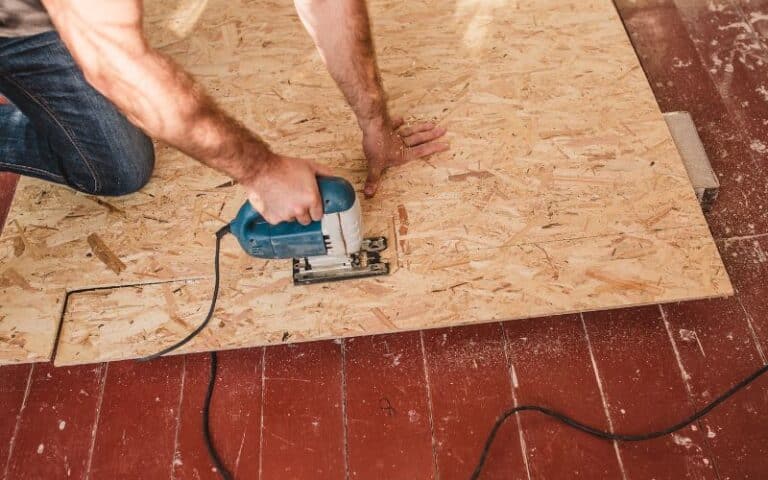
If you can’t remove the glued hardwood floors with a pry bar, rip and cut them up with a reciprocating saw.
If you have a reciprocating or other power saw, cut through any glued flooring that won’t budge from its place on the subfloor.
If you don’t have access to one of these tools, try using a pry bar or other small pry tool instead.
- Use a belt sander or orbital sander to remove any remaining glue and finish from the subfloor.
- Be careful not to damage the underlying subfloor when using these tools.
Conclusion
If you’re removing glued hardwood flooring, it’s important to know that if you don’t remove the glue and sand down to the subfloor, your new finish will not look as good as it could.
You may also need to replace your subfloor if there is a large amount of damage done by removing this type of flooring.
If you want to refinish your existing subfloor (instead of replacing it).
We recommend using an electric sander instead of hand tools like hammers or chisels because they can damage other parts of your home while trying to remove glued hardwood floors.
If you want to remove glued hardwood floors, the best thing to do is ensure you have enough time and patience.
Ensure you have all the tools needed before starting the project and a plan for disposing of any leftover materials.
If possible, hire someone with experience who can help guide you through this process.

