Electrical boxes house cables and wirings that facilitate receptacles, switches, and outlets. There is a proper way of mounting these boxes to minimize electrical accidents from sparks.
Improper installation of electrical boxes can start fires, especially when drywall is present. Fortunately, this article will tell you how to correctly mount electrical boxes next to drywall.
Installing electrical boxes flush with the drywall is essential. When mounting electrical boxes, the exterior edges should maintain a 1/4-inch depth from the drywall’s face. This way, the outlet will be flat with the wall, reducing fire accident risks.
The article below will highlight why electrical boxes must be installed flush with the drywall. You’ll also understand the precise process of fixing electrical boxes.
Reading on, you’ll learn how to amend an incorrectly installed electrical box, so it sits flush with the drywall.
Ready for a Drywall Quiz?
Why Should Electrical Boxes Sit Flush with Drywall?
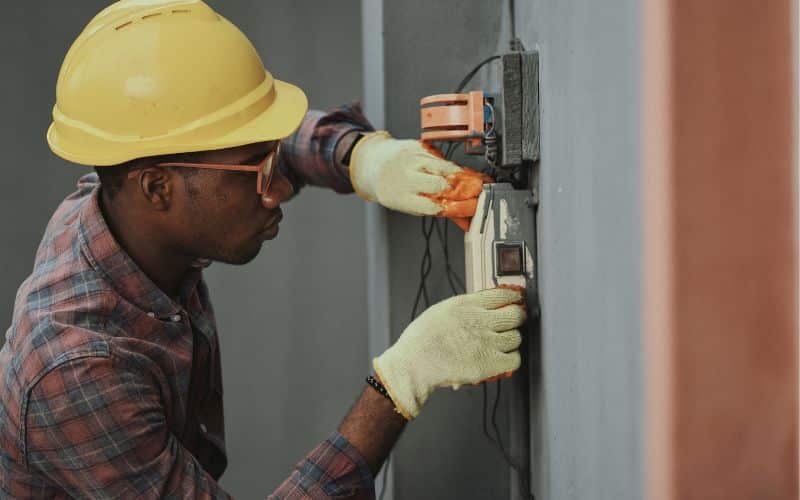
Electrical boxes must be flush with drywall to lessen the possibility of electrical mishaps.
Electrical boxes hold wirings and cables for power outlets and other electrical components. They serve as the first line of defense when electrical accidents occur.
If the boxes aren’t even with the drywall and electrical arcing happens, then there would be risks of a fire outbreak.
However, electrical boxes that are even with the wall will reduce the possibility of electricity arcing from cables to the wall material.
Electrical arcing happens when electric current drifts through air from one conductive location to another. Two causes of this phenomenon include overload and faulty panels.
Since drywall is slightly flammable, a sustained electrical spark can ignite the panels. Sometimes people even add other highly volatile layers to the drywall panels.
These synthetic items can quickly burn once electrical accidents happen in the box.
Evidence from the Electrical Safety Foundation International suggests that improper electrical box installation causes thousands of home fires annually.
These outbreaks record high losses in property and sometimes lives. Therefore, technicians must install electrical boxes even with drywall.
Can Electrical Boxes Sit Behind Drywall?
Electrical boxes shouldn’t sit behind drywall. Installation of this nature is risky and can cause electrical fires; any electrician guilty of it is unprofessional.
When mounting an electrical box, ensure it is even with the drywall panel. Most building codes advise against burying electrical boxes.
Additionally, fixing electrical boxes inside the wall makes it difficult to reach. Any electrician can easily access the unit, even with the wall.
A short circuit can happen at any time in an electrical box. Imagine a faulty box sitting behind a drywall unseen; any incident can easily cause a fire.
Understandably, some homeowners prefer their electrical boxes to be more invisible. However, in the act of concealing them, they endanger the entire house.
Moreover, an electrician can still tactfully install the panel so it will be barely visible. The box’s front panel must always be reachable, so the drywall shouldn’t cover the box.
Ensure that you hire a licensed electrician who installs electrical boxes correctly.
When Should You Install Electrical Boxes, Before Or After Drywall?
You can install electric boxes at any time so long as they are even with the drywall.
However, installing the boxes before mounting the drywall is better since it ensures evenness with the drywall.
You’ll get better access to the studs in the wall when you fix the electrical boxes first. After mounting drywall, the studs will hide beneath the panels, making them difficult to find.
If everything is available, you should install the box before mounting drywall.
The table below shows the items needed to install electrical boxes before or after drywall.
| Equipment | Use |
|---|---|
| Measuring tape | Aids in measuring heights and distances |
| Screwdriver | For driving screws. |
| Utility knife | Used for cutting through drywall |
| Hammer | For nailing. |
| Drywall saw | Used to create holes in drywall |
| Stud finder | Locating studs |
Now, let’s look at how you can install an electrical box before you mount drywall panels.
#1. Take Measurement
If the wall doesn’t have prior wiring, the first step to mounting an electrical box is identifying a wall stud. Mounting the box on a stud is essential because it offers stability.
Your next task is measuring the height required for the electrical box. These boxes usually mount 12 inches from the ground. Grab your tape, measure 12 inches, and mark it with a pen.
#2. Place a Drywall Panel on the Wall for Reference
It’s crucial to install the electrical box even with the drywall panel. You can achieve this by placing a drywall sheet on the wall to help you mount the electric box.
Place the electrical box on the stud you want to nail, then hold a drywall sheet next to it. This act will ensure you install the electrical box, even with the drywall.
Typically, most drywall sheets are 1/2-inch and 3/8-inch sized; if lucky, the electrical box will have measuring tabs.
Some electrical boxes come with 3/8-inch measuring tabs on the side.
Once you place such boxes against the stud, you’ll know how deep to mount it without needing a drywall sheet for reference.
#3. Mount the Electrical Box
Use the hammer to nail the box’s bolts into the wall stud to hold it in place. Don’t hit too hard; the blows can damage the electrical box.
When hammering, alternate between one nail and the other. This way, the box won’t twist awkwardly, and you’ll end up with a perfectly mounted electrical box.
After installing drywall, the following steps will guide you on mounting the electrical box.
#4. Make a Hole in the Drywall
Grab a stud locator to locate studs beneath the drywall sheets. Others can still choose to install the electrical box without a stud, especially if there’s existing wiring in the wall.
Once you locate where you want to mount the box, place it against the drywall and trace its outline with a blade.
After tracing, place the box aside, then cut through the outline with a drywall saw.
#5. Thread Wires Through Electrical Box
Once you make the hole, pull out the wiring (if any) from behind the drywall and fix it through the electrical box.
Ensure you clamp the wires in the box appropriately so they fit tight.
#6. Mount the Electrical Box
Shove the unit into the gap you’ve made. If the box doesn’t fit into the opening, don’t force it in, as you can bruise the drywall.
You should use the blade to widen the hole so the box fits better. Nail the electrical box into a stud if there’s one behind the box.
Some electrical boxes have extensions that allow you to screw them into the drywall. If you’re using this kind of box, screw it in using a screwdriver till it secures into the drywall.
How to Adjust Electrical Box to Sit Flush with Drywall?
Electrical box extenders correct improperly installed electrical boxes. If an electrical box isn’t flat with the drywall, you can get an extender to fix it.
The following are the tools needed for mounting an electrical box extender.
- Screwdriver
- Box extender
- Mounting screws
- Circuit tester
Below is a guide on how to install electrical box extenders.
#1. Picking the Right Box Extender
Box extenders come in various sizes to fit different electrical box depth requirements. Ensure you pick the one extending the box, even with the drywall.
Therefore, measure the distance from the electrical box to the drywall surface before picking an extender. This way, you’ll pick a suitable extender.
#2. Cut Off Power
Before carrying out any operation, cut off power from the circuit you’re working on. Pull out a fuse or turn off the breaker so you’re safe during the procedure.
After cutting off power, use a circuit tester to check if power is in the outlet or switch. Once you’ve confirmed no power, unscrew the electrical box’s switch receptacle.
Pull out the receptacle from the electrical box but don’t disconnect any wires.
#3. Mount Box Extender
The next step is fixing the box extender over the receptacle and the junction box. If you can’t slip the extender over the receptacle, then you can disconnect the wires.
After attaching the box extender, you can reconnect the cables to the receptacle.
#4. Refastening the Receptacle
The box extender’s hole and the box hole should line up. The next step is screwing the receptacle into the box.
Move the receptacle into place and screw it down to the electrical box. If the screws aren’t long enough, you can get new ones to fasten the receptacle.
Turn on the power and check if the receptacle is working.

