Using cement board and drywall for your home is exhilarating as you can enhance its beauty and elegance. These materials have unique features that make them stand out every time.
Hence, you can use them in your bathroom, kitchen, and other parts of your home. However, what happens when there’s an uneven transition? And how does this happen?
There’s bound to be an uneven transition when you use cement board and drywall in the same part of your home. When this happens, the seams or joints become exposed and are susceptible to mold growth. It’s best to make the transition even to avoid unforeseen circumstances.
In this article, I’ll vividly explain how to transition from cement board to drywall properly and how to finish the joints between them.
Ready for a Roofing Quiz?
How Do You Correct an Uneven Transition Between Cement Board and Drywall?
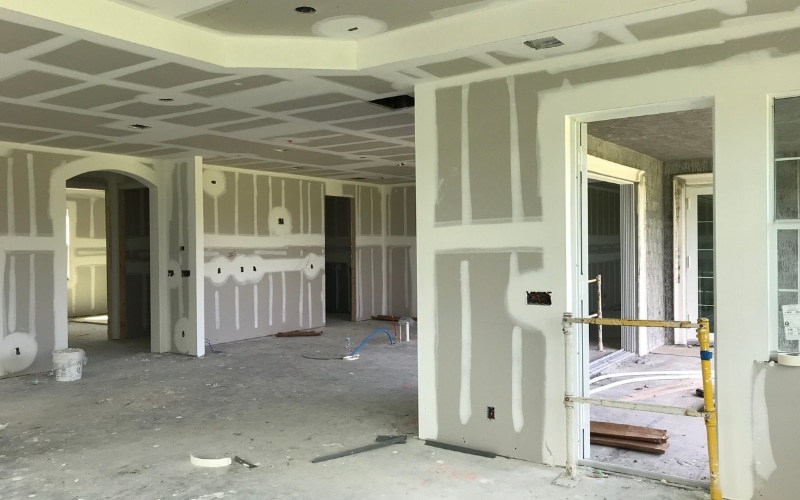
Cement board and drywall are superior materials you can utilize to design your bathroom, as they produce a unique combination that gives it an appealing appearance.
Hence, cement board is best for the bathtub surround, and drywall is best for the walls.
However, when you combine these materials in your bathroom, you’ll notice an uneven transition between them. So, how can you correct this uneven transition?
Let’s find out below:
- First, locate the transition between the cement board and drywall.
- Utilize fiberglass tape to seal the transition.
- Afterward, apply one to two coats of mortar to the affected area. However, this product is only applicable to the cement board side.
Hence, you must use another product on the drywall side:
- Leave the mortar to dry for a few hours.
- Afterward, apply 2-3 hot mud/joint compound coats.
- Rub the compound evenly using a drywall knife.
- Sand the compound with 12-grit sandpaper.
This procedure completely corrects the uneven transition between your cement board and drywall. It makes the transition smooth and unnoticeable.
Many homeowners often utilize cement boards in the bathroom because of their ability to withstand moisture. Hence, installing it in your shower or bathtub surround is best.
On the other hand, drywall is predominantly utilized on walls and ceilings due to its fire-resistant nature and aesthetic value.
Unfortunately, drywall is not suitable for bathroom floors with a lot of moisture. Using drywall for bathroom floors will only result in disastrous consequences.
For instance, if you use drywall on your bathroom floor, it’ll absorb a lot of moisture leading to the growth of mold and other microorganisms.
Thereby making the bathroom unfit for use and leading to health challenges.
Thus, if you want a stunning look for your bathroom, it’s best to consult a professional on the right materials to combine for your wall and floor.
Furthermore, it’s advisable to seek the services of an experienced technician if you can’t install the cement board and drywall.
This way, you don’t have to worry about the uneven transition between the cement board and drywall.
How to Seal Joints Between Cement Board and Drywall Transition?
It’s frustrating when you discover joints between your cement board and drywall transition. The best way to handle this dilemma is to seal the joints.
But how do you achieve this? I’ll highlight the procedure below.
- First, measure the size of the joint between the transition of the cement board and drywall.
- Cut out the size of the joint on your cement board.
- Fix the piece inside the joint using a compound to hold it in place.
Alternatively, you can fill the joint with coats of joint compound. Furthermore, you can use mesh tape to seal the joints between the cement board and drywall transition.
Sealing the joint where the cement board and drywall meet is crucial as it prevents further problems.
Most times, the joint pops up when you fail properly to install the drywall and cement board. If you are not well experienced in this field, it’s best to consult a professional to help you.
However, if you have enough experience with drywall and cement board installation, you can proceed. When sealing the joints, it’s vital to note the type of products you want to use.
Use the wrong product, and the problem will become worse. Use the right product, and your wall and floor will last long.
Therefore, it’s wise to use hybrid products or products that are suitable for cement boards and drywall. It’s not advisable to use paper tape to seal the joints.
The reason for this is simple! Paper tapes contain paper that is highly susceptible to moisture.
Therefore, mildew and mold might grow on it, leading to bigger problems. Furthermore, it’s not advisable to use thinset mortar for the joints.
Using thinset mortar might give you a quick result but lead to a terrible/rough finish. Hence, mesh and joint compounds are the best products for the joints.
This way, you can seal the joints and give them a neat finish. Plus, always purchase high-quality products from a trusted shop or online website.
It’s not advisable to settle for low-quality products as they will only cause more problems and waste money.
Once you purchase the right products and tools, you can seal the joints without assistance from an expert.
How to Properly Transition from Cement Board to Drywall?
Transitioning from cement board to drywall is no easy task, as it requires utmost care.
To do this, you must follow the procedure below.
- Carefully measure the length of the wall of your bathroom.
- Measure the length of the floor beside the wall of your bathroom.
- Ensure that the two measurements are equal to avoid problems.
- Carefully install the drywall on the wall and cement board on the floor.
- You’ll get an even transition between cement board and drywall.
- You can paint or caulk to conceal the transition.
You can avoid an uneven transition provided you take accurate measurements and work with them.
Every homeowner often fancies a perfect transition between the cement board and drywall. This can only be possible when you use the right materials.
Although drywall and cement boards have unique features, they’re manufactured of different sizes and quality.
In other words, to get perfect interior decor in your bathroom, you must use drywall and cement boards of the same thickness.
For instance, if the thickness of the cement board is. ½ or 5/8 inches, the same must be applied to drywall. This way, you will have equal size and thickness for a long lifespan.
On the other hand, the type of drywall you use plays a crucial role in the lifespan of your bathroom wall. Some drywalls are not suitable for your bathroom.
Although the drywall is not subjected to high moisture exposure, it still encounters moisture from the splash of water and other media.
Hence, it’s best to settle for drywall that’s water-resistant. For instance, MMR drywall is best for your bathroom as it has high moisture resistance.
Nonetheless, it’s best to use cement boards in your shower as it’s waterproof. Plus, you can use MMR drywall outside your shower and install it on the wall.
How Do You Finish the Joint Between Drywall and Cement Board?
Finishing the joints between your drywall and cement board is essential to give it a smooth and appealing appearance.
Before highlighting the procedure for finishing the joints, I’ll outline some tools you’ll need and their functions in the table below.
| Tools | Functions |
|---|---|
| Utility knife | To cut drywall. |
| Sanding pad | To sand and provide a smooth finish. |
| Drywall tape (mesh-style, self-adhesive) | To seal joints/gaps in drywall and cement board. |
| Joint compound | To seal gaps/joints in drywall. |
Below are the steps to finish the joints between the drywall and the cement board.
- First, attach the sticky side of the drywall tape (mesh-style, self-adhesive) on the edges of the joints/seams.
- Ensure it doesn’t cover the hole of the joint and covers only the surface/edges.
- Apply two coats of the joint compound on the joint’s surface and leave it to dry for 5-6 hours.
- Scrape the high points of the coat using a utility knife.
- Apply the second coat of joint compound inside the joint and allow it to dry for another 5-6 hours.
- Scrape the second coat with the utility knife.
- Apply the last coat of joint compound and allow it to dry for 10-12 hours.
- Use the sand pad to smoothen the coat to a neat finish.

