Have you ever noticed that your window jamb must be flush with the drywall?
It can be a frustrating problem that not only affects the appearance of your home but can also cause drafts and energy loss.
But why does a window jamb not flush well with the drywall? Read on to find out.
A window jamb not flush with the drywall can occur for various reasons, such as rough framing or a misaligned window installation. The misalignment can create an unsightly gap between the jamb and the drywall, compromising the window’s energy efficiency and reducing its aesthetic appeal.
In this article, we will explore the causes of this issue and provide some solutions to help you fix it.
Also, we’ll go over some tips for lining up your window jamb with drywall.
Ready for a Drywall Quiz?
Should the Window Jamb Sit Flush With Drywall?
When installing a window, one of the questions that often arises is whether the window jamb should sit flush with the drywall.
The answer to this question is only sometimes straightforward, as it depends on various factors such as the kind of window, the type of wall, and personal preference.
A window jamb is a vertical frame that surrounds the sides of a window.
It is usually made of wood or vinyl and is attached to the rough opening of the wall.
The jamb helps to support the weight of the window and keeps it in place.
In terms of installation, there are generally two methods for installing a window jamb which is the flush and proud installation.
Flush installation means that the jamb sits even with the drywall, while the proud installation implies that the frame extends beyond the drywall.
One advantage of a flush installation is that it can provide a cleaner and more seamless look, as the window is an integral part of the wall.
It can be particularly beneficial in modern or minimalist designs with a desired streamlined appearance.
On the other hand, a proud installation can also provide some advantages.
It allows for more flexibility in finishing the window surround, as the extra space can be used for trim or molding.
Additionally, proud installation can help to conceal any imperfections in the drywall or framing, as the jamb can cover up gaps or inconsistencies.
Another factor to consider is the type of wall. For example, if the wall is made of plaster or concrete.
Achieving a flush installation without extensive modifications may be difficult or impossible. In this case, a proud installation may be the more practical option.
Ultimately, whether to install a flush or proud window jamb depends on personal preference and the project’s specific requirements.
Some homeowners or designers may prefer the look of a flush installation, while others may prioritize functionality or ease of installation.
It’s worth noting that building codes or regulations may require a flush installation.
For instance, windows may need a flush installation in hurricane-prone areas to ensure structural integrity and resistance to high winds.
Can the Window Jamb Sit Behind Drywall?
A window jamb can sit behind drywall but requires careful planning and installation to ensure a secure and finished look.
When a window is installed, the jamb is typically flush with the interior wall surface to install the drywall directly over it.
However, installing the jamb behind the drywall may sometimes be desirable or necessary.
To do this, you must create a recess where the window jamb will sit on the wall.
You can do this by removing the drywall or plaster from the area around the window and creating a frame to hold the jamb in place.
The frame can be made from wood or metal studs and should be securely attached to the surrounding wall structure.
Once the frame is in place, the window jamb can be installed by either nailing it directly to the framing or using brackets or clips to attach it to the studs.
The jamb should be carefully aligned with the window opening to ensure level and square.
With the jamb securely in place, the drywall can be installed around it, leaving a small gap between the frame and the drywall.
The gap should be filled with a flexible sealant, such as caulk, to prevent drafts and moisture from entering the wall cavity.
Once the drywall is installed, the window can be finished with trim and molding to create a finished look.
It may require additional planning and installation to ensure the trim aligns appropriately with the jamb and the drywall.
While installing a window jamb behind drywall may seem like a good idea for a seamless look, there are advantages and disadvantages to consider before installing.
| Advantages | Disadvantages |
|---|---|
| It provides a seamless and aesthetically pleasing appearance | It offers minimal structural support for the window frame |
| It increases the window size | It isn’t easy to repair because of its location on the drywall |
| It is easy to install | There’s a high possibility of air leakage if the installation isn’t correct. |
Installing a window jamb behind drywall is viable but requires careful planning and installation to ensure a secure and finished look.
If you are considering this option, consult a professional window installer or contractor to ensure the job is done correctly.
How Do You Line up the Window Jamb With Drywall?
If you’re installing a new window, you may wonder how to line up the window jamb with the drywall correctly.
Lining up the window jamb can be tricky, but it can be done quickly and easily with the right tools and techniques.
To line up a window jamb with drywall, you will need to follow these steps:
Step 1: Measure and Mark
The first step in lining up your window jamb with drywall is to measure and mark where the jamb will go.
Start by measuring the distance from the window’s frame edge to the drywall’s edge.
Then, use a pencil to mark this distance on the drywall. Repeat this process on all sides of the window frame.
Step 2: Cut the Drywall
Once you’ve marked where the window jamb will go, it’s time to cut the drywall.
Use a drywall saw or utility knife to carefully cut along the pencil lines you made in step one.
Be sure to cut just deep enough to remove the drywall but not so deep that you damage any wires or pipes behind the wall.
Step 3: Install the Window Jamb
With the drywall cut, it’s time to install the window jamb. Start by placing the frame into the opening you created in step two.
Ensure it fits snugly and is level. Once satisfied with the fit, purchase a screwdriver and use screws to secure the jamb.
Be sure to use screws long enough to reach through the jamb and into the framing behind the wall.
Step 4: Finish the Job
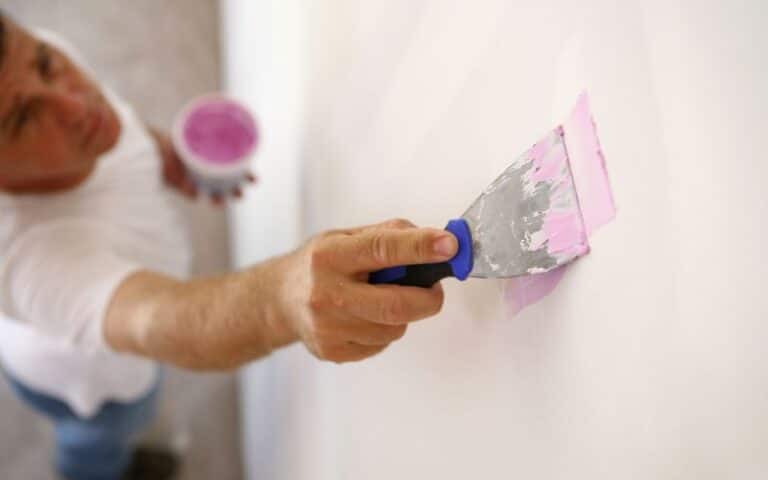
With the window jamb installed, it’s time to finish it. Use a joint compound and a putty knife to fill gaps between the frame and drywall.
Once the joint compound is dry, sand it smoothly and paint over it to match the surrounding wall.
FAQs
How Do You Fix an Uneven Window Frame?
You can fix an uneven window frame by removing the trim, checking the shims, and adjusting as necessary.
Why is the Window Frame Separating From the Wall?
The possible reasons for the window frame separating from the wall include moisture damage, improper installation, structural issues, or age-related wear and tear.
How Close Can a Door Jamb Be to a Wall?
A door jamb must be at least 1.5 inches from a nearby wall with any door above eight inches.


