Plywood is an excellent and inexpensive subflooring material. The installation of a bath or shower, however, could be complicated.
You can often install a shower bed straight into a plywood floor with no effort. Make sure the shower drain rough-in is constructed and sealed before you begin creating the shower bed.
Additionally, you need to be sure that the floor and floorboards can hold the shower pan you chose.
You can usually install shower beds made of tile, fiberglass, or your construction with no trouble upon a plywood subfloor. To preserve the plywood, install a shower curtain or a moisture layer.
Ready for a Roofing Quiz?
Can You Put Shower Mud Bed Over Plywood?
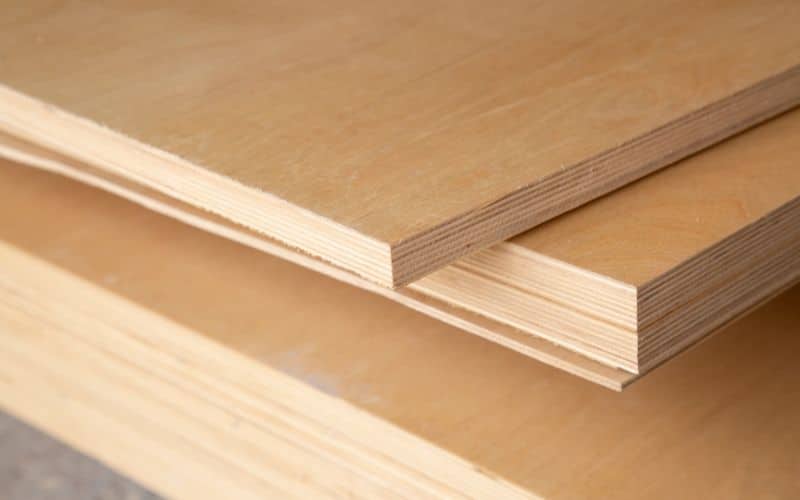
If desired, one could place a shower pan on top of a plywood subfloor. Adding a layer of mortar is almost always a brilliant idea.
For instance, if you place a fiberglass pan directly onto wood, there is a greater chance that it may condense or possibly fracture. This is because wood absorbs moisture from the air.
A layer that can absorb moisture is often placed between the shower bed and the flooring in a standard installation.
Remember that if the plywood flooring you are working on is not level, you can rectify this problem using either mortar or a leveling agent based on foam.
However, you should always make sure that your subfloor is solid and level before installing any flooring on top of it. It will guarantee that the weight is spread equally over the floor.
How Do I Install a Shower Mud Bed over Plywood?
#1. Construct a Frame
To begin making a shower mud bed, you must first construct a framework. It’s essential to elevate the frame off the ground at this point.
If you’re installing a walk-in shower, you can get away with elevating the floor surrounding the shower area as part of the shower base.
The ideal height for a shower mud bed is 6 inches. You could accomplish this by using a frame constructed from three stacked 2x4s.
#2. Install Watertight Seals
Waterproofing membranes can be applied directly to the concrete surface. However, it’s best to use asphalt felt or a sealer made of latex.
It will act as an absorbent, soaking up any moisture that could otherwise seep into the plywood and cause it to decay.
#3. Incorporate Bracing Mesh
Cover the shower’s mud floor and wooden support structure with a plastic or galvanized metal mesh. It is necessary to ensure that the concrete adheres to the wood.
To prevent scratches, tuck in any protruding edges of the metal mesh before usage. To improve the concrete’s adhesion, you should also make little waves in the mesh.
See that any protruding sharp objects do not damage the shower liner. Next, cover the timber with mesh before covering it with mortar to create a frame.
#4. Add the Priming Mortar Layer
Create a bed of mortar by mixing it as directed on the packaging. Again, minimal water use is ideal in this situation.
Less moisture in the mortar means it will dry with less shrinkage, lowering the risk of cracks in your new shower pan.
You should use a quarter to a third of an inch slope from the pan’s rim to direct water from the mortar bed and down the drain.
You also can determine the angle with the use of a level. The dimensions of the shower could also determine the angle.
For instance, a 3/4-inch rise in shower floor level above the drain level would be appropriate for a three-by-three shower bed.
To insert the mortar more efficiently, you can sketch a line around the frame. Finally, if you need a guide for the slopes, you can buy one.
A straight edge or board can draw the mortar toward the drain from a piled-up edge, creating a clean, angled line. If the pan needs to be full, continue filling it with mortar.
Coat the framework with mortar and work it well into the mesh. It is recommended that you smooth the mortar with a straight board.
Once the mortar has been applied, it has to cure for at least one night and up to two days.
#5. Set up the Liner
After the concrete shower base has hardened, you may install the shower liner. In this case, you need to ensure your shower pan has the right slope.
A shower pan on a level surface can lead to flooding and leaks. In addition, the shower liner’s care recommendations should be strictly adhered to at all times.
Nonetheless, there are recommended methods. Your liner, for instance, must be the right size without being too snug. Moreover, it is preferable to fold rather than chop the corners.
You can use silicone caulk to seal the joints. In addition, use a box knife to trim the lining to fit.
You will also need a box knife to make the drain hole. Then, to keep the waterproofing intact, cover all the cut edges with silicone caulk.
Finally, use the drain clamps to secure the liner completely. The drain riser is installed above the liner, which necessitates cutting minor incisions in the liner for the drain bolts to pass through.
After the sealant has cured, you can proceed to the next step or flood-test it.
#6. Apply the Tiler Backer Board
The tile backer board should be up half an inch higher than the shower liner. When installing the shower line, be careful not to puncture it with sharp objects such as nails or screws.
The bottom section of the backer board must be put first, while the upper section may be added later.
#7. Place the Final Covering
The top mortar layer must be 2-3 inches thick and slanted to match the current slope of the shower pan.
In this case, a homogeneous layer of mortar may be formed over the preexisting pan by following the current guidance.
Spend more time polishing this layer if necessary. Additionally, you may need to modify your drain throat to account for the combined thickness of the top layer and the tile you install on top.
You may wish to have the shower drain ready to double-check your estimates since its height should be identical to the tile.
Apply the same coating on the shower curb after you’re done. You can add layers of wire mesh if more support is needed.
Get a polished look by using a finishing trowel. Still, a big board or a straight edge would do the trick, too. Work from the rear to the front to get the most satisfactory outcomes.
#8. Fix the Cement
The concrete has to cure for a whole day. This usually takes approximately 48 hours. Afterward, you could use Thinset or an equivalent grout to start setting your tiles.
Upsides and Downsides of Putting a Shower Mud Bed Over Plywood
Putting a shower mud bed over plywood has a few upsides and downsides.
#1. Pros
- One benefit of a mud bed is that point load considerations do not limit the tile size.
- There are several benefits to using a pre-formed shower pan, including that they are simple to install and need no cutting or measuring.
#2. Cons
- Since a mud bed is designed to retain moisture, mold and mildew are among the most significant drawbacks.
- Wet mud in a shower may be uncomfortable to stand on, and a mud bed requires a steeper slope to direct water to the drain than is ideal for the flooring.
- It takes more time to construct a mud bed application, and it also takes longer for the application to dry, increasing the total amount of time needed to complete the project.
#3. Pros and Cons of Shower Mud Bed
| Pros | Cons |
|---|---|
| Low material cost | Absorb moisture |
| Flexible designs | Requires a professional |
| Liability- Pan liner | It consumes a lot of time during installation |
Conclusion
Putting in a shower mud bed may not seem like much of a project. Still, it will take many days to finish. You can install a fiberglass pan in a shorter time, but it is also less sturdy.
In any instance, the plywood flooring has to be safeguarded with proper waterproofing and a shower liner.

