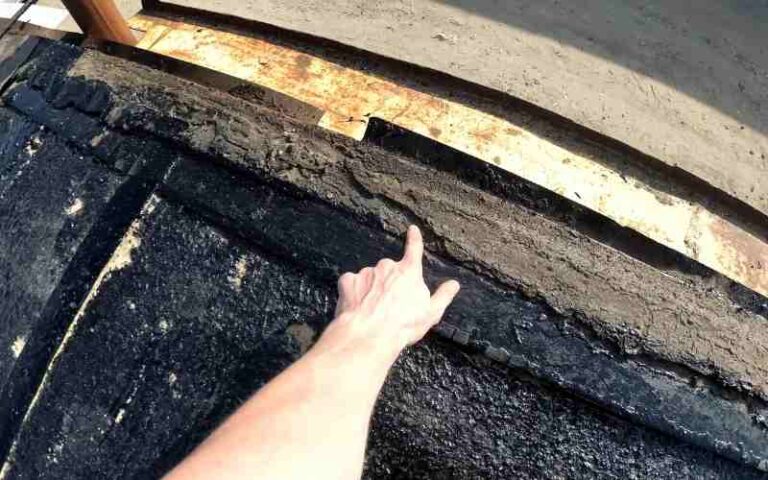
Home is the best place to relieve all the day’s stress and relax. For this reason, you want your house to suit your taste in all aspects.
However, adding a room or two to your house, there can be roof leakages. This issue can be a very frustrating situation.
You probably tried to fix the roof leaks yourself. You’re not alone. Many people wonder why and what to do if the roof leaks where the addition meets.
Several issues make the roof leak where the addition meets the house. Some of them include misaligned screws, stack flashings, seams and overlaps, and curb flashings. In cases of accidents, you’ll also get insurance for such leakages. However, you can fix these issues easily with professional help.
In this article, I’ll explain why roof leaks where the addition meets, how to fix it, and whether insurance covers these leakages.
By the end, you’ll be able to tell if your roof is leaking and provide the best solution quickly.
Ready for a Roofing Quiz?
Why Does My Roof Leak Where Addition Meets the House?
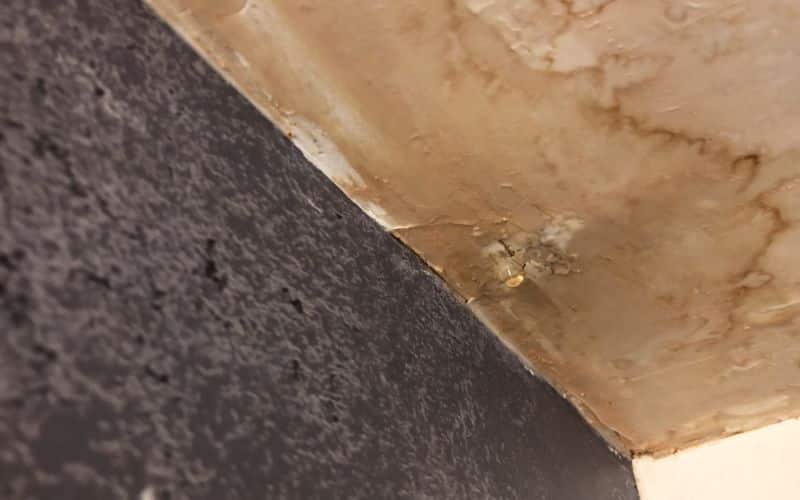
Several issues can result in leaks where the addition meets the house.
Most of these leaks occur as a result of unskilled professionals. However, other issues warrant it.
Such issues include;
- Misaligned screws
- Stack flashings
- Seams and overlaps
- Curb flashings
#1. Misaligned Screws
This problem can be unnoticeable at first, but it could become a problem in the future.
Misaligned screws at places where addition meet could cause minor leaks in such areas.
Since these screws are already misaligned, frequent expansion and contraction can cause them to loosen up and fall off.
These screws can cause the roofing sheets to open up and cause leaks.
Also, the spaces left by such screws make the roof leak. If left unchecked, the roofing sheets held by such screws can entirely fall off.
#2. Stack Flashings
Stack flashings are often in areas where vents or pipes come out of the roof. You could have such pipes or vents in areas where the addition meets in the house.
Stack flashings have a lifespan of less than half the roof itself. This situation makes them fail faster than the roof. Once they fail, the roof begins to leak in such areas.
#3. Seams and Overlaps
Seams are joints on the roof where roofing sheets, tiles, or panels meet. There are tiny unnoticeable spaces that could hide after the addition construction.
These spaces expand over time and cause leakage on the roofs. Water gets into such spaces over time and causes leakage.
At points of addition on the building, it can create overlaps due to unequal walls or inaccurate woodwork.
Overlaps can also occur when unequally placed roofing tiles or roofing sheets.
#4. Curb Flashings
Although this is uncommon for residential buildings, install HVAC at points of addition on the building.
Before the HVAC unit installation, place a roof curb so you can place the unit.
The area surrounding a roof curb is prone to leaks. Flashings normally undergo installation around the curb, but even when done currently can still have leaks.
Water can get through over time, especially on the uphill side of the curb.
How Do You Fix a Leak In a House Addition?
There are several ways of fixing a leak in a house addition. However, it is important to know that the professional handling the problem matters.
Fixing Leaks in a house addition is not so expensive. Time, resources, and analysis are necessary to repair properly.
Below are the ways of fixing a leak in a house addition.
#1. Location of Roof Leak
Before venturing into fixing a roof leak, you must locate the leakage point. This statement is important to fix each leak without leaving out any.
In addition, you can move around your house during severe rainfall to confirm leakage points.
The presence of debris on the roof indicates that the roof is leaking.
More to this, you can also check for walls stained with water. If you do this, you’ll be able to locate the source of the water spots.
#2. Architectural Shingles
A simple way to fix shingles is by using silicone caulk. However, it is not advisable.
The best way is to remove the damaged row of shingles and create a new one. Below is a list showing the processes involved in replacing the shingles.
- Dismantle the spoiled shingle.
- Spoil the caulk holding the shingles together.
- Remove all the fasteners from the damaged shingles to remove them freely.
- Check carefully if the roof decking is damaged. If it is, then replace it with a new one.
- Replace the new shingles in their original place. Make sure it is in the same space.
- Nail the new shingles. Make sure you create an appropriate gap between the nails.
- Put caulk at unsealed points on top and beneath the shingles.
#3. Metal Roofings
It is easier to fix a leaking where the addition meets the house for a metal roof.
However, it is best to contact a professional to carry it out. Here are some materials needed to fix the metal roof.
- Power drills
- Caulk
- Pencil
- Metal roofing panels
- Aviation snips
- Abrasive steel wool
- Knife
- Metal screws
Below is a list of steps to follow to fix metal roof leaks.
- Use a cleaning agent to clean the leaking point.
- Measure the area and mark it on the new metal sheet.
- Use the abrasive to scrape the damaged area to allow adhesion.
- With the aid of snips, cut the part of the new metal sheet.
- Put the sealant on the damaged area.
- Place the new metal sheet on the damaged area and press it hard
- Use screws to hold the new metal sheet on. Space screws, and don’t let them spoil the roof.
- Using the knife reduces the sealant if it is in excess.
#4. TPO Roofing
These roofs are mostly known for commercial buildings. The roof material and welder are important materials needed to complete this repair.
To complete this process, follow the following listed steps.
- Carefully clean the damaged part with a weathered membrane cleaner.
- Compare the size of the damaged area and cut the roof replacement to fit.
- Use the welder to join the roof material to the damaged part. Rollers help to hold the surfaces together while welding.
- Make sure it’s cool and properly joined. Apply sealant on the edges and allow it to dry.
The roof you’re using might also determine if it needs replacement. Here’s a table that shows the longevity of different roof types.
| Roofings | Durability(Years) |
|---|---|
| Wood roofs | 30 |
| TPO roofs | 20 |
| Metal roofs | 70 |
| EPDM rubber | 25 |
| Slate roofs | 100 |
| Copper roofs | 70 |
| Architectural shingles | 20 |
Will Insurance Cover Roof Leaks Where There’s an Addition To the House?
Insurance covers roof leaks where there’s an addition to the house. However, if the leak is your fault, the insurance cannot cover it.
You need to ensure your insurance policy contains privileges such as roof leaks. If not, you shouldn’t be expecting to gain insurance services for a leaking roof.
In addition, homeowners insurance covers more points, such as the following listed below.
- Fire burns during violent riots and protests.
- Natural disasters especially cause explosions.
- Lighting.
- Theft of car.
- Damage when vehicles run into the house.
- Damage caused by an electric surge.
Note the points mentioned above are natural or sudden occurrences. However, a deliberate or careless action won’t get insurance benefits.
Conclusion
In conclusion, the issues that result in leaking where the addition meets the house include;
- Misaligned screws
- Stack flashings
- Seams and overlaps
- Curb flashings
There are several ways of fixing leaking where the addition meets, depending on the type of roof. Insurance won’t cover roof leaks if it isn’t an accident but the owner’s fault.

