If you appreciate nature, sunlight, and fresh air, or are just a general lover of the outdoors, then I’m sure you’d have strongly considered adding a deck to your building. But, on the other hand, you can just go for placing a roof over your existing deck.
Either way, you’d have to learn how to attach roof posts to a deck. Now, you may be wondering how you can connect strong posts to support your deck’s roof.
But especially if your deck is made of concrete, pressure-treated wood, brick, or composite wood decking boards.
One of the best ways to attach roof posts to a deck is by using a post anchor. This anchor should be able to connect your roof post to the deck in question excellently. Also, add some considerable blockage to make it stand better. Also, ensure to use the appropriate fasteners to hold to enhance the strength.
Ready for a Roofing Quiz?
Do I Need a Permit To Put a Roof Over My Deck?
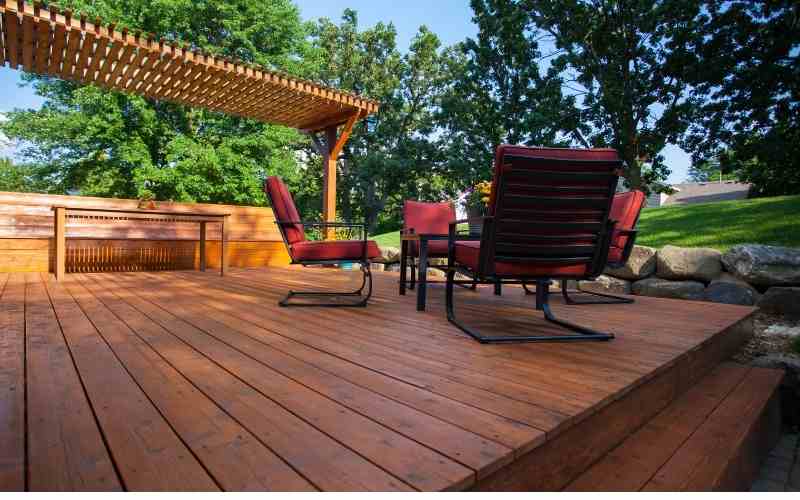
You will need a permit if your deck goes beyond 2.5ft above ground level or if it’s required to cover at least a 200 square feet area.
This permit serves to standardize requirements for decks and roof posts, thus, ensuring safety for the residents and the environment. The local building code stands whether your patio(deck) is attached to your house or freely placed.
If your deck doesn’t reach these specified parameters, you may not need to apply for a permit. Going ahead to build a roof over your deck without a permit if they meet these parameters might incur some consequences, which include:
#1. Missing Out On The Trained Eyes Of A Professional
You might skip many vital factors as a layman that an expert wouldn’t. And this is key for safety reasons. For example, you don’t want a roof post pulling away from a ledger board as you relax under it? Do you?
#2. Tearing down the deck
You don’t want to spend so much on building and roofing a lovely deck, only for the government to order it torn down all because it didn’t satisfy a code.
#3. Back Taxing
It’s better to pay your taxes monthly than to be caught in the neck by a one-year property tax because the city discovered you hadn’t gotten a permit.
#4. Lack Of Insurance
Your insurance company would require a permit to cover your deck. If perhaps, an accident related to the deck occurs, and someone gets injured, you might pay the hospital bills.
Your city or state laws will determine what requirements you’d need to meet to get your permit, but some are general. Here are a few:
- A drawing of your desired deck and, if possible, its attachment to your building.
- Measurements of your compound.
- Height, length, and width of your deck, and where you’d be joining the posts.
- Thickness (4×4, 6×6, etc.) and spacing between roof posts.
- Location and width of stairs.
- Height of railing.
- A list of materials.
- The footing you would use — maybe concrete or screw piles.
The best way to obtain a permit will be to call the reviewer’s office to know the state of things before going, as sometimes you might be asked to submit your papers, and you won’t get feedback for weeks.
It also helps you plan when you’ll get your materials and start building your deck footings. Nevertheless, it would help if you didn’t start developing them until you get your permit.
How Do You Attach 4×4 Posts to an Existing Deck for a Roof?
The easiest way to attach a 4×4 post to your deck is to use a Titan Post Anchor. This high-grade steel anchor is a strong connection between the posts and the deck.
To get a strong attachment with the Titan Post Anchor, you must have about four inches of blocking or other substructure under the post location.
The first step is to check the posts with the anchor and trim their four sides to ensure they fit in seamlessly. If the fitting is too tight, it can cause the post to crack.
The next thing would be to open up a hole under the bottom of your deck post by using a Hole Saw. After joining both, fasten the anchor to the deck with four structural screws.
With the fasteners, you can then fix the top portion of the anchor into that opening. We recommend using structural screws like the GRK RSS screw if the deck is wood or composite decking.
While for a concrete patio, we prefer concrete screws like the Caliburn XL Screw from GRK.
Cedar and pressure-treated lumber are the best wood choices for 4×4 posts. Though Cedar doesn’t work well with a strict budget, it’s naturally resistant to insects, rot, or decay.
Its durability and strength are also exceptional for building construction. However, pressure-treated lumber is more affordable and very strong, and will last over a long period.
It’s also essential to note the importance of coating your attached roof posts with grease to preserve their health.
I recommend the Penofin Exotic Hardwood Stain for this job because it penetrates the wood and allows for its proper ventilation.
This stain contains the potent, water-resistant Brazilian Rosewood oil, which helps the wood maintain its flexibility while resisting cracking, peeling, or surface film formation.
Applying this stain enables you to cut the time and energy of sanding your deck posts in the future.
Related: Gorilla Glue Composite Decking (Beginners Guide)
How Do You Attach 6×6 Posts to a Deck?
6×6 posts are installed on concrete footings that rise above ground level; hence, they are rock-solid and more reliable than 4×4s.
Recently, 4×4 posts are no longer widely used as they are prone to bowing, even for decks just three feet above ground level. Therefore, we strongly advise that you use 6×6 posts to support your deck.
But if the deck goes past ten feet, you must install bracing.
Their installation process also takes a more detailed approach. For example, you can take the following steps to build a lasting 6×6 post:
- Mark out the exact ground portion where you’d need to place the concrete footers.
- After fixing and filling a concrete form on the marked portion, wait for at least two days before drilling holes from post-installation in it. This waiting is to prevent the concrete footer from cracking later on.
- During installation, the post’s side should flush with the outer part of the deck.
- With the aid of a level, draw out the post’s corners on the concrete; and draw out its outline using a square.
- Place the post’s base on the portion you inscribed, and draw out a circle where the lag screw of the base will go.
- Bore a hole into the circle on the concrete with a heavy-duty hammer drill, which will be more effective and easier than the regular ⅜-inch drill. Lift the drill intermittently to remove the dust in the hole.
- Install the post’s base to fit your lines properly, then drop the sleeve anchors inside the holes.
- Using a crescent or socket wrench, tighten the nut. This tightening makes the anchor’s sleeve expand and makes a firm grip on the concrete.
- Install a post-to-beam connector on the beam above (underneath the deck). Use a plumbline to ensure it aligns perfectly with your post base.
- Measure the distance between the deck above and the post base below. Cut the 6×6 into this length, subtracting about 1/16 inch to make up for imperfections in cutting. Then, drive the 6×6 in place using a hand sled, and fix all the required nails to get a firm and secured post. Check vertical alignment and remove all temporary supports.
Summary
Attaching roof posts will give your roof and deck the maximum support they need to last long and provide your needed comfort, even through the harshest weather conditions.
Getting the best results will require choosing the suitable wood material, measurements, and quality check by your city’s property inspection body.

