In construction, every step has to be followed properly and done with all diligence. Little construction mistakes could turn out to be big issues one day.
Attaching sill plates to steel beams is easy but requires attention and good work knowledge.
A guide often comes in handy. Once you follow it to the letter, you’d have no issues.
Attaching sill plates to steel beams is an easy process that requires only a few procedures. All you need to do is get the appropriate sill plate sizes to go with the steel beams. You may also use hangers along with the joists to tighten the connections further. But the joists alone would work perfectly too.
This article contains everything you need to know about Attaching Sill Plate To Steel Beam.
Ready for a Roofing Quiz?
How Do You Attach Sill Plates To Steel Beams?
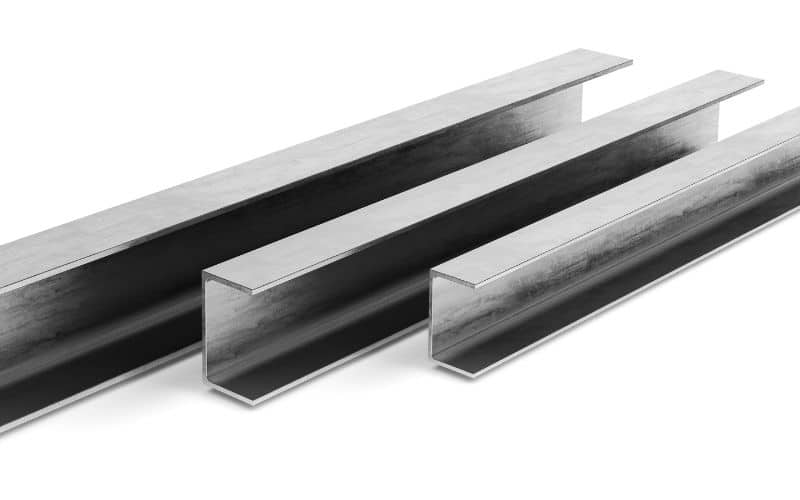
Attaching sill plates to steel beams is a process that requires time and attention. It is important to ensure everything goes right.
Ensure to take your time and study the procedures properly before you begin. First, here are the materials and tools needed for this process.
| Materials | Tools |
|---|---|
| Steel Beams | Lag bolts |
| Pressure-treated lumber wood for sill plates | Hammer drill |
| Measuring materials | Hex-head key |
| Top mount hangers | Joist hanger nails and hammer |
Here is a step-by-step guide on attaching sill plates to steel beams.
Measure the Length and Width of the Steel Beams: Use the measuring materials to measure the length and width of your steel beams.
Ensure you take the measurements of the right side where you’ll be attaching the sill plate.
Cut the Sill Plates: Use the measurements of the steel beams you’ve taken to cut out the sill plates. Ensure the sill plates are not too big or too small.
Remember, the main purpose is to give the building an even, flat surface.
Drill Holes Through the Steel Beams: Not all drills can drill through steel. Use a hammer drill with steel drill bits for the process.
Since these drill bits are particularly for steel, it should be easy to drill through the steel beam. Give a 4-6 inch space after each hole.
Drill Similar Holes Through the Sill Plate: Drilling through the sill plate will ease your work as you try to install the bolts.
Ensure the holes on the sill plates are similar to those on the beams with 4-6 inch spaces.
Bolt the Sill Plates To the Beam: Lag bolts are perfect enough for this attachment. Lay the sill plate onto the beam and drill in the lag bolts through the sill plate into the beam.
Use a hex head key to secure the connection. After this last procedure, you may decide whether to attach hangers or not.
If you decide to attach the top mount hangers, use joist hanger nails to attach the hangers firmly.
Are Sill Plates Good For Steel Beams?
Sill plates work perfectly well with steel beams. Sill plates are long pieces of lumber, but they work well with steel beams.
Although different, sill plates and steel beams have certain characteristics that allow them to work together.
Sill plates are mostly pieces of lumber wood. A direct connection of sill plates to the steel beams allows a proper frame construction on the building’s foundation.
Sill plates web on the steel beams to form the wall of buildings gives the building a higher level of stability than the beam itself.
That is why sills are necessary with steel beams. Therefore, it is proper to say sill beams are a suitable intermediary between the foundation walls and the building.
It supports and enhances the different characteristics of the steel beams and the wooden or concrete frame above it.
Sill plates are excellent for steel beams. Also, the attachment of sill plates to steel beams is easy and does not require too much effort.
Once you read through the guide, you should have no problem with the attachment. Furthermore, sill plates create a flat and even surface for the concrete.
Once you measure and cut the sill plates rightly, you’re sure to get an even surface to balance your building right.
How Do You Attach Top Plates To Steel Beams?
Attaching top plates to steel beams is just as easy as attaching sill plates to steel beams. Although most times, the top plates are double and attached to studs.
You can decide to attach the studs to the top plates to make a complete frame before attaching it to the steel beam.
Or, you could attach the top plate to the beam first and then the studs afterward.
Whatever option you decide to go with out of the two, the procedure remains the same. Below is the procedure for attaching top plates to steel beams.
#1. Get the Necessary Tools and Materials
Firstly, the wood for your top plate should be pressure-treated. Pressure-treated lumber is the best option if you look at construction lasting for years.
Pressure-treated lumber is resistant to water, moisture, fungus, and insects. They are also very durable and easy to use.
Secondly, the tools you’ll need for the process are as follows;
- Hammer drill
- Lag bolts
- Hex-head key
#2. Cut Out The Top Plate
The top plate has to be the same width as the studs and bottom plate.
Therefore, ensure you cut out the top plate based on your measurement of the studs and bottom plate.
If attaching the top plate before installing the studs, ensure you cut out everything at once.
It would be easier to measure and compare the widths on the ground than when they’re attached.
#3. Drill Similar Holes In the Top Plate and Steel Beam
Use a hammer or any strong drill to cut through steel to make holes. Make holes of similar sizes on both the top plate and steel beam.
Ensure to maintain the distance from one hole to the other on the plate and beam. Also, ensure the holes are not too big so the bits can fit perfectly.
#4. Drill In the Top Plate To the Steel Beam
Lag bolts are very strong bolts perfect for connecting wood and steel. With the holes you already drilled, it would be very easy to drill in the lag bolts.
Ensure you drill the bolts into the holes you’ve made. You’re done with a hex head key to secure the connection.
Related: Flitch Beam 20-Foot Span (Beginners Guide)
FAQs
#1. What Should Be the Length of the Sill Plates?
It depends on the length of your beam. Most sill plates, however, come in sizes of 2×4, 2×6, 2×8 and 2×10.
#2. How Thick Be Should Sill Plates?
Sill plates should be two inches thick at most. Two inches or 55mm is the right thickness for still plates.
#3. Top Plates Vs. Sill Plates
While top plates are double timber plates on the top of a wall, sill plates are the basic horizontal bottom timbers carrying the wall.
Conclusion
Sill plates are very important aspects of buildings because they play a role between the foundation and the building.
That is why properly attaching it to steel beams is important.
However, when attaching sill plates to steel beams, you’ll need tools that can work on wood and steel since steel is hard to cut through.

