The gambrel roofs are common designs in many modern homes. This is because apart from the fact that they are generally beautiful, the roof’s steep slope provides durability and protection from many elements.
While the flatter top that it possesses serves as an additional storage space or upper room.
A gambrel roof is known to have two different pitches with two slopes on each side and the lower being steeper than the upper.
Due to the difference in angle, there is a high possibility of leakage from the point where these two roofing materials meet, and that is where the transition comes in.
The gambrel roof transition system is based on the unevenness in the pitches of the upper and lower part of the gambrel roof. The gambrel transition trim is used where the two slopes meet to prevent leakage. So, the basic idea behind the gambrel roof transitioning is placing a transition trim where two pitches are to avoid leakage.
Ready for a Roofing Quiz?
What Is Transitional Flashing?
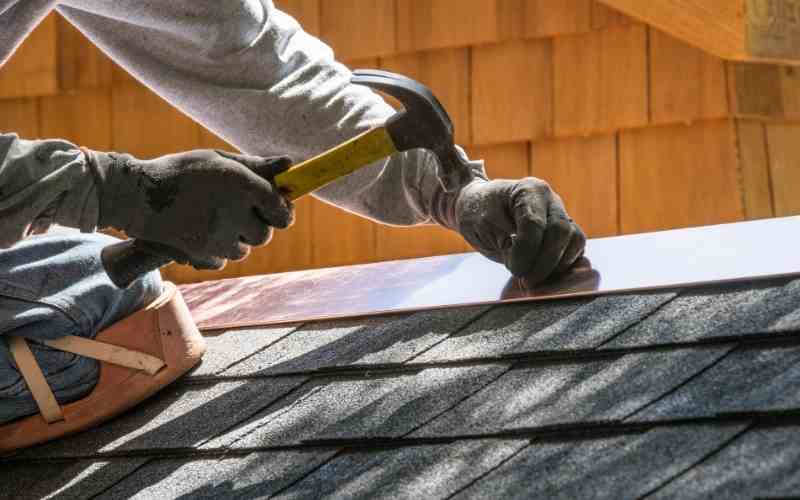
A transition flashing is carried out to prevent leakage at the point where two pitches meet.
To attain a proper transition, you must seal the lower side of the roof with outside closures and the upper side with inside closures. Before installing your transition flashing, it is essential to note a few things.
Before transitioning your gambrel roof, you should note that the bend of the trim is not meant to be aligned with the transition of the roof. However, the bend of the trim should be aligned with the roofing panel.
For an easier transition, you should line up your low trim to a higher one and use an erasable marker to trace the outline and wipe it off when done.
How Do You Transition a Gambrel Shingle Roof?
Shingling a gambrel roof isn’t so different from shingling a roof with a constant pitch.
Instead of using flashing to seal the roof edges for the shingle roof, you treat it differently by using pretty flexible shingles to keep your roof waterproof and lightweight.
Shingling your gambrel roof is as easy as ABC as long as you follow these few steps:
#1. Shingling The Lower Pitch
You should shingle the lower pitch between those two just like doing with any other roof by offsetting the gats created in the tabs with each row and overlapping shingles covering the nails you used to cover the previous row have already been shingled.
Again, it would be best to work upwards from the middle of the roof or the bottom corner with shingling.
This would’ve created a triangular working edge, making your work much more accessible than straight across the row.
It will help if you keep applying your shingles until you get to the top row’s upper tabs. You are almost there if you notice that the shingles extend over the lowest edge.
#2. Shingling The Upper Pitch
After the lower part has been done, you should place your shingle on your roof’s top working edge to ensure it goes past the edge of the lower pitch.
You can choose to use your knees to hold your shingles for ease, bend them over to lie flat on the top pitch, and then nail them.
After nailing it, you can now release your knees from the shingles and notice how it remains malleable and holds still without it being fixed to the down half of the roof.
You can now straighten your shingle, and while exposing the lower side, apply a shingle adhesive to the lower part and hold it into position.
You can still hold on to the edge part as long as the adhesive is not yet set and let go when it can finally stay on its own.
Also, you can repeat this process for your other shingles, and once all sides are finally shingled, you can now apply your ridge cap along its peak.
This is a pretty much DIY process; however, it is more efficient if you’ve got someone else around to give you a hand while you’re at it. This is one of the most demanding parts of transitioning a gambrel shingle roof.
What Are The Disadvantages of The Gambrel Roof?
Even if the gambrel roof is used in a lot of modern houses due to its architectural punch, it is not a perfect roofing system and comes with a few disadvantages like;
- Being poorly resistant to snow puddles, the lower and flatter side of the gambrel roof doesn’t accommodate snow, and it shows. When the snow falls, it gathers at the lower slope of the gambrel roof and, if not mitigated early, might cause a lot of damage and even collapse.
- They are prone to uneven wear. Since you can use various materials to make the gambrel roof, it is susceptible to uneven wearing. That is why checking on it is an excellent way to maintain the gambrel roof.
- They are not retrofitting-friendly. Another bad news about this roof is that when it starts to wear off too much, it cannot be replaced easily or restructured, and even when you try to leave it to contractors who seem familiar with the job, they might end up ruining the whole thing.
- They are more prone to dust. In some areas where the gushes of wind are heavier than in others, it is advisable to find a way to clean the layers of the steeps regularly. Consequently, due to the nature of the gambrel roof, the steeps can attract dust faster and, if left for a long time, cause damage.
- Ventilation issues. Some designs provide enough headspace, but the major problem now is that ventilation becomes the issue. Due to the large and non-ventilated roof, adequate ventilation might be an issue as the air breathed out might be the one you still breathe in.
The design of your gambrel roof also matters and not only the appearance. For example, the gambrel combination involves a mix of the gambrel roof and another type of roof, the dormer gambrel.
If you want to accommodate some natural light in your home, the overhang gambrel provides you with an aesthetically pleasing view.
The gambrel combo, just like a buy one, gets two free designs; you can mix it with another type of roof mentioned here.
The gambrel roof has a unique architectural vibe, and only a few materials are used in its construction. The sleep slopes of the gambrel roofs provide you with a better drainage structure.
So, it allows rainwater to efficiently run into the sides of the gutter without causing a mess.
The gambrel roof lasts longer than many other roof types, and as a matter of fact, they can last for decades before there is even a need for refurbishment.
Just this feature provides a great edge over other kinds of roofs and pushes more people to choose it.
Conclusion
The gambrel roof is said to have two unequal slopes, and the lower one is said to be longer and steeper. Transition is the point where these slopes meet at the top.
After the top of these slopes come together, there might be a little space that may later accommodate leakages.

