Roof flashing is essential in construction, so a poorly installed flashing can cause many problems, especially leaks.
Installing roof flashings shouldn’t be a problem if you understand and follow the correct procedure.
However, there are many ways to install step flashing, but they depend on the location and material you are using.
It is well known that the roof flashing is always installed against the wall, but in some cases, it may be necessary to place the flashing over the siding.
Retro flashing entails installing roof flashings onto an existing roof or siding. A roof repair or remodel may require a roof retro flash instead. It may seem a little impossible, but it is easy to do retro flashes.
To install the roof flashing against the wooden siding, you need to cut a grove in the siding and flash the intersection of the roof wall. Then, you can remove the nails from the nearest siding and slide the flashing under it.
Ready for a Roofing Quiz?
Steps to Install the Roof Flashing Against the Wood Siding
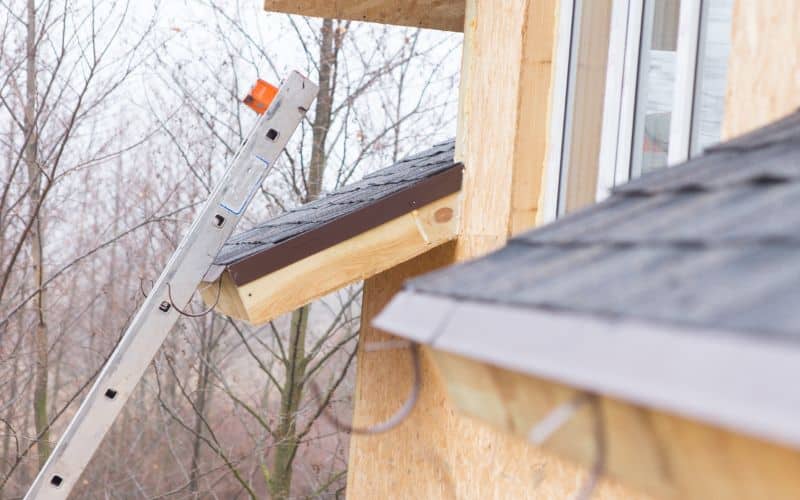
Here are the steps to install the roof flashing against wood siding. These steps also apply if a corner of the wall above the roof.
- The first piece of flashing should rest on a shingle, so you need to install the shingles until it completely covers where the wall begins.
- Measure a 45-degree line on the tin cuts from any angle in the center, cut out the line, and trim along the center crease. You would have a triangle-shaped cut. The cutout triangle makes it easier to bend the flashing around the corner to get a neat corner flashing piece.
- Sit the flashing piece in the corner and fold it firmly. The flashing corner piece should have an extension of at least eight inches above the roof tiles. Next, nail the flashing on each edge side with two nails to hold it in place.
- Place another piece of flashing and fold it back to cover the corner flashing partially.
- Apply sealant between where the flashings partially cover each other. Hammer a nail high into the bottom of the flashing so you can cover it with the next row of shingles.
- Install an entire shingle course above this flash
- In the place where the next course of shingles would begin, it is necessary to apply a piece of step flashing. First, apply sealant where the flashing would be and firmly seat it. Make sure this piece of flashing overlaps the first one by at least three inches.
- Keep applying the shingles and flashing from that point until you get to the top of the roof.
- When you get to the top of the roof, cut a piece of step flashing in half. Fold one side of it and cut it into a shape identical to the tip of the roof.
- Secure the folded flashing in place with roofing concrete. Next, insert a nail into its base and cover it with a tile.
Can Flashing Go Over the Wood Siding?
In some cases, it is possible to install the roof flashing over a wooden siding is possible. However, installing the flashing step behind the siding is a rule of thumb.
In a situation where you need to install the flashing over the siding, you should cut.
It is always recommended to install the step flashing against the wall behind the siding so that the fitting can cover the top of the flashing on the wall.
Should There Be a Gap Between Wood Siding and Roof?
Yes, there should be a gap between the roof and the wood siding because the siding materials naturally expand and contract during temperature changes.
The gap gives the material enough room to expand and helps prevent damage. If there is not enough space, the siding could split, warp and warp in many ways.
There should be a gap of approximately 5/16 inches between the siding and 2 inches between the siding and the edges of the roof.
To hide the gap, you can paint it with matching aluminum flashings to give it a clean look.
Proper installation and maintenance can make your siding last longer, so you should always ensure you give it the space it needs.
In addition, there should be a gap between the siding and the shingles to prevent moisture from getting trapped.
Trapped water can lead to rot which damages the wood siding. The gap also helps the wood to properly dry if it gets wet, which results in better durability.
Best Way to Retro Flash Roof Against the Wood Siding Wall?
The best way to retro flash a roof with wood siding is to flash the roof wall intersection by cutting out a groove in the siding.
Another way is to pull out the nails in the fitting and pass the flash under the moisture barrier.
Here are the steps to retro-flash a roof.
- Cut a gap of approximately 6-1 / 4 “in the siding, and then use a removable trim edging to cover the gap.
- Measure 6-14 inches from the top and base of the roof and remove the siding nails from the chalk line.
- Cut the siding with a curved saw, and avoid cutting the plywood behind the siding. Remove the cut piece and install the step flashing.
- Prime the ends of the clapboard cut out of the siding, and install a flashing drip cap underneath it. The purpose of the drip cap flashing is to protect and cover the joint above the trim edge.
- Install the trim board firmly under the drip flashing. It is necessary to keep the fasteners away from the step flashing.
- At the end of the retro flash, you would have a 3/4 inch air and drain space.
The steps above can guide you on how to retro flash a roof, but you still need to do the same for side walls.
So here are the steps to install the flashing against the side wall.
- Cut out some step flashing pieces so they are two inches long and ten inches wider than the exposed shingles. Then, fold the flashing five inches above the roof and extend the other 5 inches onto the wall. You can also get pre-cut flashings if it is too stressful to cut out your step flashings.
- Fold the flashing sides in half to form a right angle.
- Place each step piece so that it overlaps the shingles below and below the shingles above in an interweaving style. Ensure you extend the bottom edge of the flashing below the nail line.
- Hold each piece of flashing in place on the side wall with a single nail. Make sure you make it high enough for the next round of flashing, siding, and building wrap to cover it.
Things to Consider During Installing Roof Flashings Against Wood Siding
First, you need to consider where the roof joins the wall. Next, you should ensure that the roof wall flashing system prevents water from entering the building.
Next, you should consider using counter flash for its ability to direct water from the wall to the roof. Finally, you should lap the joints by four inches.
Secondly, you should consider using removable counter flashings. They are convenient and easy to install, making roof repairs quicker and easier.
Finally, make sure the water receivers are ten inches tall above the finished roof. Riglets should be able to support flashing.
Also, you need to follow the correct installation method for your flashing type. There are different types of roof flashings, and each has its installation process.
You should follow the manufacturer’s installation instructions. Your roofing material and preferences should be decisive for your type of flashing.
Finally, safety and property damage must be considered. You should remove items such as shelves, tables, mirrors, and dressers from inside the building walls.
Move any furniture or valuables from your balcony, patio, or porch to a safer location.
Then cut off shrubs, bushes, and tree branches that may obstruct the construction area. Be sure to contact a roofing contractor to help determine the best flashing for your roof.
Conclusion
After all the steps explained above, you should no longer have difficulty installing the roof flashing against the wall.
However, the installation can be confusing for someone unfamiliar with flashing and siding. It is therefore advisable to contact a professional roofer for the installation of the flashings.

