Transitioning your wainscoting to door casing can be very easy once you get a proper hang of it.
However, there can also be several complications surrounding transitioning these wall wainscoting into a door casing. So how do you transition your wainscoting from your walls into a door casing?
There are several ways you can transition your wainscoting to the door casing. One method includes using a trim piece that usually goes around the door to fill all the gaps between the wainscoting and the door casing. Another method you can use is molding which is the same as the wainscoting to cover the door casing.
Ready for a Roofing Quiz?
How Do I Change Wainscoting To Door Casing?
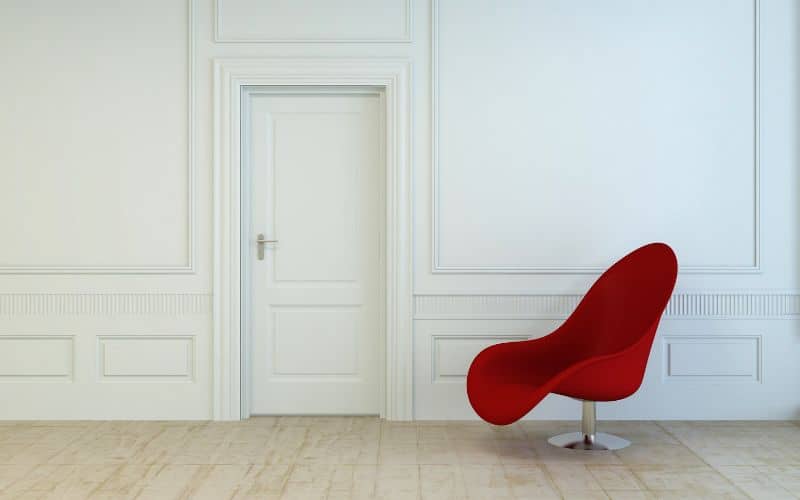
To do this, you would need a back band when casing your door for wainscoting. It would be easier for you to pre-assemble all the parts before getting to work.
Many people use the three ¼-inch baseboard for the casing, but whatever similar board you decide to use would do.
The backband is a board placed at the back of the door casing, allowing the case to transition into the wainscoting much more quickly than just back-cutting the moldings.
Along with the boards, you would need the 1/3 to be the casing, preferably 2 ½ inches wide, while the ½ wraps around it nicely.
You should place the cove molding inside the ledge, and you would use the cove molding to wrap it all up.
After assembling these boards nicely, it would solve the problem of transitioning from wainscot to door casing.
Find the good side of the molding and face it towards you. The other side is usually rough. After assembling the whole boards, you can now nail them together with some 5/8 nails.
With the correct assembly, you already work out the end finish for the external corner; all you have to do is appropriately glue it on.
How To Stop Wainscoting On a Door?
Ending your wainscot at the door is very straightforward. To terminate your wainscot, you must be familiar with the room and the type of door used.
You have to determine your panel dimensions; you can do that with whatever wooden material you have around you. Push the board against the edge of your door.
If you built your wainscot in the unit, wherever these units terminate is known as the endpoint.
Note that every corner endpoint of the room varies, and you have to establish the endpoint of the wall corners the same way you did for the edge of the doors.
You can use a 1/4 board and a pencil to establish the endpoints on both corners of the wall.
One board would have to be placed down on the opposing unit when placing the boards on the corners.
Let’s say you are using a ¼ board; 2/3 quarters would be revealed on both sides of the corners of the wall.
Of course, you wouldn’t want to be doing that, so you have to use a longer board on one side.
With that, you would have about a 2/3 quarter reveal on one side and a 3 ½ quarter display on the other.
Back to your doors, you have to ensure that there are no spaces left between the wainscotting panel and the door.
If you eventually have a space, you would use a rip and a baseboard at the bottom to fill that area.
How To End Wainscoting At an External Corner?
After installing the wainscot on your walls, once you get to the corner, take a thin strip of MDF and cut it at 46 degrees, leaving 3/16 left on it.
After accurately getting those measurements, you can place that at the end of the wainscot at the edge of your external corner. And it should cap off to the back, so it finishes nicely.
After capping the end, glue the MDF. Next, get your chair and wrap it around the corner to create a dead end.
Ensure that your chair ends on the flush part of the wall and doesn’t mess with the bull nose.
Ensure that you have a 3/16 Masonite strip behind your wainscot transition but ensure that it stops short over the miter.
For easier understanding;
- Measure and cut out two pieces of panels that would fit perfectly into a corner.
- Place one of the pieces on the wall and overlay the edge of the corner by one inch.
- Raise the blade on the table saw to about ¾ inch in height.
- Push the paneling over the blade to the miter edge at about 37 degrees.
- Unlock the fence and place the second-panel piece on the table saw so it aligns.
- Place these pieces of panels on the wall as though you were installing them.
- Use a hand block to sand and round the corner with 100-grit sandpaper.
How Do I Trim Wainscotting?
Wainscoting designs help create your space and walls with an elegant appearance. Apart from the design, it also helps to protect your inner walls.
Many people would love to have these wainscoting designs in their homes, but they do not know how to go about it, so how do we install wainscoting on walls; For this, you would need;
- Nail gums and hammers
- Chop saw
- Pencils
- Nail driver
- Wood fillers
- Construction adhesives
- Outlet extenders
- Level
- Stud finders, circular saws, cult gun, plus paintable caulk
- Paint, trims, and wood glue
#1. Prep the Area
You can use a pry bar to remove the baseboard from your walls. And if you intend on re-making use of the board, then you should first score the top gently.
It would be best if you scored to separate the paint from the wall to have a more precise area to work with.
If you have any electrical outlets or light switch that covers the wall, ensure that you get rid of them so you can receive your wainscot properly.
And also, if you plan on repainting the upper part of your wall or covering up any holes, you should do that before you hang the wainscot panels to avoid any paint drippings on them.
#2. Measure the Area
You should then measure the entire space around your wainscot. Again, this is a fixed measurement; yours should only go slightly above or below it.
Wainscoting designs follow the ”rule of thirds” for short paneling on a 9-foot ceiling. Therefore, the top of the panel should be about three feet high.
Higher wainscoting should be about 2/3 of the wall or six feet tall. Although it is essential to work based on rules, you should consider what works best for your space.
#3. Mark and Cut Out the Beadboard
Make the measurements you got with a beadboard and cut it out. When you measure the width, ensure that you divide the pieces correctly so you’re not left with narrow corner pieces.
Any little mistake in the measurements can cause you a lot, so you must calm down and try to be as precise as possible with your measurements.
#4. Test and Fit the Beadboard Pieces
After taking measurements and cutting out the beadboard pieces, you might need to put them in place to see if they fit without using an adhesive.
If you do not level the top of these boards as it should be, you need to shim the bottom panels.
It would help if you didn’t worry about the gaps on the bottom panels because you can cover them with baseboards.
#5. Sand and Paint Bead Boards
After ensuring that all your bead boards fit correctly, it is time to sand and paints them. Doing these before hanging these boards on your walls would be better.
Apart from making it easy, prepping these bead boards before hanging them on your walls makes your work less messy by preventing paint from getting on your walls.
#6. Prep Molding
You could buy several premade molding pieces, but you can also create your own for a custom finish. You can create your prep molding with a few trim pieces and wood glue.
The back should have an L shape to sit correctly with the wall and beadboard. To make a 45 degrees cut, make use of your circular saw.
#7. Hang Your Beadboard Wainscoting
After setting your bead boards, they are ready for hanging. You can hang these bead boards to your wall with nails and a construction adhesive.
Before hanging them, you can use your stud finder to locate the center of each stud and mark them out.
After getting the correct position, apply a generous amount of adhesive to the back of these boards and press against your walls.
Then use your hammer or nail gun to trim the nails into the boards. We advise you to nail the studs’ top, middle, and bottom.
After finishing the gluing and nailing, allow the glue to dry overnight before adding the molding and baseboards.
| Materials | Uses |
|---|---|
| Pry bars | These are used to remove the boards from the wall. |
| Circular saws | These are used to cut in degrees. |
| Wood glue | This is used to hold pieces of boards to each other. |
| Hammers | These are used to trim the nails into the gums. |
Final Thoughts
Transitioning your wainscot to fit in with your door and window designs can be quite a handful, but it would be much easier with the proper knowledge.
You have to get the correct measurements and fittings, and you’re good to go. Hopefully, this article will be able to guide you on that.

