Installing drywall yourself is challenging, especially when you are not a pro. You will encounter challenges that could make you want to scream or abandon the project altogether.
One such challenge requires applying layers of mud to cover the drywall.
Given that the mud has to dry before you can see the actual effect makes it even more tiresome. So why does drywall tape remain visible after your supposed final sanding?
After sanding, you can still see some drywall tape because your mud coating is too thin. Therefore, if you know the tape is showing or notice unevenness in the layer, apply more mud coats. However, keep the coatings thin so you do not have to worry about overcoating.
This article will explain how to properly apply mud coats to avoid seeing drywall or drywall tape after sanding; and what you can do when you find yourself in that position.
It will also consider the possibility of using paint to cover up the visible parts of the drywall.
Ready for a Drywall Quiz?
Should Drywall Tape Be Visible?
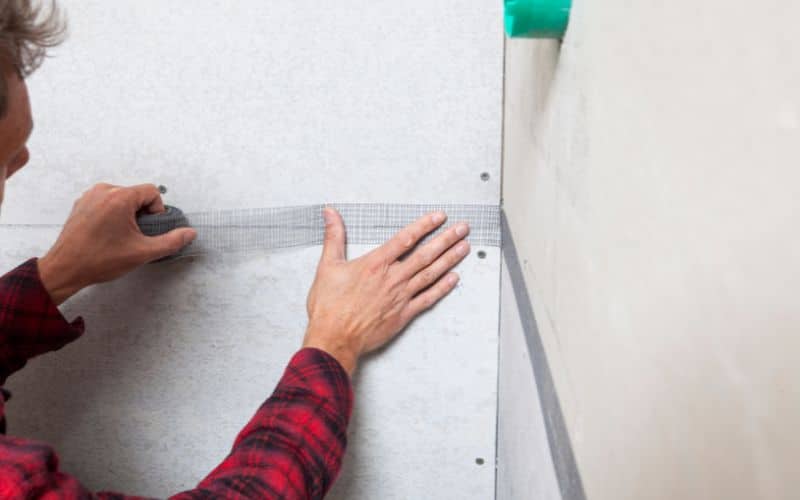
As a sign of a job well done, no part of the drywall should be visible, especially after applying the final mud coat.
You will need at least three coats when applying mud on your drywall. These are the tape, filler, and final coat.
Each coat must be well applied with the right tools and allowed to dry overnight. When dry, the next step is to sand the wall.
For the first and second coats, it is not a problem if you can still see some drywall tape through the mud coat.
However, it is vital to work on blending the layers as you work on them. This way, you will be guaranteed a seamless, uniform finish.
While smoothing your work, you should not only pay attention to the areas with tape. You should also consider the wall joints, screw holes, and corners.
Why is Drywall Showing After Sanding?
The drywall is still showing because your mud coats are too thin or not correctly applied, or you have over-sanded your dry mud coats.
If you are confident that you are applying the wall coats in the correct manner and quantity, then the problem may be the type of mud you are using.
There are at least four types of drywall mud, each with advantages and disadvantages. These drywall mud compounds are also called joint compounds.
You can use one compound. But, sometimes, you may have to combine two or more compounds to get your desired results.
Some professionals use a different mud compound at each application stage for maximum results.
The following are the different kinds of mud or joint compounds:
#1. All-Purpose Compound
This compound is pre-prepared and mixed for use. You can use it at any application stage. The main characteristics are its lightweight and quick-drying nature.
This compound is the best if you are an amateur trying DIYs. However, this compound could be better than others, like the topping compound.
#2. Topping Compound
This compound is ideal for the last two stage applications because it has a strong bond. The topping compound comes in a dry powdery form which you mix with water before you apply.
It has a smooth and strong bonding quality. Due to this texture, you can reduce the time needed for sanding compared to other compounds like the all-purpose compound.
#3. Taping Compound
The taping compound is best for the first finishing phase. The strong bonding dries harder than the other compounds, making it harder to sand.
This compound is perfect for covering up cracks and any other openings on your drywall.
#4. Quick Setting Compound
As the name implies, this compound is perfect when you must finish the job quickly. Its other names are hot mud and setting compound, available in dry powder forms.
With this mud compound, you do not need to wait overnight for the coat to dry. You can apply many layers in one day. This compound is also suitable for filling up cracks and holes.
Below is a summary of the types of mud compounds and their main features.
| Mud Compound | Main Feature | Best Stage |
|---|---|---|
| All Purpose | Lightweight and quick drying | Any stage |
| Topping compound | Smooth and strong bonding | Filler and final stages |
| Taping compound | Very firm bond and hard drying | Final stage |
| Quick Setting Compound | Dreis up quickly; perfect for quick jobs | Filler and final stages |
Another factor affecting the end product of your mud application is how well you mix the compound.
Premixed compounds like the all-purpose compound have a smooth and perfect consistency and are easier to work with than dry compounds.
However, premixed compounds are prone to spoil and grow mold. It also dries up quickly and is heavier to carry about.
On the other hand, dry compounds like taping and setting compounds are less expensive and are quicker to dry.
They are also easier to preserve since you only need to mix little portions to work with.
These advantages go with their share of disadvantages.
Dry compounds are difficult to mix, and if you are mixing a little at a time, it may be hard to maintain the same consistency throughout.
Also, you will need mixing tools, which will take up more of your working time.
Considering the types of mud available, you can combine about two compounds. This combination will give you a perfect finish that covers everything on your wall.
Can You Paint Visible Tape?
How well you can hide visible tape with paint depends on how bad the preparation work was.
Your mud application should cover all drywall tape correctly and with suitable compounds.
If the drywall finishes poorly, it will show through your painting. So, it is safer to painstakingly apply your mud thoroughly and sand it to blend out patches before painting.
Contrary to popular belief, painting does not hide finishing errors but accentuates them. Although, depending on the type of paint, some paints will be more revealing than others.
For example, glossy paints call more attention to finishing errors than matte paints. This feature makes matte paints ideal for drywall painting.
How to Fix Visible Drywall Tape?
With visible drywall tape, prevention is better than cure. Fixing visible drywall tape starts at the beginning of the job while applying mud.
Below are steps to guarantee a perfect, seamless, no-tape-showing, finished drywall.
#1. Work in Stages
No matter how small the job is, there is no way you can finish everything in a day. So, make a work plan where you execute the job in stages.
Since the paper tape is less likely to show through mud and paint, it should be your choice. Use this tape and the all-purpose compound for your first coat to cover up all seams and cracks.
Apply at least three mud coats and wait 24 hours between each application. Also, before you apply the next coat, it is best to sand the dried coat.
Sanding will guarantee a smoother application on your next coat and prevent mud build-up around ridges.
It is best to remember that proper sanding can only be done on well-dried walls. Attempting to sand a wet wall will damage your sandpaper and ruin your work.
#2. Use the Right Tools
When you want to embark on the drywall finishing journey, you should have suitable materials for every step.
You should have a complete taping set that has different sizes of knives. It is advisable to begin with small-sized knives (three to four inches) and use bigger knives with each coat.
Using the right tools certifies that you have fewer ridges to sand when you finish. With bigger knives, you can apply more mud per stroke.
Additionally, this tactic makes it easier to hide drywall seams while painting the wall.
#3. Finish Drywall Seams with a Skim Coat
While working with three coats while applying mud compound is okay, you should finish with a skim coat. The best compound to use is the topping compound.
The topping compound has a fine texture, making it easier to sand than other compounds. Also, it will help to hide any visible seams after painting.
Using the 12-inch taping knife when applying this coat for a seamless finish is better.
#4. Sand Your Seams and Prime Your Walls
At every stage, ensure you sand the wall. You can use the 120-grit, 150-grit, and 220-grit sandpaper as you progress at every step.
Moving from coarse to fine sandpaper is always best for a better finish.
Use these sandpapers in that order; otherwise, you will ruin the finish and may have to redo the work.
Finally, before painting, you should prime your walls before you paint. Wall primers help to conceal any other patches, imperfections, or textural differences.
When you prime your wall, it helps you see the areas that need smoothing, which you can fix before you paint.
Following these tips with patience and proper preparation will give you the perfect finish you desire.

