Putting tape on drywall can be frustrating and time-consuming, especially if you’re not an expert.
Regardless of how well you plan your drywall installation, you may have to tape a few joints.
How well do you understand joints and taping on drywall, and which joint layer should you tape first?
Well, read on to find out.
Tape fiberglass mesh paper over the butt joints first, then over the tapered joints and other joints. As butt joints lack a recess, you must create a layer of mud that is both thin and broad enough to blend in with the nearby flat surface.
In this guide, you’ll understand joints and how to get reliable results when mudding and taping joints.
Also, you’ll be able to differentiate between types of joints on drywall.
Ready for a Drywall Quiz?
Which Drywall Joints Do I Tape First?
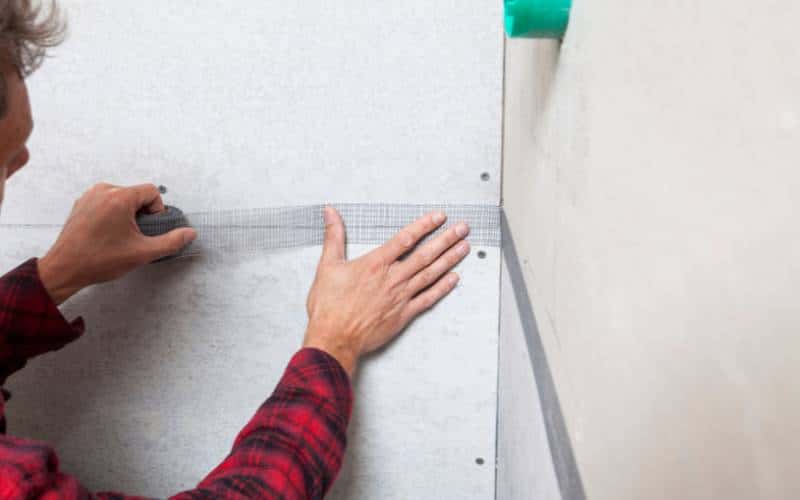
Cover the butt joints first with fiberglass mesh tape, tapered joints, and other joints.
Many drywall installers contract their taping to professionals to avoid dealing with unpleasant and frustrating components, such as butt joints.
The second form of the joint is the butt joint, the least desirable of the two. It happens when the drywall board’s breadth sides come together.
These sides are the same thickness as the remaining drywall board. As a result, tapping these kinds of joints is far more challenging than tapping tapered joints.
The joint will have a noticeable bump in the wall if the tape and coating are done incorrectly.
The table below shows how to differentiate between butt and tapered joints.
| Butt Joint | Tapered Joint |
|---|---|
| It uses less mudding work | It requires a lot of mudding work |
| The tape is visible after mudding. | It covers up the seams, gaps, and tape. |
| Difficult to create | It is easier to work with |
| It is versatile and not limited to just corners and edges | It will be hard to access if there’s a mistake with the taping. |
How Do I Tape Drywall Joints?
If you’re not a pro at taping drywall joints, you can learn a few tips and steps to achieve a flawless finish.
Before taping drywall seams, you must purchase the proper tools, such as a utility knife, drywall knife, joint compound, tape, and a mud pan.
You don’t need any skill or talent to tape drywall joints. However, you can produce smooth walls and invisible seams with the help of these step-by-step instructions.
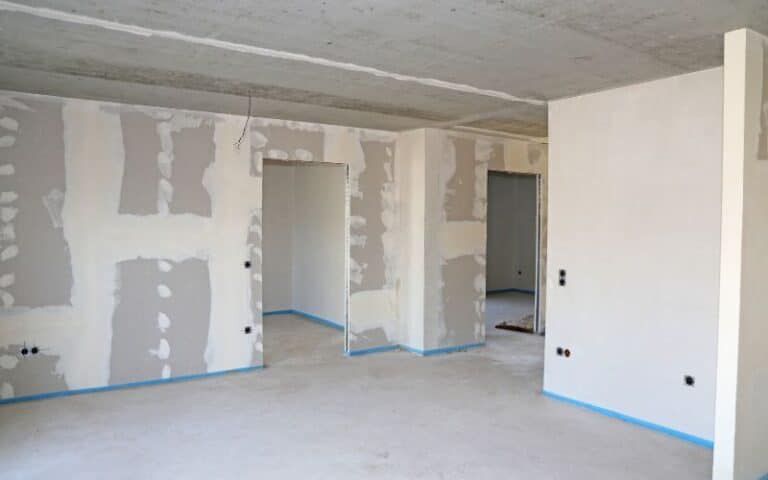
Fill the seams and Gaps.
Filling seams and gaps using a Setting-Type Compound is the first step.
Then, in your mud pan, combine the joint powder compound with water to create a paste-like consistency.
Squeeze the compound into gaps and seams wider than roughly 1/8 inch afterward. Ensure you maintain an even or slightly lower fill level than the surrounding surface.
Spread the Joint Compounds in Joints
To fill the joint pocket, spread a setting compound. The tapered edges on tapered drywall joints create a pocket for joint compound and tape. Thus it’s crucial to know this.
It happens because there is enough room for mud and tape; they are surprisingly simple to fill.
The key here is immediately filling the joint with the compound surface around it on your first application.
#1. Put in the Tape
Using a stroke of the taping knife, lay the tape on top and insert it into the compound. Then, using a little mud with your knife, apply a thin layer of mud over the tape.
#2. Mud and Tape the Corners
Around each side of the corner, spread a ribbon of mud about ⅛ inch thick and two inches wide.
To arrange the paper tape precisely in the corner, sharply fold it, tuck it and then delicately run your knife over both edges.
#3. Tape Corners to Walls
By placing one end of the taping knife on the tape and the other on the wall, you can make a clean, precise crossing to embed the tape.
#4. Fill in the External Corners
Put enough mud on the ground to fill the corner bead pockets. Then, slide your 6-inch knife along the drywall and the beads on opposite sides.
#5. Tape Butt Joints
Tape the butt joints completely with fiberglass mesh paper to prevent lumps in the wall.
#6. Cut Out the Loose Tape
Trim any loose drywall paper to avoid bumps and bubbles under the tape.
Cut into the joint on both sides to form a shallow V-shaped groove.
#7. Apply Joint Compound
Spread sufficient amounts of mud about 4 inches wide and 1/8 inch thick over the joint.
#8. Tape in and Smoothen
Using only a few small strokes of your knife, lay the tape on top and embed it so that only a little dirt shows underneath.
Put a thin second layer over the tape to taper the extra mud away from the center, and gently stroke down each side.
To conceal the tape bump left behind when the compound dries, taper the edges out by a foot or more with subsequent layers.
Should You Prefill Drywall Joints Before Taping?
Yes. Prefilling drywall seams and corners is one of the preparations for drywalls you must perform before taping.
Apply a small layer of hot mud to any drywall joints or openings to prefill them.
To achieve this, apply a powdered joint compound after being combined with water.
Before prefilling, check that all your joint screws are correctly positioned, then smooth and hide any uneven surfaces.
Moreover, prefill helps keep each screw in place. Make sure to fill any gaps larger than 1/8 with the compound.
Also, search for un securely fastened parts, then add the required screws.
Remove any missing screws and tighten any screws that are misaligned.
Use the utility knife to remove any loose paper or damaged areas from seams, particularly butted edges.
Over damaged areas that will also receive a brief application of setting compound, a mesh tape is applied.
As a result of these actions, the tapers’ effectiveness will be significantly improved.
Although gaps of 1/8 inch or more between drywall panels might give a drywall installation a shoddy appearance, holes are not fatal.
Fill them fully before taping them since the compound will shrink after application and cause the tape to warp.
But, the compound in the gaps won’t harm the tape if you prefill them and let them cure before applying the tape coat.
Carefully press the compound into the joint using a small flexible putty knife and an all-purpose combination to prefill any gaps.
You don’t want any mud to accumulate on the drywall face, so use the blade of the putty knife to wipe off the excess.
Before putting on the first coat of tape, let the joints thoroughly dry for a day.
Here are the steps to effectively seal the gap and give the wall a flawless finish.
Step 1: Mesh Drywall Tape
The gap should first be covered with a fiberglass mesh drywall tape strip, with the top edge flush with the ceiling.
Step 2: Apply the Joint Compound
Finally, using a putty knife, coat the mesh tape with a joint compound (or mud).
In the end, the gap is filled in by pressing the dirt forcefully into the opening until it passes through the mesh tape and into the opening.
The tape needs to be covered in mud. On both sides of the tape, you should stretch it out to extend about two inches beyond its edge.
Step 3: Paper Tape
To produce a crease between the two surfaces, press the knife along the seam between the wall and the ceiling before adhering a strip of paper tape along it.
Finally, add some mud to the wall and shelter for a little more tape grip.
FAQs
Do You Mud Over Drywall Tape?
Apply a coat of mud before taping, smoothing the joints, and then adding a second layer of mud the next day after it has dried overnight.
What is the Most Effective Way to Tape Drywall?
Tape over the joints, smooth them out with a knife, and press the tape firmly into the drywall by dragging the buildup.
Can One Tape and Mud on the Same Day?
Setting the tape first and letting it dry should be done independently of applying the buildup coat and finishing with the final coat.

