Roofing a house is one of the most tasking structural processes in building as there are many things you have to do rightly.
Everything needs to be in place, and as such, you must establish a secure connection between the ledger board and rafters. Getting this perfectly will give you a beautiful patio roof that will stand out and shine.
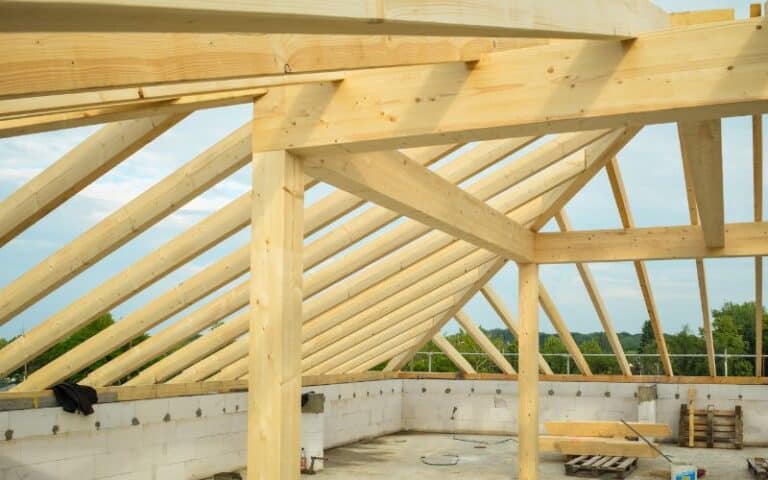
Constructing a patio roof for a house involves utilizing the building’s structure to support the roof with a ledger. The 2 by 6 ledger is horizontally adjoined to the roof by the rafters. The process is relatively easy and begins with attaching the ledger before building the deck foundation and other structures.
Ready for a Roofing Quiz?
How to Attach Rafters to Ledger Board?
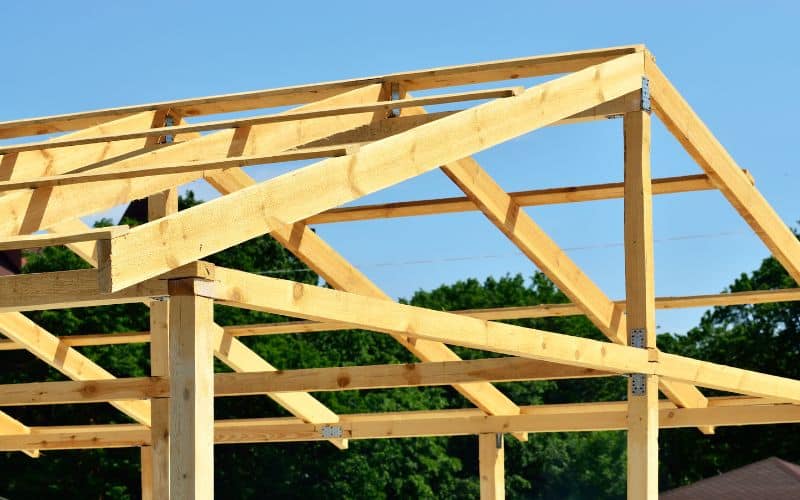
Attaching rafters to your ledger board means you’re trying to add a rooftop patio to your house. A horizontal ledger etched into the rafter will serve as the link between your patio and house.
This connection can be a DIY task if you have the skills and know some things about woodwork.
You’ll need certain items if you want to do this yourself and get it right. These are:
- Ledger boards
- 2×6 boards
- Galvanized nails
- Aluminum flashing
- Galvanized screws
- Steel joist hangers
- Carpenter’s pencil
- Chalk line
- Ladder
- Saw horses and saw
- Ladder
Now that you know the necessary tools let’s get to the process.
- To begin, you will attach the ledger board horizontally. The height at which to adjoin it depends on your kind of house. For a one-story house, the ledger should be below the eaves or connected to the band joist for a two-story home.
- Etch the ledger to the fascia and secure this connection using bolts or lag screws. Ensure that the fastener passes through the ledger & fascia and gets to the wall.
- Proceed to add aluminum flashing to prevent water from entering the ledger. You can tuck the flashing into the siding, so it bends over the ledger.
- Now it’s time to paint and arrange your rafters hanging.
- Attach the joist hangers to your rafter, then lift and fasten the rafter to the desired corner of the house/ ledger’s top.
- After attaching the 2 by 6 rafter, use a ledger board to support it. You can check with a bevel to find the appropriate position for the rafters and ledger to align.
- Next, attach the rafters to the beam and set them at 24″ to the center, then settle the joist.
- Level each rafter upon installation, attach them to the ledger, level the vertical beam, and secure the joists.
- While it is okay for the rafters to extend past the beam, they shouldn’t protrude more than ⅓ of the rafter length.
- Ensure the ends of all rafters align straightly. If they don’t, draw a chalk line across their ends and trim them before sheathing.
- Lastly, install your fascia board to the rafters’ end for a finishing touch and a professional outlook.
Add whatever roofing material you select or a patio cover to complete the entire project. You can choose to cover the beams, leaving them exposed, or paint them.
Whatever your choice of finishing is, I’m positive your patio roof will be extremely pleasant.
Best way to Attach a Rafter to a Ledger Board
There are various methods of attaching a ledger board beam to the rafters of a house. First, the ledger is fastened to the wall of a house.
Then the rafters are attached to it such that a load of patio roofing spreads across the beams.
The spot beneath the eaves is perfect for attaching the ledger board when dealing with a single-story building.
However, for a two-story building, the rim or band joist is the place to attach your ledger for a roof patio.
If you’re having difficulty finding it, simply locate a window on the second story and measure straight down.
There are many methods when it comes to joining rafters to ledger boards. However, each method has its advantages and disadvantages.
As such, there is no best method that surpasses others; you just have to go for what best suits the structure and design of your roof.
But, the most populous method of attaching a rafter to a ledger board when building a deck is using joist hangers.
Get an appropriately sized hanger for your joist; the size is usually indicated on its pack. Also, get the right fasteners for your hangers.
Begin by aligning the top of the rafter to the rim and snug the hanger into the joist. Next, tightly squeeze the legs and use a hammer to hit the prongs.
Proceed to fasten the side of the rim by nailing into the already drilled holes on both sides.
Next, insert nails into the drilled holes and hit them in. The nail should pass through the hanger, the rafter, and into the ledger board.
Do this for all the hanger’s holes to establish a secure connection. Lastly, remove the guide block, and then you’re done.
Note that some local building codes require you to use screws for fasteners rather than nails. So, you should confirm before you begin.
Things to Consider to Attach Rafters to Ledger Board
Although a rooftop deck is a beautiful addition to your house, you shouldn’t just wake up and decide to construct one. Instead, you have to carefully evaluate certain factors before making the decision.
So, let’s look at three major factors to consider before building a rooftop patio.
- You should be familiar with the local building code in your vicinity as certain instructions must have followed. There are also regulations and necessary inspections to be carried out by an officer before you begin. You should confirm that your roof is sturdy enough and obtain the necessary permits.
- Evaluate the various roof patio materials as they all have pros and cons. For example, wood is beautiful but expensive & hard to maintain, whereas tiles are easy to clean but heavy. Remember also that you have to use a waterproof or non-absorbent material.
- Consider the weather of your location as rainfall, sunshine, or bad weather can damage your deck.
Rafter to Ledger Connection Without Hangers
There is a wide range of reasons you may want to eliminate the use of hangers in attaching rafters to the ledger for your patio cover.
Maybe you just don’t like the look of hanger brackets, so you wonder if there’s a way to bypass it.
Well, I must say that rafter-to-ledger connections are always better with hangers, although there are alternatives.
One of these alternatives involves placing the ledger beneath the rafter as a supporting header for rafters. You will need large members such as a double 2 by 8 to accomplish this.
However, I’m not too fond of this alternative because the beam will protrude low, thus disrupting the clearance needed for a low pitch.
A similar method is to use a ledger strip. It involves using a 2 by 8 ledger and joining it to a 2 by 2 below. Your joists will then rest on the ledge though the support won’t be as solid as that of hangers.
You can add a 2 by 6 at the end of the joist tail, so it covers the intersection of the rim joist and ledger.
You can secure the ledger strip with wood studs, nails, or screws. This option is perfect for an outdoor deck.
Another option involves using the hangers but in a hidden manner. For example, after installing the hangers, you could cover them up with 1x stock and block nearby rafters. This trick will help conceal the hangers.
If your deck has an interior design, it would be best to opt for sliding dovetails, seismic anchors, or mortise and dowel. These strategies are secure and beautiful but require a professional for perfection.
Before you do any of this, ensure to weigh them carefully so you can select what suits the design of your deck.
Conclusion
A roof deck or patio is a beautiful addition to a house that gives an outstanding view and airy feel of nature.
You can begin the DIY construction process by attaching rafters to the ledger. With the help of this article, you’ll do an amazing job creating your rooftop deck.

