A freestanding wall can serve many purposes in a building. They can help serve as a privacy unit to protect one side of the room.
They also serve as a partition when redesigning an old building. However, because of the time & mode of construction, freestanding walls are not as stable as the result of the structure.
However, there are intelligent ways to add stability to these walls.
Using a concrete base, steel rack, or lateral bracings are some methods available to stabilize a wall. However, applying the right option for your specific situation is necessary. Hence, the different situation requires different tools and types of stability.
Ready for a Roofing Quiz?
Ready for a Drywall Quiz?
How Do you Stabilize a Freestanding Wall on a Concrete Floor?
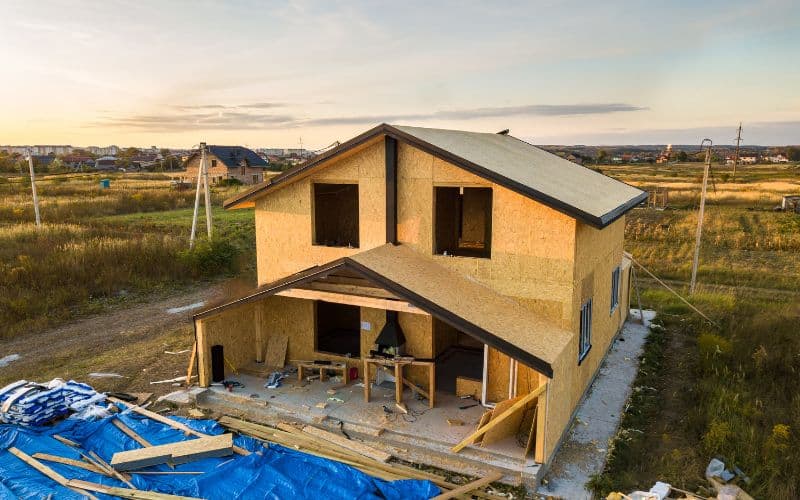
A concrete floor can provide a stable base for a freestanding wall due to its anchor strength. However, using fasteners on a concrete foundation requires a bit of expertise.
This step is not an easy task because of the nature of the floor. But if you get it right, you can keep your freestanding wall stable for a prolonged time.
A few different options are available for stabilizing a freestanding wall on a concrete floor.
Due to the nature of the task, you will need various essential tools based on the option you choose.
Here are a few options to explore:
#1. Use of Special Concrete Nails
If the construction of the freestanding wall is still in its early stages, you can use specially hardened fasteners to hold down the base of the wall.
The taller the free wall, the longer the hardened fasteners. Ensure that the nail or pin burrows into the floor for at least a depth of 1 inch.
The actual length of the nails then depends on the size of the wall base. These nails have unique features like shape and V-end tapering that make them suitable for the task.
Note that this option work best for relatively new concrete floors. Floors that are more than a year old can be too hard for the nails.
#2. Drilling both Wood and Floor
Drilling makes it easier to drive long, long nails through the wall and the floor. You can use a drill to make holes in the floor and the base of the wall. This drilling increases stability in the setup.
For this step to be practical, you need two different types of drill bits. A carbide-bit is best for concrete floors but doesn’t effectively drill wood.
Hence, it would help if you also had the wood bit. Start by using the wood bit and drill the entire length of the wood.
Next, change to the carbide bit and dig into the concrete through the wood hole. Make sure the drill is at least an inch long. Drive your long nails through the wood.
There are a few other options available when stabilizing on a concrete floor. However, these two are easy to execute. They also guarantee a firm connection between the wall and the floor.
How Do you Support a Freestanding Shower Wall?
Supporting a freestanding shower wall requires adding reinforcement of different kinds to the wall. The primary source of movement that can cause problems is the door.
Hence stabilizing the door helps to support the entire setup. Most times, freestanding shower walls do not touch the ceiling. Thus, space at the top can serve as a point of anchor to the ceiling.
Cementing the floor base can also support the shower wall. However, most people consider this step quite stressful.
You can also use plywood to brace the side of the wall. This bracing helps with the lateral weight.
If you have two or three freestanding shower walls perpendicular to one another, the use of brackets helps to hold the walls firmly.
The end of the wall can connect to the house wall using fasteners. Cementing and adding drywall are options also available to stabilize the wall.
Suppose there is space between the top of the wall and the ceiling. You can use the brass rod to connect the top of the wall to the roof.
This option helps to add stability to the upper parts of the wall. It is better to use the brass on the frame above the shower door because it’s the part that experiences the most movement.
Can you Stabilize Freestanding Wall Outdoors?
You can stabilize a freestanding wall outdoors the same way you would do an indoor wall. The best approach depends on the condition of the wall.
When building outdoor walls, it is essential to stabilize them against environmental factors like the actions of wind.
This wall might require more reinforcement than the simple addition of concrete to the base. However, there are steps to explore because you have the concrete floor as the base.
During construction, you can reinforce the inside of the wall before adding plywood or drywall. This step only works for walls with spaces within them and not solid walls.
A form of stable reinforcement uses a galvanized pipe with thread lines on one end or both ends. Screw a threaded flange to the floor using unique nails or concrete drills.
Then thread in the galvanized pipe to the flange. The line stands as a vertical support that doesn’t move. Cover the wall around this galvanized pipe, and you have a stabilized wall.
If the freestanding wall is not on concrete, then you can dig down a few inches for stability. Using lateral bracing on both sides also helps keep the wall in place.
Ensure that the bracing is also firmly rooted in the ground. Digging is one way to achieve this stability.
What Can I Do to Stabilize a Wobbling Wall?
A wobbling wall can become solid and firm with the proper support. There are various options available. However, the best choice depends on the wall’s setup, location, and height.
You can use special fasteners such as brackets to keep this wall glued to the floor. You can also use lag shields to stabilize and connect the wall to the floor.
This option helps create a more substantial base connection. Sometimes, the nail holes connecting the wall to other parts of the structures have become too big.
The fasteners move in these holes and lead to wobbling of the wall; you can remove the pins and renail the wall using newly drilled holes while covering the old nail holes.
If the wobbling wall connects to another wall, it is possible to use adhesive to keep the wall firm and reduce movement.
This option is not a major solution, but the result is compelling when combined with other options.
This table summarizes the different situations and appropriate options.
| S/N | Types of Wall | Suitable Solution |
|---|---|---|
| 1 | Freestanding on Concrete Floor | Steel track and drills |
| 2 | Freestanding Shower Walls | Brass rod as anchor |
| 3 | Freestanding Outdoor Walls | Galvanized Pipe and Bracing |
| 4 | Wobbling walls | New Fasteners |
Final Thoughts
Freestanding walls can add decoration and class to your indoor or outdoor structures. It is necessary to keep it stable to avoid accidents and loss of life.
The good news is that you have different options to explore—various options for different situations and designs.
You can combine these options for better results. Or you can stick to the one within your budget.

